Weslo Pursuit E 25 Bike English Manual - Page 6
Slide the Left and Right Handlebars 40, 41
 |
View all Weslo Pursuit E 25 Bike manuals
Add to My Manuals
Save this manual to your list of manuals |
Page 6 highlights
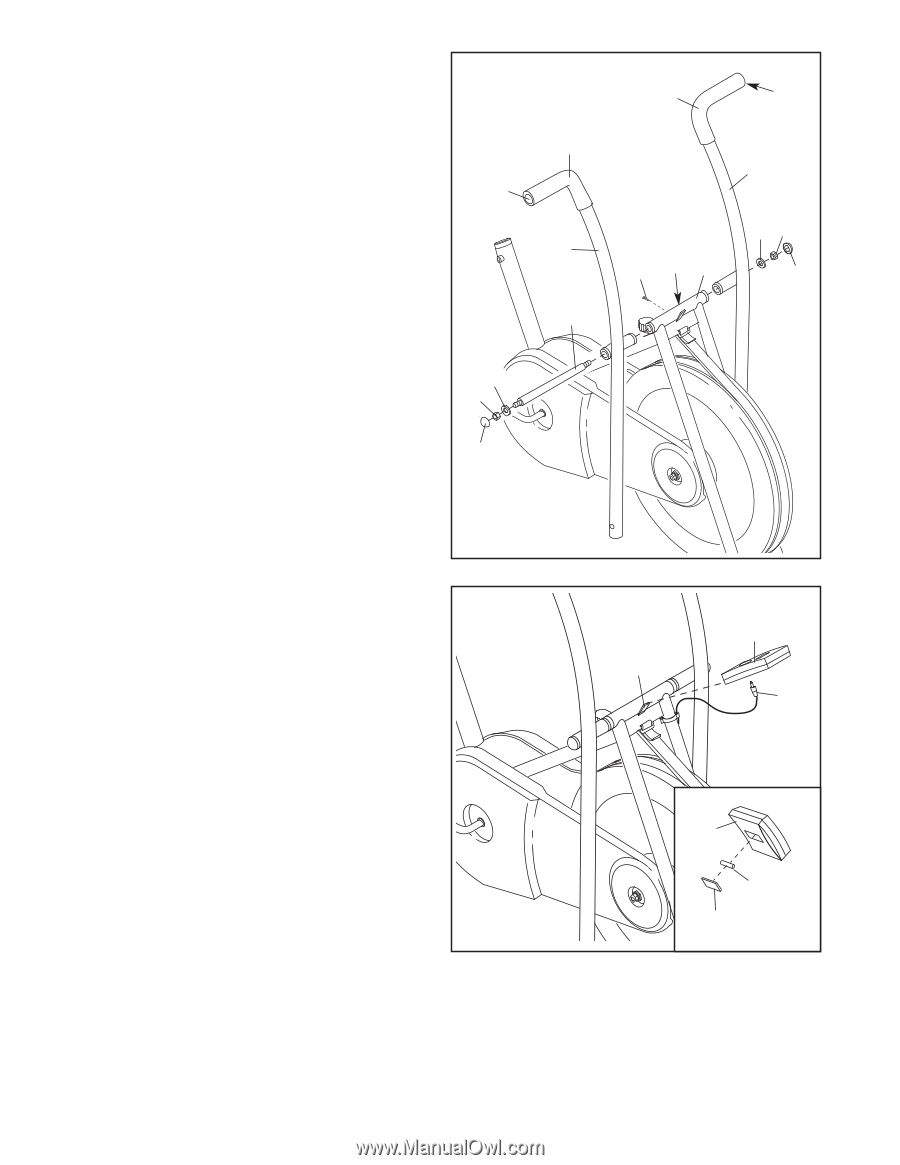
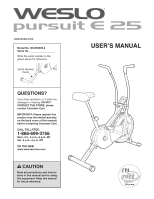
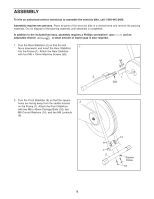
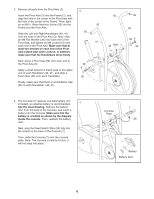
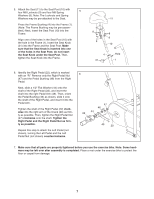
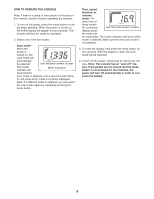
3. Remove all parts from the Pivot Axle (3). 3 Insert the Pivot Axle (3) into the Frame (1), and align the hole in the center of the Pivot Axle with the hole in the center of the Frame. Then, tight- en an M5 x 16mm Machine Screw (32) into the 42 Frame and the Pivot Axle. Slide the Left and Right Handlebars (40, 41) onto the ends of the Pivot Axle (3). Next, slide an M8 Flat Washer (38) onto each end of the Pivot Axle, and tighten an M8 Locknut (9) onto each end of the Pivot Axle. Make sure that at least two threads on each end of the Pivot Axle extend past each Locknut. In addition, make sure that the Handlebars move freely. 55 41 3 Next, press a Pivot Cap (50) onto each end of the Pivot Axle (3). 38 9 Apply a small amount of liquid soap to the upper end of each Handlebar (40, 41), and slide a Foam Grip (42) onto each Handlebar. 50 Finally, make sure that there is a Handlebar Cap (55) in each Handlebar (40, 41). 42 55 40 32 Hole 1 38 9 50 4. The Console (7) requires one AAA battery (not included); an alkaline battery is recommended. 4 See the inset drawing. Remove the battery door from the back of the Console, and insert a battery into the Console. Make sure that the battery is oriented as shown by the diagram inside the console. Then, reattach the battery door. Next, plug the Reed Switch Wire (28) fully into the socket on the back of the Console (7). Then, slide the Console (7) onto the console plate. Note: The Console is held by friction; it will not snap into place. Console Plate 7 28 7 Battery Battery Door 6
-
 1
1 -
 2
2 -
 3
3 -
 4
4 -
 5
5 -
 6
6 -
 7
7 -
 8
8 -
 9
9 -
 10
10 -
 11
11 -
 12
12 -
13
-
14
-
15
-
16
 |
 |