Weslo Pursuit E40 Bike English Manual - Page 7
How To Use The Exercise Cycle
 |
View all Weslo Pursuit E40 Bike manuals
Add to My Manuals
Save this manual to your list of manuals |
Page 7 highlights
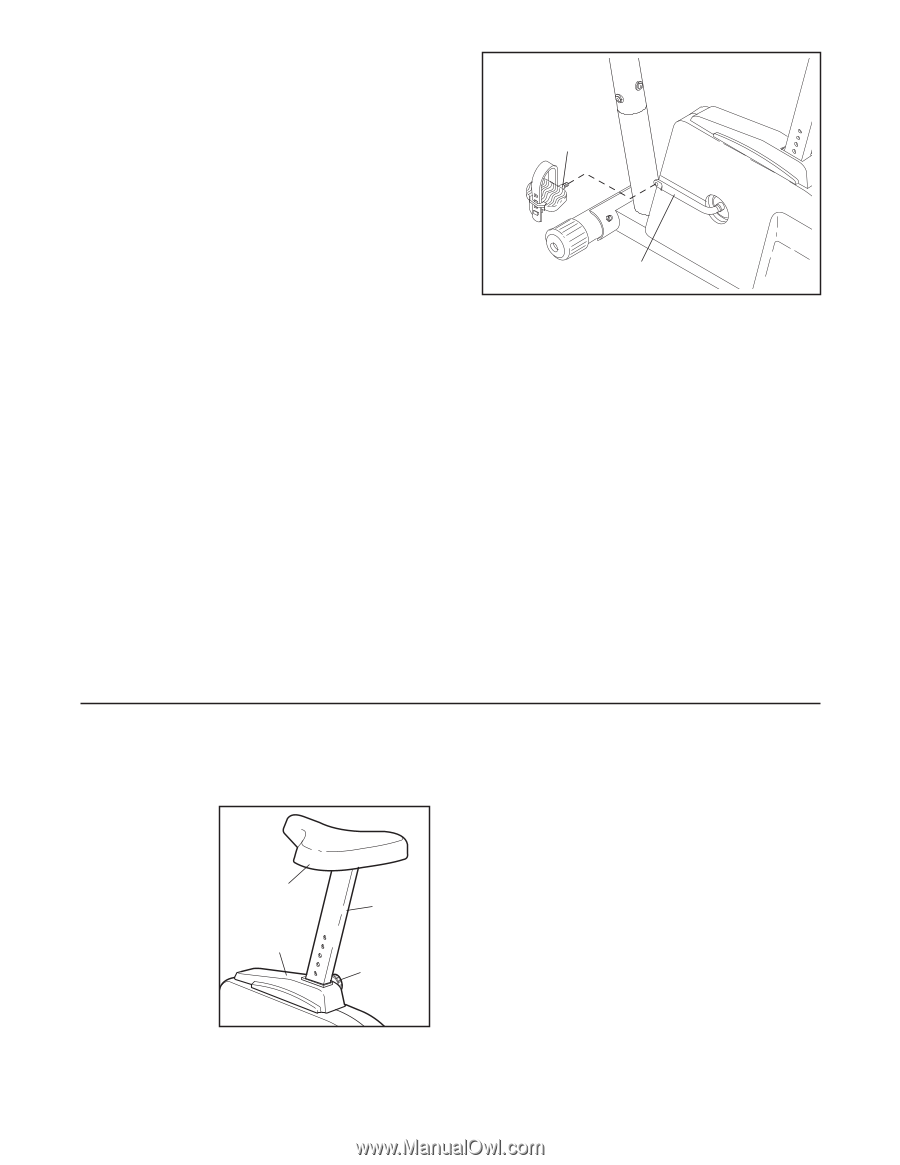
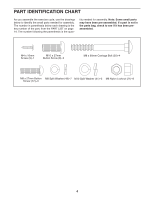
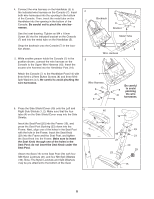
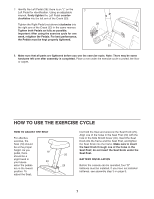
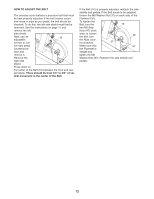
7. Identify the Left Pedal (28); there is an "L" on the 7 Left Pedal for identification. Using an adjustable wrench, firmly tighten the Left Pedal counter- clockwise into the left arm of the Crank (33). Tighten the Right Pedal (not shown) clockwise into the right arm of the Crank (33) in the same manner. Tighten both Pedals as fully as possible. Important: After using the exercise cycle for one week, retighten the Pedals. For best performance, the Pedals must be kept properly tightened. 28 33 8. Make sure that all parts are tightened before you use the exercise cycle. Note: There may be some hardware left over after assembly is completed. Place a mat under the exercise cycle to protect the floor or carpet. HOW TO USE THE EXERCISE CYCLE HOW TO ADJUST THE SEAT first hold the Seat and unscrew the Seat Knob (29). Align one of the holes in the Seat Post (20) with the For effective hole in the Side Shield Cover (40). Insert the Seat exercise, the Knob into the frame and the Seat Post, and tighten Seat (19) should the Seat Knob into the frame. Make sure to insert be at the proper the Seat Knob through one of the holes in the height. As you pedal, there should be a 19 Seat Post; do not insert the Seat Knob under the 20 Seat Post. slight bend in your knees 40 BATTERY INSTALLATION when the pedals 29 Before the console can be operated, four "D" are in the lowest batteries must be installed. If you have not installed position. To batteries, see assembly step 3 on page 5. adjust the Seat, 7
-
 1
1 -
 2
2 -
 3
3 -
 4
4 -
 5
5 -
 6
6 -
 7
7 -
 8
8 -
 9
9 -
 10
10 -
 11
11 -
 12
12 -
13
-
14
-
15
-
16
 |
 |