WestBend MG38ACL Instruction Manual
WestBend MG38ACL Manual
 |
View all WestBend MG38ACL manuals
Add to My Manuals
Save this manual to your list of manuals |
WestBend MG38ACL manual content summary:
- WestBend MG38ACL | Instruction Manual - Page 1
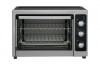
TOASTER OVEN Instruction Manual Important Safeguards...2 Before First Use...3 Control Settings...4 How To Use...5 Care And Cleaning...9 One Year Limited Warranty...10 SAVE THIS INSTRUCTION MANUAL FOR FUTURE REFERENCE © 2013 West Bend ,TM a Brand of Focus Products Group International, LLC. - WestBend MG38ACL | Instruction Manual - Page 2
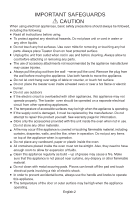
the following: . Read all instructions before using. . To protect against any electrical hazards, Do not place unit or cord in water or any other liquids. . Do not touch any hot surfaces. Use oven mitts for removing or touching any hot parts. Always place Toaster Oven on heat protected surface - WestBend MG38ACL | Instruction Manual - Page 3
remote-control system. . The rear surface of appliance should not be placed against a wall. SAVE THESE INSTRUCTIONS HOUSEHOLD USE ONLY BEFORE FIRST USE 1. Remove all accessories and shipping materials packed inside the oven. 2. Wash the racks and pan in warm soapy water. Wipe the inside of the - WestBend MG38ACL | Instruction Manual - Page 4
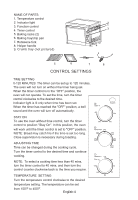
SETTINGS TIME SETTING 0-120 MINUTES: The timer can be set up to 120 minutes. The oven will not turn on without the timer being set. When the timer control is in the "OFF" position, the oven will not operate. To set the time, turn the timer control - WestBend MG38ACL | Instruction Manual - Page 5
: The upper heating elements, rotisserie, and convection feature are working during this function. HOW TO USE CAUTION: THE OVEN SURFACES ARE HOT DURING AND AFTER USE GENERAL INSTRUCTIONS 1. Place the Baking Rack in position that will accommodate the height of the food to be cooked. Place the - WestBend MG38ACL | Instruction Manual - Page 6
: Always check food temperature to ensure proper internal temperatures have been have been reached. Remove food with oven mitts. Food and oven surfaces are hot. CONVECTION/ROTISSERIE FUNCTION: 1. Remove both baking racks from the oven. Place one baking rack upside down in the lowest position of the - WestBend MG38ACL | Instruction Manual - Page 7
spit in to the drive socket located on the right-hand side of the oven wall. Make sure the square end of the spit rests in the spit. 5. the food on a heat safe plate or dish when you have removed from the oven. Let it cool slightly before attempting to remove the holding forks and spit from the - WestBend MG38ACL | Instruction Manual - Page 8
BAKING RACK LEVELS There are 4 rack levels. The baking rack can be slid into the groove for either level. 1 2 3 4 BAKING TRAY The tray must be put on the grill rack. It can not be put on the bottom heating element. ROTISSERIE LEVELS When using the rotisserie, the grill rack should be placed in - WestBend MG38ACL | Instruction Manual - Page 9
not use any metal or abrasive scouring pads or cleansers on these parts as damage to the finish may occur. 2. Wipe the exterior of the oven and glass door with a soft, damp cloth and dry. Do not use any type of scouring pad or cleaner on the exterior surfaces or the - WestBend MG38ACL | Instruction Manual - Page 10
appliance to any but the specified voltage. (Read directions carefully.) If service is required during the warranty period, properly pack your unit. We recommend reference Model Number Serial Number SAVE THIS MANUAL AND YOUR ORIGINAL RECEIPT FOR YOUR RECORDS Made in China L5900 08/13 English - WestBend MG38ACL | Instruction Manual - Page 11
Antes del Primer Uso ...3 Ajustes de Control ...5 Cómo Utilizar ...5 Cuidado y Limpieza ...9 Un Año de Garantía Limitada 10 GUARDE ESTE MANUAL PARA FUTURAS CONSULTAS 2013 West Band , una marca de productos Focus Group International, LLC Fabricado y distribuido por Midea America Corp., licenciatario - WestBend MG38ACL | Instruction Manual - Page 12
SEGURIDAD IMPORTANTE PRECAUCIÓN Cuando se utilizan aparatos eléctricos, siempre se deben seguir unas precauciones básicas de seguridad, incluyendo las siguientes: .Lea todas las instrucciones antes de usar. .Para proteger contra los riesgos eléctricos, no coloque el aparato ni el cable en agua o - WestBend MG38ACL | Instruction Manual - Page 13
.No se deben introducir alimentos demasiado grandes ni utensilios de metal en el horno tostador, ya que pueden crear riesgo de incendio o descarga eléctrica. .No cubra la bandeja colectora o cualquier parte del horno con papel de aluminio. Esto hará que se sobrecaliente el horno. .Se debe tener - WestBend MG38ACL | Instruction Manual - Page 14
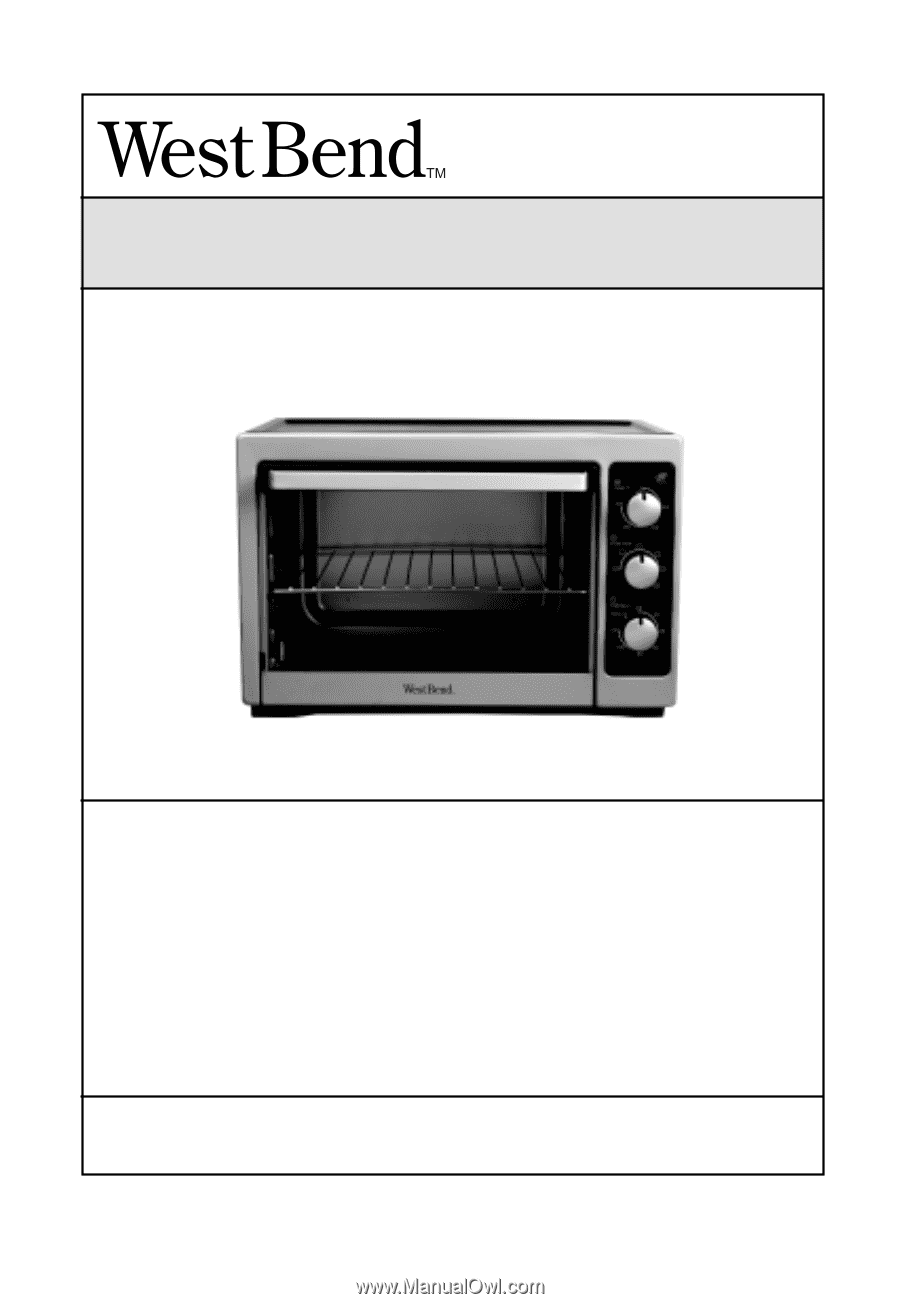
NOMBRE DE LAS PIEZAS 1. Control de temperatura 2. Luz de indicador 3. Control de función 4. Control de temporizador 5. Parrillas para hornear (2) 6. Bandeja para hornear / bandeja de goteo 7. Tenedor de asador 8. Mango auxiliar 9. Bandeja colectora (no está en la imagen) 2 1 3 4 5 6 7 AJUSTES - WestBend MG38ACL | Instruction Manual - Page 15
CONFIGURACIÓN DE FUNCIONES Este horno ofrece cuatro funciones diferentes para proporcionarle una cocina versátil en un solo aparato. Hornear: Las resistencias inferiores se utilizan durante esta función. Asar a la parrilla: Las resistencias superiores se utilizan durante este ciclo. Tostar: - WestBend MG38ACL | Instruction Manual - Page 16
FUNCIÓN HORNEAR: Utilice la función hornear para alimentos tales como cortes de carne menos tiernos, pasteles y guisos. 1. Coloque la parrilla del horno a la altura deseada. 2. Ajuste el control de la función en " ". 3. Seleccione la cantidad de tiempo que desea hornear los alimentos. 4. Ajuste el - WestBend MG38ACL | Instruction Manual - Page 17
FUNCIÓN ASADOR USANDO LAS HORQUILLAS DEL ASADOR: 1. Inserte el extremo en punta del asador a través de una de las horquillas, asegurándose de que los puntos de la cara del tenedor están en la misma dirección que el extremo puntiagudo de la saliva. Deslice el tenedor hacia el extremo cuadrado del - WestBend MG38ACL | Instruction Manual - Page 18
NIVELES DE PARRILLA PARA HORNEAR Hay 4 niveles de parrilla. La parrilla del horno se puede deslizar en la ranura de cualquier nivel. 1 2 3 4 BANDEJA DE HORNO La bandeja se debe poner en la rejilla de la parrilla. No se puede poner en el elemento de calentamiento inferior. NIVELES DE ASADOR - WestBend MG38ACL | Instruction Manual - Page 19
CUIDADO Y LIMPIEZA PRECAUCIÓN: Antes de limpiar cualquier parte del horno, ponga siempre los controles del temporizador y de función en "OFF", desconecte el cable de la toma eléctrica y deje que el horno se enfríe por completo. Para mantener el horno limpio, limpie los derrames de comida, las - WestBend MG38ACL | Instruction Manual - Page 20
que anote el número de serie de su unidad en el espacio a continuación para su consulta futura. Número de modelo: Número de serie: GUARDE ESTE MANUAL Y EL RECIBO ORIGINAL PARA SUS REGISTROS Hecho en China L5900 08/13 Español - 10 Impreso en China
-
 1
1 -
 2
2 -
 3
3 -
 4
4 -
 5
5 -
 6
6 -
 7
7 -
8
-
9
-
10
-
11
-
12
-
13
-
14
-
15
-
16
-
17
-
18
-
19
-
20
 |
 |
Instruction Manual
201
West Bend
a Brand of Focus
SAVE THIS INSTRUCTION MANUAL FOR FUTURE REFERENCE
Products Group International, LLC.
TM
,
3
TOASTER OVEN
2
Important Safeguards
..................................................................................................................
...........................................................................................................................
4
One Year Limited Warranty
......................................................................................................
Control Settings
How To Use
..................................................................................................................................
5
Care And Cleaning
.......................................................................................................................
9
.
Before First Use
...........................................................................................................................
3
Manufactured and Distributed by Midea America Corp., Authorized Licensee,
Parsippany, NJ 07054
10