Western Digital My Book Duo User Manual - Page 14
Installing the WD Drive Utilities software with the Launch Application option
 |
View all Western Digital My Book Duo manuals
Add to My Manuals
Save this manual to your list of manuals |
Page 14 highlights
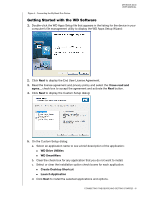
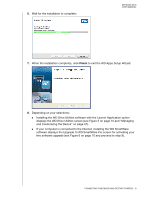
6. Wait for the installation to complete: MY BOOK DUO USER MANUAL 7. When the installation completes, click Finish to exit the WD Apps Setup Wizard: 8. Depending on your selections: Installing the WD Drive Utilities software with the Launch Application option displays the WD Drive Utilities screen (see Figure 5 on page 10 and "Managing and Customizing the Device" on page 47). If your computer is connected to the Internet, installing the WD SmartWare software displays the Upgrade to WD SmartWare Pro screen for activating your free software upgrade (see Figure 6 on page 10 and proceed to step 9). CONNECTING THE DEVICE AND GETTING STARTED - 9
-
 1
1 -
2
-
3
-
4
-
5
-
6
-
7
-
8
-
 9
9 -
 10
10 -
 11
11 -
 12
12 -
 13
13 -
 14
14 -
 15
15 -
 16
16 -
 17
17 -
 18
18 -
 19
19 -
20
-
21
-
22
-
23
-
24
-
25
-
26
-
27
-
28
-
29
-
30
-
31
-
32
-
33
-
34
-
35
-
36
-
37
-
38
-
39
-
40
-
41
-
42
-
43
-
44
-
45
-
46
-
47
-
48
-
49
-
50
-
51
-
52
-
53
-
54
-
55
-
56
-
57
-
58
-
59
-
60
-
61
-
62
-
63
-
64
-
65
-
66
-
67
-
68
-
69
-
70
-
71
-
72
-
73
-
74
-
75
-
76
-
77
-
78
-
79
-
80
-
81
-
82
-
83
-
84
-
85
-
86
-
87
-
88
-
89
-
90
-
91
-
92
-
93
-
94
 |
 |

MY BOOK DUO
USER MANUAL
CONNECTING THE DEVICE AND GETTING STARTED
– 9
6.
Wait for the installation to complete:
7.
When the installation completes, click
Finish
to exit the WD Apps Setup Wizard:
8.
Depending on your selections:
±
Installing the WD Drive Utilities software with the Launch Application option
displays the WD Drive Utilities screen (see Figure 5 on page 10 and “Managing
and Customizing the Device” on page 47).
±
If your computer is connected to the Internet, installing the WD SmartWare
software displays the Upgrade to WD SmartWare Pro screen for activating your
free software upgrade (see Figure 6 on page 10 and proceed to step 9).