Western Digital My Passport Ultra User Manual - Page 36
Setting the Drive Sleep Timer, Using the WD Quick View Icon, Start, All Programs, Western Digital
 |
View all Western Digital My Passport Ultra manuals
Add to My Manuals
Save this manual to your list of manuals |
Page 36 highlights
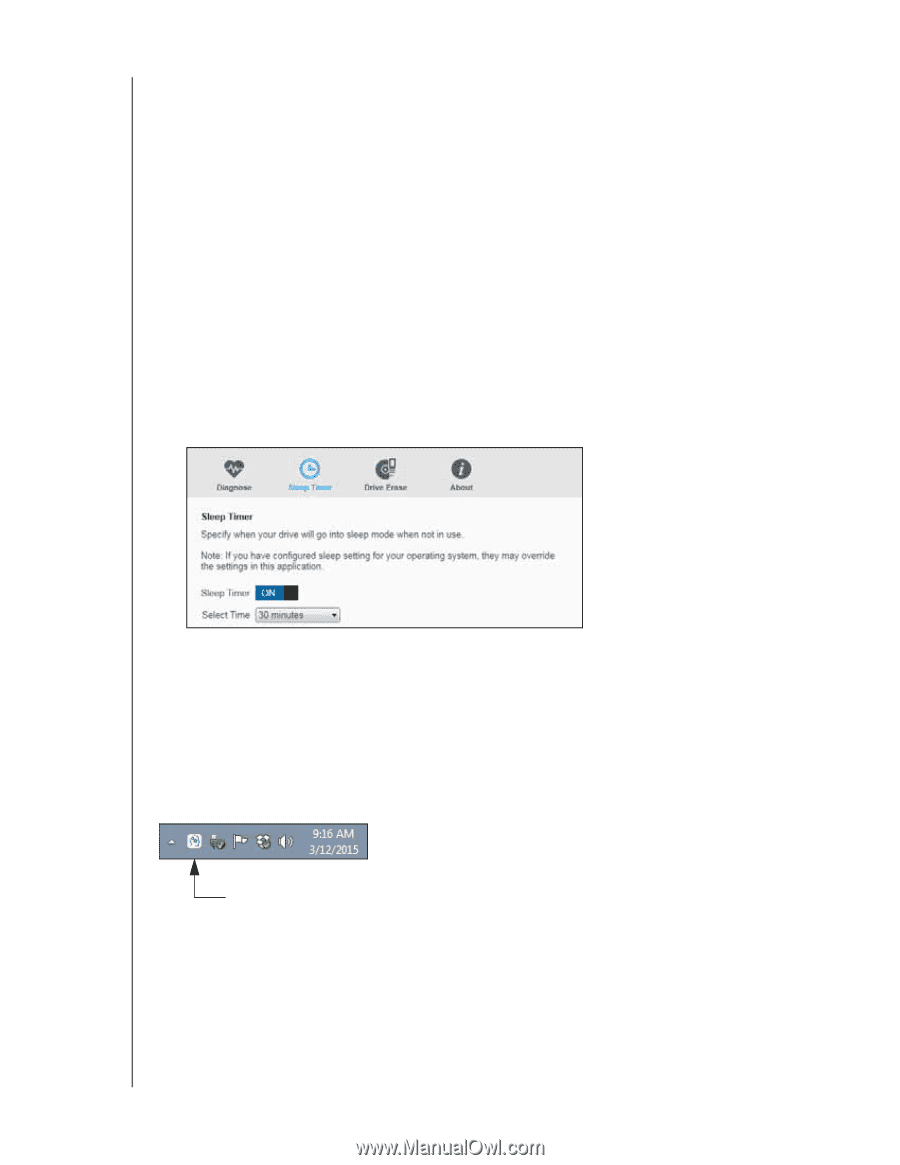
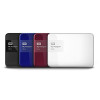
MY PASSPORT ULTRA USER MANUAL If you ever need to remove and reinstall the WD software on your computer, or move the drive to another computer and install the software there, you will need to restore the WD software and disk image on your drive. To do this, after you have erased or reformatted the drive, go to http://support.wd.com and see Knowledge Base Answer ID 7. Setting the Drive Sleep Timer The drive sleep timer turns off the power to your drive after a certain period of inactivity to conserve power and minimize long-term wear on the drive. 1. Open the WD Drive Utilities software by clicking either: The WD Drive Utilities desktop shortcut icon Start > All Programs > Western Digital > WD Apps > WD Drive Utilities See Figure 6 on page 10. 2. If you have more than one supported device connected to your computer, select the one that you want to set. 3. Click Sleep Timer to display the Sleep Timer dialog: 4. On the Sleep Timer dialog: a. Verify or click the Sleep Timer on/off toggle button to the ON position. b. In the Select Time box, select the inactivity period for turning off the drive. Using the WD Quick View Icon After you have installed the WD software, the WD Quick View icon displays in the system tray portion of the Windows taskbar: WD Quick View Icon You can use the icon to: Check the status of supported WD drives Monitor icon alerts Safely disconnect supported WD drives The following sections describe how to use the icon and other ways to do these things. MANAGING AND CUSTOMIZING THE DRIVE - 32
-
 1
1 -
2
-
3
-
4
-
5
-
6
-
7
-
8
-
9
-
10
-
11
-
12
-
13
-
14
-
15
-
16
-
17
-
18
-
19
-
20
-
21
-
22
-
23
-
24
-
25
-
26
-
27
-
28
-
29
-
30
-
 31
31 -
 32
32 -
 33
33 -
 34
34 -
 35
35 -
 36
36 -
 37
37 -
 38
38 -
 39
39 -
 40
40 -
 41
41 -
42
-
43
-
44
-
45
-
46
-
47
-
48
-
49
-
50
-
51
-
52
-
53
-
54
-
55
 |
 |