Western Digital WDBVHT0060JCH User Manual - Page 54
Launching WD SmartWare (Windows only), Exiting WD SmartWare Safely (Windows only), Opening Shares
 |
View all Western Digital WDBVHT0060JCH manuals
Add to My Manuals
Save this manual to your list of manuals |
Page 54 highlights
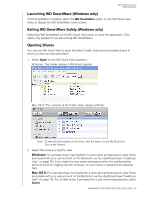
MY BOOK LIVE DUO USER MANUAL Launching WD SmartWare (Windows only) If WD SmartWare is installed, select the WD SmartWare option on the WD Quick View menu to display the WD SmartWare home screen. Exiting WD SmartWare Safely (Windows only) Select Exit WD SmartWare on the WD Quick View menu to close the application. (This option only appears if you are running WD SmartWare.) Opening Shares You can use WD Quick View to open the drive's Public share and any private shares to which you have access permission. 1. Select Open on the WD Quick View submenu. Windows: The shares display in Windows Explorer: Mac OS X: The contents of the Public share display in Finder: Note: To view all of the shares on the drive, click the name of your My Book Live Duo under Shared. 2. Select the share you want to view: Windows: For a private share, if prompted for a user name and password, enter those associated with your user account on the My Book Live Duo dashboard (see "Creating a User" on page 76). If you make the user name and password for the dashboard the same as those for logging into the computer, no user name or password are required here. Mac OS X: For a private share, if prompted for a user name and password, enter those associated with your user account on the My Book Live Duo dashboard (see "Creating a User" on page 76). For a Public share, if prompted for a user name and password, select Guest. MANAGING YOUR DRIVE WITH WD QUICK VIEW - 48
-
 1
1 -
2
-
3
-
4
-
5
-
6
-
7
-
8
-
9
-
10
-
11
-
12
-
13
-
14
-
15
-
16
-
17
-
18
-
19
-
20
-
21
-
22
-
23
-
24
-
25
-
26
-
27
-
28
-
29
-
30
-
31
-
32
-
33
-
34
-
35
-
36
-
37
-
38
-
39
-
40
-
41
-
42
-
43
-
44
-
45
-
46
-
47
-
48
-
 49
49 -
 50
50 -
 51
51 -
 52
52 -
 53
53 -
 54
54 -
 55
55 -
 56
56 -
 57
57 -
 58
58 -
 59
59 -
60
-
61
-
62
-
63
-
64
-
65
-
66
-
67
-
68
-
69
-
70
-
71
-
72
-
73
-
74
-
75
-
76
-
77
-
78
-
79
-
80
-
81
-
82
-
83
-
84
-
85
-
86
-
87
-
88
-
89
-
90
-
91
-
92
-
93
-
94
-
95
-
96
-
97
-
98
-
99
-
100
-
101
-
102
-
103
-
104
-
105
-
106
-
107
-
108
-
109
-
110
-
111
-
112
-
113
-
114
-
115
-
116
-
117
-
118
-
119
-
120
-
121
-
122
-
123
-
124
-
125
-
126
-
127
-
128
-
129
-
130
-
131
-
132
-
133
-
134
-
135
-
136
-
137
-
138
-
139
-
140
-
141
-
142
-
143
-
144
-
145
-
146
-
147
-
148
-
149
-
150
-
151
-
152
-
153
-
154
-
155
 |
 |
