Western Digital WDBVHT0060JCH User Manual - Page 67
Date & Time, Device Name, Device, Description, Language, Serial Number, Usage, Warranty, Registration
 |
View all Western Digital WDBVHT0060JCH manuals
Add to My Manuals
Save this manual to your list of manuals |
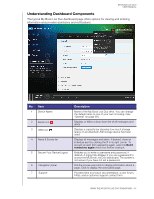
Page 67 highlights
MY BOOK LIVE DUO USER MANUAL 1. View or modify the following settings: Device Name Device Description Language Serial Number Usage Warranty Registration Enter a unique name for your drive to identify it on the network. The default description is My Book Live Duo. If desired, enter a different description. From the drop-down list, select the language in which you want the My Book Live Duo web pages to display. The default language is English. Displays the WD-assigned number that identifies the specific unit. Displays the storage capacity used and the total storage capacity. Click Register Now and follow the prompts to register your drive. 2. If you made any changes, click the Save button that appears below the section. Note: Throughout the My Book Live Duo dashboard, the Save and Cancel buttons display only if you make changes. Date & Time The date and time are synchronized to the NTP (network time protocol) server by default. You have the option of setting the date and time manually or allowing the NTP to access the Internet and automatically set the time. If you are not connected to the Internet, you must enter the date and time manually. 1. View or modify the following settings: Time Zone NTP Service From the drop-down list, select the time zone where your drive is located. Select the check box to enable NTP service, which automatically synchronizes your drive to update the time and date. If you want to change to another primary NTP server, click Add New Primary, and then enter the URL address of the new primary server. CONFIGURING BASIC SETTINGS - 59
-
 1
1 -
2
-
3
-
4
-
5
-
6
-
7
-
8
-
9
-
10
-
11
-
12
-
13
-
14
-
15
-
16
-
17
-
18
-
19
-
20
-
21
-
22
-
23
-
24
-
25
-
26
-
27
-
28
-
29
-
30
-
31
-
32
-
33
-
34
-
35
-
36
-
37
-
38
-
39
-
40
-
41
-
42
-
43
-
44
-
45
-
46
-
47
-
48
-
49
-
50
-
51
-
52
-
53
-
54
-
55
-
56
-
57
-
58
-
59
-
60
-
61
-
 62
62 -
 63
63 -
 64
64 -
 65
65 -
 66
66 -
 67
67 -
 68
68 -
 69
69 -
 70
70 -
 71
71 -
 72
72 -
73
-
74
-
75
-
76
-
77
-
78
-
79
-
80
-
81
-
82
-
83
-
84
-
85
-
86
-
87
-
88
-
89
-
90
-
91
-
92
-
93
-
94
-
95
-
96
-
97
-
98
-
99
-
100
-
101
-
102
-
103
-
104
-
105
-
106
-
107
-
108
-
109
-
110
-
111
-
112
-
113
-
114
-
115
-
116
-
117
-
118
-
119
-
120
-
121
-
122
-
123
-
124
-
125
-
126
-
127
-
128
-
129
-
130
-
131
-
132
-
133
-
134
-
135
-
136
-
137
-
138
-
139
-
140
-
141
-
142
-
143
-
144
-
145
-
146
-
147
-
148
-
149
-
150
-
151
-
152
-
153
-
154
-
155
 |
 |
