Whirlpool GS563LXS Use and Care Guide - Page 9
Range Lights, Tones, Fahrenheit and Celsius, Timer, Control Lockout
 |
View all Whirlpool GS563LXS manuals
Add to My Manuals
Save this manual to your list of manuals |
Page 9 highlights
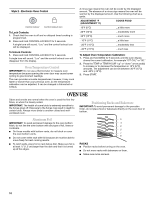
To Set: Before setting, make sure the oven and Timer are off. 1. Press CLOCK. 2. Depending on your model, press the HR or MIN or TEMP/HOUR "up" or "down" arrow pads to set the time of day, including a.m. or p.m. 3. Press CLOCK or START. The clock display can be turned off/on (on some models) by pushing and holding the Clock keypad for 5 seconds. Range Lights Oven light Night light Oven Light While the oven door is closed, press OVEN LIGHT keypad to turn the light on or off. The oven light will come on when the oven door is opened. The oven light will not come on during the selfclean cycle. Night Light (on some models) Press the NIGHT LIGHT/COOKTOP LOCKOUT keypad to turn the night light on and off. Tones Tones are audible signals, indicating the following: One tone s Valid pad press s Oven is preheated (long tone) s Function has been entered s Reminder, repeating each minute after the end-of-cycle tones Three tones s Invalid pad press Four tones s End of cycle Style 1 - Electronic Oven Control Reminder Tones: The audible tones at the end of a cook time or timer may be set to beep once (Off) or continue to beep once per minute (rEP On). Press and hold the TIMER SET/OFF keypad for 5 seconds to turn tones on or off. "Off" or "rEP On" will flash in the display. Sound: All audible tones can be turned off. Press and hold the COOK TIME keypad for 5 seconds to turn tones on or off. "Off" or "Snd On" will flash in the display. Volume: The tone volume can be set to "Lo" or "Hi." Press and hold the START TIME keypad for 5 seconds to set the volume to high or low. "Lo" or "Snd HI" will flash in the display. Style 2 - Electronic Oven Control Reminder Tones: The audible tones at the end time may be set to beep once or continue to beep. Press and hold the TIMER keypad for 5 seconds to enter the Options mode. "Opt" will be displayed. Cycle through the options ("12hr" or "hr"), ("LOn" or "Loff"), to ("b" or "b1") using the TEMP/HOUR keys. Choose on or off using the TIMER keypad. Press CANCEL to exit mode. Fahrenheit and Celsius The temperature is preset at Fahrenheit, but can be changed to Celsius on some models. To Change: Press and hold BROIL for 5 seconds. A tone will sound, and "°C" will appear on the display. Repeat to change back to Fahrenheit. To exit mode, press OFF/CANCEL. Timer The Timer can be set in hours or minutes up to 12 hours and 59 minutes, and counts down the set time. The Timer does not start or stop the oven. To Set: 1. Press TIMER SET or TIMER. The timer indicator light will light up on some models. If no action is taken after 1 minute, the display will return to the time of day mode. 2. Depending on your model, press the HR or MIN or TEMP/HOUR "up" or "down" arrow pads to set the length of time to cook. 3. Press START or TIMER SET. When the set time ends, end-ofcycle tones will sound, then, if enabled, reminder tones will sound every minute on some models. 4. Press TIMER OFF or TIMER twice anytime to cancel the Timer and reminder tones. Remember, do not press the OFF/CANCEL pad because the oven will turn off. To display the time of day for 5 seconds when the timer is counting down, press CLOCK. Control Lockout Control Lockout shuts down the control panel keypads to avoid unintended use of the oven. When the control is locked, only the CLOCK, OVEN LIGHT and TIMER keypads will function. Style 1 - Electronic Oven Control Control lockout Control lockout icon To Lock Controls: 1. Check that the oven is off and no delayed timed cooking is programmed. 2. Press and hold CONTROL LOCKOUT for 3 seconds. A single tone will sound. "Loc," "LOCKED," and the control lockout icon will be displayed. To Unlock Controls: 1. Press and hold CONTROL LOCKOUT for 3 seconds. A single tone will sound. "Loc," "LOCKED," and the control lockout icon will disappear from the display. 9
-
 1
1 -
2
-
3
-
 4
4 -
 5
5 -
 6
6 -
 7
7 -
 8
8 -
 9
9 -
 10
10 -
 11
11 -
 12
12 -
 13
13 -
 14
14 -
15
-
16
-
17
-
18
-
19
-
20
-
21
-
22
-
23
-
24
-
25
-
26
-
27
-
28
-
29
-
30
-
31
-
32
-
33
-
34
-
35
-
36
-
37
-
38
-
39
-
40
-
41
-
42
-
43
-
44
 |
 |
