Whirlpool GU3100XTVQ Installation Instructions - Page 11
Warning
 |
View all Whirlpool GU3100XTVQ manuals
Add to My Manuals
Save this manual to your list of manuals |
Page 11 highlights
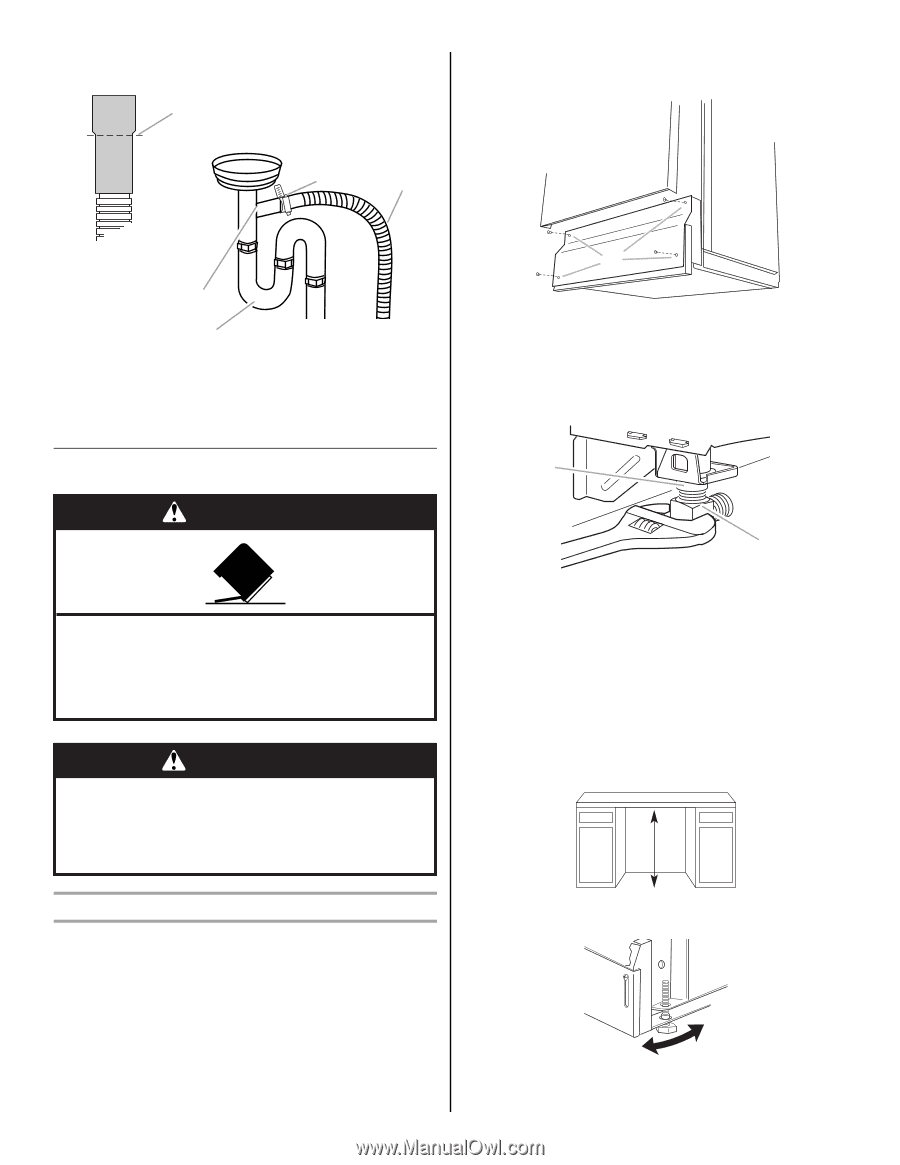
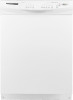
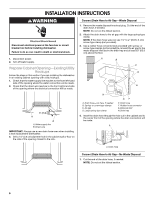
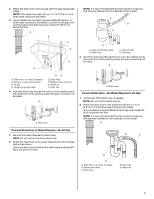
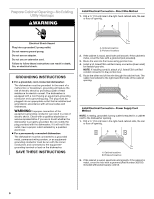
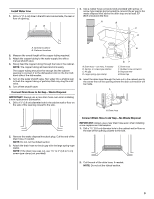
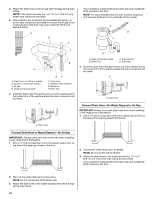
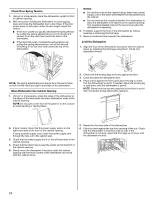
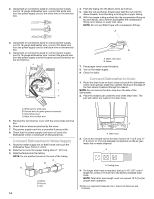
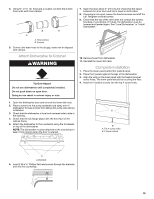
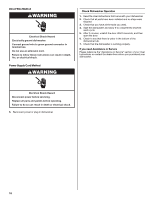
NOTE: It is recommended that the drain hose be looped up and securely fastened to the underside of the counter. A 2. Using a ¹⁄₄" hex socket, nut driver or Phillips screwdriver, remove the 4 screws attaching the toekick panel and lower panel to the dishwasher. B C E D A. Drain hose-cut here, if needed B. Screw-type clamp C. Drain hose D. Drain trap E. Waste tee A A. Screws 3. Remove both panels and set aside on a protected surface. 4. Apply thread seal tape to 90º elbow fitting and connect fitting to water inlet valve. 5. Tighten elbow until snug. NOTE: Elbow should face to the rear of the dishwasher. Install Dishwasher WARNING Tip Over Hazard Do not use dishwasher until completely installed. Do not push down on open door. Doing so can result in serious injury or cuts. WARNING Excessive Weight Hazard Use two or more people to move and install dishwasher. Failure to do so can result in back or other injury. A B A. Water inlet valve B. Elbow 6. Remove terminal box cover. ■ Direct Wire-Install a U.L. listed/CSA certified clamp connector to the terminal box. If using conduit, use a U.L. listed/CSA certified conduit connector. ■ Power Supply Cord-Install a power supply cord kit that is U.L. listed and marked for use with dishwashers (Part Number 4317824). 7. Measure the shortest opening height between the underside of the countertop and the floor where the dishwasher will be installed. Prepare Dishwasher for Installation 1. Using 2 or more people, place the dishwasher on its back on a piece of cardboard. 8. Extend leveling legs out from the dishwasher base, ¹⁄₄" less than the shortest opening height. A A. Leveling leg 11
-
 1
1 -
2
-
3
-
4
-
5
-
 6
6 -
 7
7 -
 8
8 -
 9
9 -
 10
10 -
 11
11 -
 12
12 -
 13
13 -
 14
14 -
 15
15 -
 16
16 -
17
-
18
-
19
-
20
-
21
-
22
-
23
-
24
-
25
-
26
-
27
-
28
-
29
-
30
-
31
-
32
 |
 |