Whirlpool GU3100XTVQ Installation Instructions - Page 4
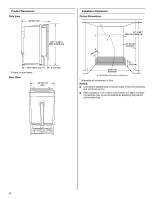
Product Dimensions, Side View, Rear View, Installation Clearances, Cutout Dimensions
 |
View all Whirlpool GU3100XTVQ manuals
Add to My Manuals
Save this manual to your list of manuals |
Page 4 highlights
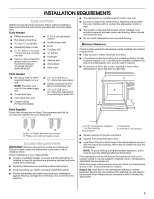
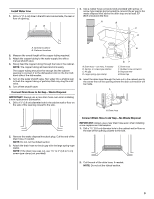
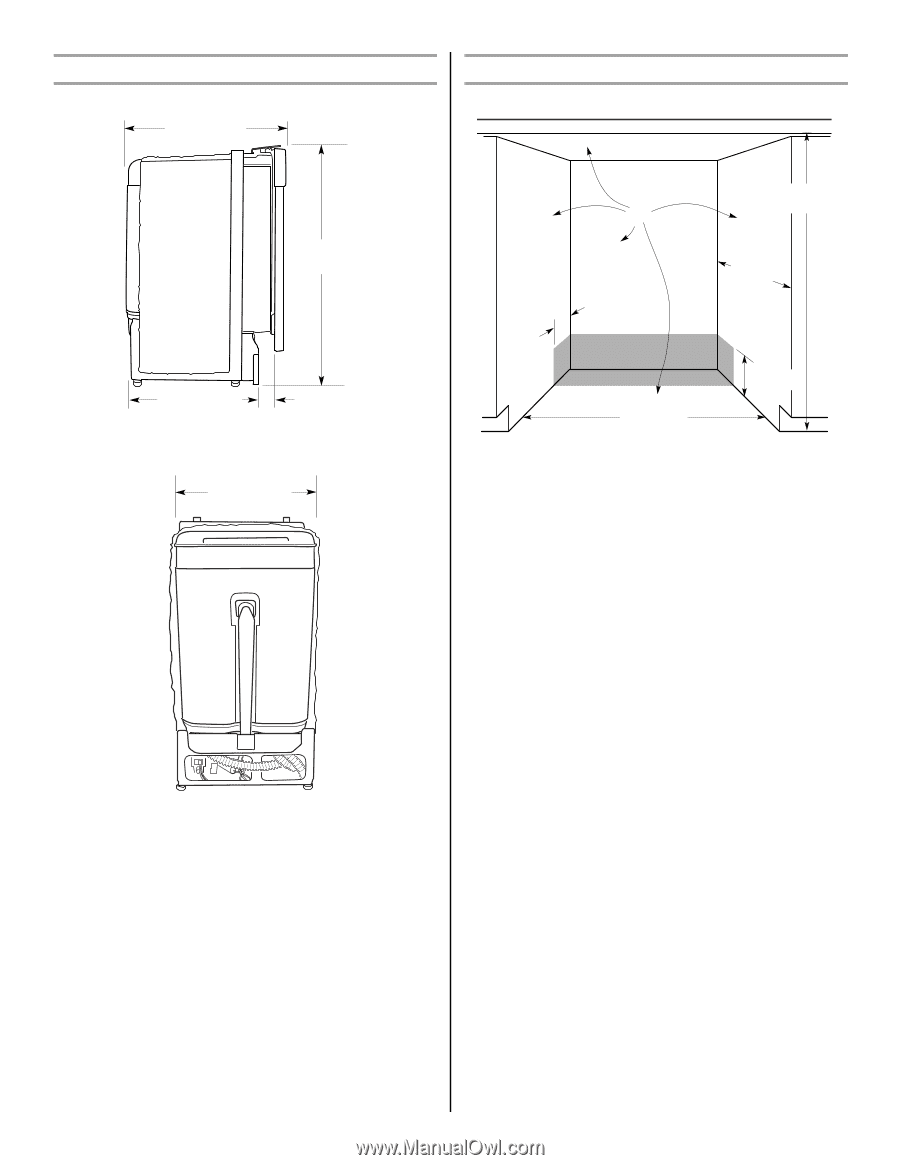
Product Dimensions Side View * 24" (61 cm)* 32¹⁄₂" to 34¹⁄₂" (82.6 to 87.6 cm) 20¹⁄₂" (52.1 cm) * To front of door frame Rear View 4" (10 cm) 24" (61 cm) max. Installation Clearances Cutout Dimensions 34" to 35"* (86.4 cm to 88.9 cm) A (10.2 c4m" ) 24" (61 cm) minimum 6" (15.2 cm) 24 (61 cm) maximum A. All surfaces free from intrusions * Underside of countertop to floor NOTES: ■ Cut holes in shaded area of cabinet walls or floor for plumbing and electrical service. ■ ADA installation-32¹⁄₂" (82.5 cm) beneath 34" (86.4 cm) high countertops may be accomplished by adjusting the toekick and leveling legs. 4
-
 1
1 -
 2
2 -
 3
3 -
 4
4 -
 5
5 -
 6
6 -
 7
7 -
 8
8 -
 9
9 -
 10
10 -
11
-
12
-
13
-
14
-
15
-
16
-
17
-
18
-
19
-
20
-
21
-
22
-
23
-
24
-
25
-
26
-
27
-
28
-
29
-
30
-
31
-
32
 |
 |
4
Product Dimensions
Side View
*
* To front of door frame
Rear View
Installation Clearances
Cutout Dimensions
* Underside of countertop to floor
NOTES:
■
Cut holes in shaded area of cabinet walls or floor for plumbing
and electrical service.
■
ADA installation—32
¹⁄₂
" (82.5 cm) beneath 34" (86.4 cm) high
countertops may be accomplished by adjusting the toekick
and leveling legs.
24" (61 cm)*
20
¹⁄₂
" (52.1 cm)
32
¹⁄₂
" to 34
¹⁄₂
"
(82.6 to 87.6 cm)
4" (10 cm)
24" (61 cm)
max.
A. All surfaces free from intrusions
24" (61 cm)
minimum
34" to 35"*
(86.4 cm to 88.9 cm)
24 (61 cm)
maximum
A
6"
(15.2 cm)
4"
(10.2 cm)