| Section |
Page |
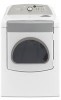
| cabrio® steam fabric care system ELECTRIC DRYER |
1 |
| Use & Care Guide |
1 |
| For questions about features, operation/performance, parts, accessories or service call: 1-800-253-1301 |
1 |
| In Canada, call: 1-800-807-6777 or visit our website at www.whirlpool.com or www.whirlpool.ca |
1 |
| Sécheuse électrique Cabrio® avec système de soin des tissus |
1 |
| Guide d’utilisation et d’entretien |
1 |
| Au Canada, pour assistance, installation ou service, composez le : 1-800-807-6777 ou visitez notre site internet à www.whirlpool.ca |
1 |
| Table of Contents/Table des matières 2 |
1 |
| table of contents |
2 |
| Table des matières |
2 |
| dryer Safety |
3 |
| INSTALLATION instructions |
4 |
| Tools and Parts |
4 |
| Parts supplied: |
4 |
| Parts needed: |
5 |
| If using a power supply cord: |
5 |
| Location Requirements |
5 |
| You will need |
5 |
| Installation Clearances |
5 |
| Dryer Dimensions |
5 |
| Installation spacing for recessed area or closet installation |
5 |
| Mobile home - Additional installation requirements |
5 |
| Mobile home installations require: |
6 |
| Electrical Requirements - U.S.A. Only |
6 |
| It is your responsibility |
6 |
| Electrical Connection |
6 |
| If using a power supply cord: |
6 |
| If your outlet looks like this: |
6 |
| 4-wire receptacle (14-30R) |
6 |
| If your outlet looks like this: |
6 |
| 3-wire receptacle (10-30R) |
6 |
| If connecting by direct wire: |
6 |
| Electrical Requirements - Canada Only |
7 |
| It is your responsibility |
7 |
| 4-wire receptacle 14-30R |
7 |
| Electrical Connection - U.S.A. Only |
8 |
| Power Supply Cord |
8 |
| Direct Wire |
8 |
| 1. Disconnect power. |
8 |
| 2. Remove the hold-down screw and terminal block cover. |
8 |
| 3. Install strain relief. |
8 |
| 4. Now complete installation following instructions for your type of electrical connection: |
9 |
| Electrical Connection Options |
9 |
| If your home has: |
9 |
| And you will be connecting to: |
9 |
| Go to Section: |
9 |
| 4-wire connection: Power supply cord |
9 |
| 1. Remove center, silver-colored terminal block screw. |
9 |
| 2. Remove neutral ground wire from external ground conductor screw. Connect neutral ground wire and the neutral wire (white or center wire) of power supply cord under center, silver-colored terminal block screw. Tighten screw. |
10 |
| 3. Connect ground wire (green or bare) of power supply cord to external ground conductor screw. Tighten screw. |
10 |
| 4. Connect the other wires to outer terminal block screws. Tighten screws. |
10 |
| 5. Tighten strain relief screws. |
10 |
| 6. Insert tab of terminal block cover into slot of dryer rear panel. Secure cover with hold-down screw. |
10 |
| 7. You have completed your electrical connection. Now go to “Venting Requirements.” |
10 |
| 4-wire connection: Direct Wire |
10 |
| 1. Remove center, silver-colored terminal block screw. |
10 |
| 2. Remove neutral ground wire from external ground conductor screw. Connect neutral ground wire and place the hooked end (hook facing right) of the neutral wire (white or center wire) of direct wire cable under the center screw of the terminal block.... |
10 |
| 3. Connect ground wire (green or bare) of direct wire cable to external ground conductor screw. Tighten screw. |
11 |
| 4. Place the hooked ends of the other direct wire cable wires under the outer terminal block screws (hooks facing right). Squeeze hooked ends together. Tighten screws. |
11 |
| 5. Tighten strain relief screw. |
11 |
| 6. Insert tab of terminal block cover into slot of dryer rear panel. Secure cover with hold-down screw. |
11 |
| 7. You have completed your electrical connection. Now go to “Venting Requirements.” |
11 |
| 3-wire connection: Power supply cord |
11 |
| Use where local codes permit connecting cabinet-ground conductor to neutral wire. |
11 |
| 1. Loosen or remove center, silver-colored terminal block screw. |
11 |
| 2. Connect neutral wire (white or center wire) of power supply cord to the center, silver-colored terminal screw of the terminal block. Tighten screw. |
11 |
| 3. Connect the other wires to outer terminal block screws. Tighten screws. |
11 |
| 4. Tighten strain relief screws. |
11 |
| 5. Insert tab of terminal block cover into slot of dryer rear panel. Secure cover with hold-down screw. |
11 |
| 6. You have completed your electrical connection. Now go to “Venting Requirements.” |
11 |
| 3-wire connection: Direct Wire |
11 |
| Use where local codes permit connecting cabinet-ground conductor to neutral wire. |
11 |
| 1. Loosen or remove center, silver-colored terminal block screw. |
12 |
| 2. Place the hooked end of the neutral wire (white or center wire) of direct wire cable under the center screw of terminal block (hook facing right). Squeeze hooked end together. Tighten screw. |
12 |
| 3. Place the hooked ends of the other direct wire cable wires under the outer terminal block screws (hooks facing right). Squeeze hooked ends together. Tighten screws. |
12 |
| 4. Tighten strain relief screw. |
12 |
| 5. Insert tab of terminal block cover into slot of dryer rear panel. Secure cover with hold-down screw. |
12 |
| 6. You have completed your electrical connection. Now go to “Venting Requirements.” |
12 |
| Optional 3-wire connection |
12 |
| Use for direct wire or power supply cord where local codes do not permit connecting cabinet-ground conductor to neutral wire. |
12 |
| 1. Remove center, silver-colored terminal block screw. |
12 |
| 2. Remove neutral ground wire from external ground conductor screw. Connect neutral ground wire and the neutral wire (white or center wire) of power supply cord/cable under center, silver- colored terminal block screw. Tighten screw. |
12 |
| 3. Connect the other wires to outer terminal block screws. Tighten screws. |
12 |
| 4. Tighten strain relief screws. |
12 |
| 5. Insert tab of terminal block cover into slot of dryer rear panel. Secure cover with hold-down screw. |
12 |
| 6. Connect a separate copper ground wire from the external ground conductor screw to an adequate ground. |
12 |
| Venting Requirements |
13 |
| If using an existing vent system |
13 |
| If this is a new vent system |
13 |
| Vent material |
13 |
| Rigid metal vent |
13 |
| Flexible metal vent |
13 |
| Elbows |
13 |
| Good |
13 |
| Better |
13 |
| Clamps |
13 |
| Exhaust |
13 |
| Plan Vent System |
14 |
| Choose your exhaust installation type |
14 |
| Recommended exhaust installations |
14 |
| Standard exhaust installation with rigid metal or flexible metal vent |
14 |
| Alternate installations for close clearances |
14 |
| Special provisions for mobile home installations |
14 |
| Determine vent path |
14 |
| Determine vent length and elbows needed for best drying performance |
15 |
| Vent system chart |
15 |
| Number of 90º turns or elbows |
15 |
| Type of vent |
15 |
| Box or Louvered hoods |
15 |
| Angled hoods |
15 |
| 0 |
15 |
| Rigid metal |
15 |
| 1 |
15 |
| Rigid metal |
15 |
| 2 |
15 |
| Rigid metal |
15 |
| 3 |
15 |
| Rigid metal |
15 |
| 4 |
15 |
| Rigid metal |
15 |
| Install Vent System |
15 |
| 1. Install exhaust hood. Use caulking compound to seal exterior wall opening around exhaust hood. |
15 |
| 2. Connect vent to exhaust hood. Vent must fit inside exhaust hood. Secure vent to exhaust hood with 4\ |
15 |
| 3. Run vent to dryer location. Use the straightest path possible. See “Determine vent path” in “Plan Vent System.” Avoid 90º turns. Use clamps to seal all joints. Do not use duct tape, screws, or other fastening devices that extend into the ... |
15 |
| Install Leveling Legs |
15 |
| 1. To avoid damaging the floor, use a large, flat piece of cardboard from the dryer carton. Place cardboard under the entire back edge of the dryer. |
15 |
| 2. Firmly grasp the body of the dryer (not the top or console panel). Gently lay the dryer on the cardboard. See illustration. |
15 |
| 3. Examine the leveling legs. Find the diamond marking. |
15 |
| 4. Screw the legs into the leg holes by hand. Use a wrench to finish turning the legs until the diamond marking is no longer visible. |
15 |
| 5. Place a carton corner post from dryer packaging under each of the 2 dryer back corners. Stand the dryer up. Slide the dryer on the corner posts until it is close to its final location. Leave enough room to connect the exhaust vent. |
15 |
| Connect Vent |
15 |
| 1. Using a 4\ |
15 |
| 2. Move dryer into its final location. Do not crush or kink vent. |
15 |
| 3. Once the exhaust vent connection is made, remove the corner posts and cardboard. |
15 |
| Connect Inlet Hose |
15 |
| 1. Turn cold water faucet off and remove washer inlet hose. |
15 |
| 2. Remove old rubber washer from inlet hose and replace with new rubber washer provided. If space permits, attach the brass female end of the “Y” connector to the cold water faucet. |
15 |
| 3. Attach short hose to cold water faucet. Screw on coupling by hand until it is seated on faucet. |
15 |
| 4. Using pliers, tighten the couplings with an additional two-thirds turn. |
15 |
| 5. Attach “Y” connector to brass male end of small hose. Screw on coupling by hand until it is seated on connector. |
15 |
| 6. One end of the long hose has a wire mesh strainer inside the coupling. Attach this end to the “Y” connector. |
15 |
| 7. Attach washer cold inlet hose to other end of “Y” connector. Screw on coupling by hand until it is seated on connector. |
15 |
| 8. Using pliers, tighten the couplings with an additional two-thirds turn. |
16 |
| 9. Attach other end of long hose to fill valve at bottom of dryer back panel. Screw on coupling by hand until it is seated on fill valve connector. |
16 |
| 10. Using pliers, tighten the coupling with an additional two-thirds turn. |
16 |
| 11. Check that the water faucets are on. |
16 |
| 12. Check for leaks around “Y” connector, faucet, and hoses. |
16 |
| Level Dryer |
16 |
| Reverse Door Swing |
16 |
| 1. Place a towel or soft cloth on top of the dryer or work space to avoid damaging the surface. |
16 |
| Remove the door assembly |
16 |
| 1. Open the dryer door. |
16 |
| 2. Remove the bottom screw from each of the 2 hinges that attach the dryer door to the front panel of the dryer. |
16 |
| 3. Loosen the top screw from each of the 2 hinges in Step 2. |
16 |
| 4. Remove the dryer door and the hinges by lifting upward on the door. Lay the door on a flat, protected surface, with the inside of the door facing up. Remove remaining 2 loose screws from dryer front panel. |
16 |
| 5. Remove the 4 plastic plugs located outside the dryer door opening. |
17 |
| 6. Install 4 plastic plugs into screw holes in the dryer left where the hinges were removed in Step 4. |
17 |
| Reverse the strike |
17 |
| 1. Remove the door strike from the dryer door opening. |
17 |
| 2. Remove the cosmetic screw opposite the door strike. |
17 |
| 3. Reinstall the door strike and cosmetic screw on the opposite side of the dryer door opening from where they were removed. NOTE: Door strike and plugs must be on the same side of the dryer door opening. |
17 |
| Reinstall the door |
17 |
| 1. Remove the 4 screws and 2 hinges from the dryer door. |
17 |
| 2. Replace the 4 screws in the same holes. |
17 |
| 3. Remove the 4 screws from the opposite side of the door. |
17 |
| 4. Install the 2 hinges to the front panel of the dryer using 4 screws. Use the non-slotted side to attach the hinge to the front panel. |
17 |
| 5. Install screws in the top hinge holes in the door. Do not tighten screws. Leave approximately ¼\ |
17 |
| 6. Hang door by placing screw heads into top slotted holes of hinges and slide door down. Align bottom screw holes in hinge and door. Install two bottom screws. Tighten all hinge screws. |
17 |
| 7. Close door to engage door strike. |
17 |
| Complete Installation |
18 |
| 1. Check that all parts are now installed. If there is an extra part, go back through the steps to see which step was skipped. |
18 |
| 2. Check that you have all of your tools. |
18 |
| 3. Dispose of/recycle all packaging materials. |
18 |
| 4. Be sure the water faucets are on. |
18 |
| 5. Check for leaks around “Y” connector, faucet, and hoses. |
18 |
| 6. Check the dryer’s final location. Be sure the vent is not crushed or kinked. |
18 |
| 7. Check that the dryer is level. See “Level Dryer.” |
18 |
| 8. In the U.S.A. |
18 |
| 9. Remove any film or tape remaining on the dryer. |
18 |
| 10. Read “Dryer Use.” |
18 |
| 11. Wipe the dryer drum interior thoroughly with a damp cloth to remove any dust. |
18 |
| 12. If you live in a hard water area, use of a water softener is recommended to control the buildup of scale through the water system in the dryer. Over time, the buildup of lime scale may clog different parts of the water system, which will reduce p... |
18 |
| 13. Test dryer operation by selecting a Timed Dry heated cycle and starting the dryer. For this test, do not select the Air Only modifier. |
18 |
| Dryer Use |
19 |
| Starting Your Dryer |
19 |
| 1. Clean lint screen before each load. See “Cleaning the Lint Screen.” |
19 |
| 2. Place laundry into dryer and shut door. |
19 |
| 3. Press POWER. |
19 |
| 4. Turn the knob to the selected cycle. The preset settings for Automatic Cycles or Timed Cycles will illuminate. The estimated (automatic cycle) or actual (timed) cycle time (in minutes) will show in the display. |
19 |
| 5. (OPTIONAL STEP) If desired, select OPTIONS. For more details, see “Options.” |
20 |
| 6. (OPTIONAL STEP) If desired, press END OF CYCLE SIGNAL. A signal will sound to alert you when a cycle ends. For more details, see “End of Cycle Signal.” |
20 |
| 7. Press START. Be sure the door is closed. |
20 |
| Stopping, Pausing, or Restarting |
20 |
| To stop or pause your dryer at any time |
20 |
| To restart the dryer |
20 |
| Drying and Cycle Tips |
20 |
| Drying tips |
20 |
| Cycle tips |
21 |
| Status Lights |
21 |
| Sensing |
21 |
| Wet |
21 |
| Damp |
21 |
| Cool Down |
21 |
| Done |
21 |
| WRINKLE SHIELD™ Setting |
21 |
| Indicator lights |
21 |
| Cycles |
21 |
| Automatic Cycles |
21 |
| Heavy Duty |
21 |
| Normal |
21 |
| Casual |
21 |
| Delicate |
21 |
| Automatic Preset Cycle Settings |
21 |
| Automatic Cycles Load Type |
21 |
| Temperature |
21 |
| Steam Cycles |
22 |
| Quick Refresh |
22 |
| Enhanced Touch Up |
22 |
| Steam Preset Cycle Settings |
22 |
| Timed Cycles Load Type |
22 |
| Default Temperature* |
22 |
| Default Time (Minutes)* |
22 |
| Timed Cycles |
22 |
| Timed Dry |
22 |
| Timed Preset Cycle Settings |
22 |
| Timed Cycle Load Type |
22 |
| Default Temperature |
22 |
| Default Time (Minutes) |
22 |
| Modifiers |
22 |
| Automatic Cycle Modifiers |
22 |
| Timed Cycle Modifiers |
22 |
| Air Only |
23 |
| Type of Load |
23 |
| Time* (Minutes) |
23 |
| When using Air Only |
23 |
| Options |
23 |
| Drum Light |
23 |
| WRINKLE SHIELD™ Setting |
23 |
| Damp Dry Signal |
23 |
| End of Cycle Signal |
23 |
| End of Cycle Signal |
23 |
| Changing Cycles, Modifiers, and Options |
23 |
| Changing Cycles after pressing Start |
23 |
| 1. Press PAUSE/CANCEL twice. |
23 |
| 2. Select the desired cycle and options. |
23 |
| 3. Press START. The dryer starts at the beginning of the new cycle. |
23 |
| Changing Modifiers and Options after pressing Start |
23 |
| 1. Press PAUSE/CANCEL once. |
23 |
| 2. Select the new Option and/or Modifiers. |
23 |
| 3. Press START to continue the cycle. |
23 |
| Changing the Preset Dryness Level Settings |
23 |
| 1. The Dryness Level settings cannot be changed while the dryer is running. |
24 |
| 2. Press and hold the DRYNESS button for 5 seconds. The dryer will beep, and “CF” will be displayed for 1 second followed by the current drying setting. |
24 |
| 3. To select a new drying setting, press the DRYNESS button again until the desired drying setting is shown. NOTE: While cycling through the settings, the current setting will not flash, but the other settings will flash. |
24 |
| 4. Press START to save the drying setting. |
24 |
| 5. The drying setting you selected will become your new preset drying setting for all Auto Dry cycles. |
24 |
| Drying Rack Option |
24 |
| To use the drying rack |
24 |
| 1. Open dryer door. |
24 |
| 2. Place drying rack inside dryer drum, positioning the back wire on the ledge of the inner dryer back panel. Push down on front edge of drying rack to secure at the front of the dryer. |
24 |
| 3. Put the wet items on top of the drying rack. Leave space between the items so air can reach all the surfaces. |
24 |
| 4. Close the door. |
24 |
| 5. Press the POWER button. |
24 |
| 6. Select Timed Dry Cycle and select a temperature (see following chart). Items containing foam, rubber, or plastic must be dried on a clothesline or by using the Air Only temperature setting. |
24 |
| 7. You must select a time by pressing TIME ADJUST Up or Down. Reset time as needed to complete drying. Refer to the following table. |
24 |
| 8. Press (and hold) START button (about 1 second). |
24 |
| Rack Dry |
24 |
| Setting |
24 |
| Temp. |
24 |
| Time* |
24 |
| Wool Sweaters |
24 |
| Stuffed toys or pillows |
24 |
| Stuffed toys or pillows |
24 |
| Sneakers or canvas shoes |
24 |
| dryer care |
25 |
| Cleaning the Dryer Location |
25 |
| Cleaning the Lint Screen |
25 |
| IMPORTANT: |
25 |
| Every load cleaning |
25 |
| 1. The lint screen is located on the top of the dryer. Pull the lint screen toward you. Roll lint off the screen with your fingers. Do not rinse or wash screen to remove lint. Wet lint is hard to remove. |
25 |
| 2. Push the lint screen firmly back into place. |
25 |
| As needed cleaning |
25 |
| 1. Roll lint off screen with your fingers. |
25 |
| 2. Wet both sides of lint screen with hot water. |
25 |
| 3. Wet a nylon brush with hot water and liquid detergent. Scrub lint screen with the brush to remove residue buildup. |
25 |
| 4. Rinse screen with hot water. |
25 |
| 5. Thoroughly dry lint screen with a clean towel. Insert lint screen back into dryer. |
25 |
| Cleaning the Dryer Interior |
25 |
| 1. Apply a liquid, nonflammable household cleaner to the stained area of the drum and rub with a soft cloth until stain is removed. |
25 |
| 2. Wipe drum thoroughly with a damp cloth. |
25 |
| 3. Tumble a load of clean cloths or towels to dry the drum. |
25 |
| Removing Accumulated Lint |
25 |
| From Inside the Dryer Cabinet |
25 |
| From the Exhaust Vent |
25 |
| Water Inlet Hoses |
25 |
| Vacation, Storage, and Moving Care |
25 |
| Non-Use or Vacation Care |
25 |
| 1. Unplug dryer or disconnect power. |
25 |
| 2. Clean lint screen. See “Cleaning the Lint Screen.” |
25 |
| 3. Turn off the water supply to the dryer. This helps to avoid unintended flooding (due to a water pressure surge) while you are away. |
25 |
| To winterize dryer |
25 |
| 1. Unplug dryer or disconnect power. |
25 |
| 2. Shut off water faucet. |
25 |
| 3. Disconnect water inlet hose from faucet and drain. |
25 |
| To use dryer again |
25 |
| 1. Flush water pipes. Reconnect water inlet hose to faucet. Turn on water faucet. |
25 |
| 2. Plug in dryer or reconnect power. |
25 |
| Moving care |
26 |
| For power supply cord-connected dryers: |
26 |
| 1. Unplug the power supply cord. |
26 |
| 2. Shut off water faucet. |
26 |
| 3. Disconnect the water inlet hose from faucet, then drain the hose. Transport hose separately. |
26 |
| 4. Make sure leveling legs are secure in dryer base. |
26 |
| 5. Use masking tape to secure dryer door. |
26 |
| For direct-wired dryers: |
26 |
| 1. Disconnect power. |
26 |
| 2. Disconnect wiring. |
26 |
| 3. Shut off water faucet. |
26 |
| 4. Disconnect the water inlet hose from faucet, then drain the hose. Transport hose separately. |
26 |
| 5. Make sure leveling legs are secure in dryer base. |
26 |
| 6. Use masking tape to secure dryer door. |
26 |
| Reinstalling the dryer |
26 |
| Changing the Drum Light |
26 |
| To change the drum light |
26 |
| 1. Unplug dryer or disconnect power. |
26 |
| 2. Open the dryer door. Locate the light bulb cover on the back wall of the dryer. Remove the screw located in the lower right corner of the cover. Remove the cover. |
26 |
| 3. Turn bulb counterclockwise. Replace the bulb with a 10-watt appliance bulb only. Replace the cover and secure with the screw. |
26 |
| 4. Plug in dryer or reconnect power. |
26 |
| troubleshooting |
26 |
| First try the solutions suggested here or visit our website and reference FAQs (Frequently Asked Questions) to possibly avoid the cost of a service call... In U.S.A. www.whirlpool.com/help - In Canada www.whirlpool.ca |
26 |
| Dryer Operation |
26 |
| Dryer will not run |
26 |
| No heat |
26 |
| Unusual sounds |
26 |
| Dryer displaying code message |
27 |
| Dryer Results |
27 |
| Clothes are not drying satisfactorily, drying times are too long, or load is too hot |
27 |
| Cycle time too short |
28 |
| Lint on load |
28 |
| Stains on load or drum |
28 |
| Loads are wrinkled |
28 |
| Odors |
28 |
| Assistance or Service |
29 |
| If you need replacement parts |
29 |
| To locate FSP® replacement parts in your area: |
29 |
| In the U.S.A. |
29 |
| Our consultants provide assistance with: |
29 |
| For further assistance |
29 |
| Accessories U.S.A. |
29 |
| In Canada |
29 |
| Our consultants provide assistance with: |
29 |
| For further assistance |
29 |
| Accessories |
29 |
| Part Number |
29 |
| Accessory |
29 |
| WHIRLPOOL CORPORATION LAUNDRY WARRANTY |
30 |
| LIMITED WARRANTY |
30 |
| For one year from the date of purchase, when this major appliance is operated and maintained according to instructions attached to or furnished with the product, Whirlpool Corporation or Whirlpool Canada LP (hereafter “Whirlpool”) will pay for Fa... |
30 |
| ITEMS EXCLUDED FROM WARRANTY |
30 |
| This limited warranty does not cover: |
30 |
| 1. Replacement parts or repair labor if this major appliance is used for other than normal, single-family household use or when it is used in a manner that is inconsistent to published user or operator instructions and/or installation instructions. |
30 |
| 2. Service calls to correct the installation of your major appliance, to instruct you on how to use your major appliance, to replace or repair house fuses, or to correct house wiring or plumbing. |
30 |
| 3. Service calls to repair or replace appliance light bulbs, air filters or water filters. Consumable parts are excluded from warranty coverage. |
30 |
| 4. Damage resulting from accident, alteration, misuse, abuse, fire, flood, acts of God, improper installation, installation not in accordance with electrical or plumbing codes, or use of products not approved by Whirlpool. |
30 |
| 5. Cosmetic damage, including scratches, dents, chips or other damage to the finish of your major appliance, unless such damage results from defects in materials or workmanship and is reported to Whirlpool within 30 days from the date of purchase. |
30 |
| 6. Pick up and delivery. This major appliance is intended to be repaired in your home. |
30 |
| 7. Repairs to parts or systems resulting from unauthorized modifications made to the appliance. |
30 |
| 8. Expenses for travel and transportation for product service if your major appliance is located in a remote area where service by an authorized Whirlpool servicer is not available. |
30 |
| 9. The removal and reinstallation of your major appliance if it is installed in an inaccessible location or is not installed in accordance with Whirlpool’s published installation instructions. |
30 |
| 10. Replacement parts or repair labor on major appliances with original model/serial numbers that have been removed, altered, or cannot be easily determined. |
30 |
| DISCLAIMER OF IMPLIED WARRANTIES |
30 |
| IMPLIED WARRANTIES, INCLUDING ANY IMPLIED WARRANTY OF MERCHANTABILITY OR IMPLIED WARRANTY OF FITNESS FOR A PARTICULAR PURPOSE, ARE LIMITED TO ONE YEAR OR THE SHORTEST PERIOD ALLOWED BY LAW. Some states and provinces do not allow limitations on the du... |
30 |
| LIMITATION OF REMEDIES; EXCLUSION OF INCIDENTAL AND CONSEQUENTIAL DAMAGES |
30 |
| YOUR SOLE AND EXCLUSIVE REMEDY UNDER THIS LIMITED WARRANTY SHALL BE PRODUCT REPAIR AS PROVIDED HEREIN. WHIRLPOOL SHALL NOT BE LIABLE FOR INCIDENTAL OR CONSEQUENTIAL DAMAGES. Some states and provinces do not allow the exclusion or limitation of incide... |
30 |
| If outside the 50 United States and Canada, contact your authorized Whirlpool dealer to determine if another warranty applies. |
30 |
| If you think you need repair service, first see the “Troubleshooting” section of the Use & Care Guide. If you are unable to resolve the problem after checking “Troubleshooting,” additional help can be found by checking the “Assistance or Se... |
30 |
| SÉCURITÉ DE LA SÉCHEUSE |
31 |
| INSTRUCTIONS D’INSTALLATION |
32 |
| Outillage et pièces |
32 |
| Pièces fournies : |
32 |
| Pièces nécessaires : |
32 |
| Si l’on utilise un cordon d’alimentation électrique : |
33 |
| Exigences d’emplacement |
33 |
| Il vous faudra : |
33 |
| Dégagements de séparation à respecter |
33 |
| Dimensions de la sécheuse |
33 |
| Espacement minimum pour une installation dans un encastrement ou dans un placard |
33 |
| Exigences supplémentaires pour l'installation dans une maison mobile |
34 |
| L'installation dans une maison mobile exige : |
34 |
| Spécifications électriques - Pour le Canada seulement |
34 |
| C'est à l'utilisateur qu'incombe la responsabilité de |
34 |
| Prise murale à 4 fils 14-30R |
34 |
| Exigences concernant l'évacuation |
34 |
| En cas d'utilisation du système d'évacuation existant |
35 |
| En cas de nouveau système d'évacuation |
35 |
| Matériel pour l'évacuation |
35 |
| Conduit métallique rigide |
35 |
| Conduit métallique flexible |
35 |
| Coudes |
35 |
| Brides de serrage |
35 |
| Évacuation |
35 |
| Planification du système d’évacuation |
36 |
| Choisir un type de système d'évacuation |
36 |
| Installations d'évacuation recommandées |
36 |
| Installations standard du conduit d'évacuation à l'aide d'un conduit métallique rigide ou flexible |
36 |
| Autres installations où le dégagement est réduit |
36 |
| Dispositions spéciales pour les installations dans une maison mobile |
36 |
| Déterminer l'itinéraire d'acheminement du conduit |
36 |
| Déterminer la longueur du conduit et les coudes nécessaires pour la meilleure performance de séchage |
36 |
| Tableau des systèmes d'évacuation |
37 |
| REMARQUE : L'évacuation par l'arrière (côté gauche ou droit) fonctionne en ajoutant un coude. Pour établir la longueur maximale du conduit, ajouter un coude supplémentaire dans le tableau. |
37 |
| Nombre de change- ments de direction à 90° ou coudes |
37 |
| Type de conduit |
37 |
| Clapets de type boîte ou à persiennes |
37 |
| Clapets inclinés |
37 |
| 0 |
37 |
| Métallique rigide |
37 |
| 1 |
37 |
| Métallique rigide |
37 |
| 2 |
37 |
| Métallique rigide |
37 |
| 3 |
37 |
| Métallique rigide |
37 |
| 4 |
37 |
| Métallique rigide |
37 |
| Installation du système d’évacuation |
37 |
| 1. Installer le clapet d'évacuation. Utiliser du composé de calfeutrage pour sceller l'ouverture murale à l'extérieur autour du clapet d'évacuation. |
37 |
| 2. Raccorder le conduit d'évacuation au clapet. Le conduit doit être inséré à l'intérieur du clapet. Fixer ensemble le conduit et le clapet avec une bride de serrage de 4\ |
37 |
| 3. Acheminer le conduit d'évacuation jusqu'à l'emplacement de la sécheuse. Utiliser l'itinéraire le plus rectiligne possible. Voir “Déterminer l'itinéraire d'acheminement du conduit” dans “Planification du système d'évacuation”. Évit... |
37 |
| Installation des pieds de nivellement |
37 |
| 1. Pour éviter d'endommager le plancher, utiliser un grand morceau de carton provenant du carton de la sécheuse. Placer le morceau de carton sous toute la longueur du bord arrière de la sécheuse. |
37 |
| 2. Saisir fermement la sécheuse par la caisse (ni par le dessus ni par le panneau de commande). Déposer délicatement la sécheuse sur le carton. Voir l'illustration. |
37 |
| 3. Examiner les pieds de nivellement. Trouver le symbole de repérage (losange). |
37 |
| 4. Engager manuellement les pieds dans les trous prévus à cet effet. Utiliser une clé à molette pour visser les pieds jusqu'à ce que le symbole de repérage (losange) ne soit plus visible. |
37 |
| 5. Placer une cornière en carton sous chacun des deux coins arrière de la sécheuse. Placer la sécheuse debout. Glisser la sécheuse sur les cornières jusqu'à ce que l'appareil soit proche de son emplacement final. Laisser assez d'espace pour co... |
37 |
| Raccordement du conduit d’évacuation |
37 |
| 1. À l'aide d'une bride de serrage de 4\ |
37 |
| 2. Placer la sécheuse à son emplacement final. Ne pas écraser ni déformer le conduit d'évacuation. |
37 |
| 3. Une fois que le conduit d'évacuation est raccordé, retirer les cornières et le carton. |
37 |
| Raccordement des tuyaux d'alimentation |
37 |
| 1. Arrêter le robinet d'eau froide et retirer le tuyau d'alimentation de la laveuse. |
37 |
| 2. Retirer l'ancienne rondelle de caoutchouc du tuyau d'alimentation et la remplacer par la nouvelle rondelle fournie. Si l'espace le permet, fixer l'embout femelle du connecteur en Y au robinet d'eau froide. |
37 |
| 3. Fixer un tuyau court au robinet d'eau froide. Visser complètement le raccord à la main pour qu'il soit scellé au robinet. |
37 |
| 4. À l'aide d'une pince, serrer les raccords en effectuant deux tiers de tour supplémentaire. |
37 |
| 5. Fixer le connecteur en Y à l'embout mâle du tuyau court. Visser complètement le raccord à la main pour qu'il soit scellé au connecteur en Y. |
37 |
| 6. L'un des extrémités du tuyau long comporte un treillis métallique à l'intérieur du raccord. Fixer cette extrémité au connecteur en “Y”. |
37 |
| 7. Fixer le tuyau d'alimentation en eau froide de la laveuse à l'autre extrémité du connecteur en Y. Visser le raccord à la main jusqu'à ce qu'il soit fixé au connecteur en Y. |
38 |
| 8. Terminer le serrage des raccords - deux tiers de tour supplémentaires avec une pince. |
38 |
| 9. Fixer l'autre extrémité du long tuyau à l'électrovanne située au bas du panneau arrière de la sécheuse. Visser le raccord à la main jusqu'à ce qu'il repose sur le connecteur de l'électrovanne. |
38 |
| 10. Terminer le serrage des raccords - deux tiers de tour supplémentaires avec une pince. |
38 |
| 11. Vérifier que les robinets d'eau sont ouverts. |
38 |
| 12. Vérifier s'il y a des fuites autour du connecteur en Y, du robinet et des tuyaux d'alimentation. |
38 |
| Réglage de l'aplomb de la sécheuse |
38 |
| Inversion du sens d'ouverture de la porte |
38 |
| 1. Placer une serviette ou un linge doux sur la sécheuse ou l'espace de travail pour protéger la surface. |
38 |
| Dépose de la porte |
38 |
| 1. Ouvrir la porte de la sécheuse. |
38 |
| 2. Retirer la vis inférieure de chacune des deux charnières qui fixent la porte au panneau avant de la sécheuse. |
38 |
| 3. Desserrer la vis supérieure de chacune des deux charnières de l'étape 2. |
39 |
| 4. Retirer la porte de la sécheuse et les charnières en les soulevant à la verticale. Poser la porte sur une surface plane protégée, côté intérieur (partie interne de la porte) vers le haut. Retirer les deux vis desserrées du panneau avant d... |
39 |
| 5. Retirer les quatre chevilles de plastique situées à l'extérieur de l'ouverture de la porte de la sécheuse. |
39 |
| 6. Installer 4 chevilles de plastique dans les trous des vis sur la gauche de la sécheuse après avoir retiré les charnières (Étape 4). |
39 |
| Inversion de la gâche |
39 |
| 1. Retirer la gâche de la porte de la sécheuse. |
39 |
| 2. Retirer la vis cosmétique à l'opposé de la gâche de la porte. |
39 |
| 3. Réinstaller la gâche de la porte et la vis cosmétique sur le côté opposé de leur place initiale. REMARQUE : La gâche de la porte et les chevilles d'obturation doivent être sur le même côté de l'ouverture de la porte. |
39 |
| Réinstallation de la porte |
39 |
| 1. Retirer les quatre vis et les deux charnières de la porte de la sécheuse. |
39 |
| 2. Replacer les quatre vis dans les mêmes trous. |
39 |
| 3. Retirer les quatre vis du côté opposé de la porte. |
39 |
| 4. Installer les deux charnières sur le panneau avant de la sécheuse à l'aide de quatre vis. Utiliser le côté sans fente pour fixer la charnière sur le panneau avant. |
39 |
| 5. Installer les vis dans les trous supérieurs de la porte destinés à la pose des charnières. Ne pas serrer les vis. Laisser les vis en retrait d'environ ¼\ |
40 |
| 6. Suspendre la porte : insérer les têtes de vis dans les trous de fente supérieurs des charnières et glisser la porte vers le bas. Aligner les trous de vis inférieurs dans la charnière et la porte. Fixer deux vis inférieures. Serrer toutes le... |
40 |
| 7. Fermer la porte; vérifier l'engagement de la gâche. |
40 |
| Achever l'installation |
40 |
| 1. Vérifier que toutes les pièces sont maintenant installées. S'il reste une pièce, passer en revue les différentes étapes pour découvrir laquelle aurait été oubliée. |
40 |
| 2. Vérifier la présence de tous les outils. |
40 |
| 3. Jeter ou recycler tous les matériaux d'emballage. |
40 |
| 4. Vérifier que chaque robinet d'arrivée d'eau est ouvert. |
40 |
| 5. Vérifier s'il y a des fuites autour du connecteur “Y”, du robinet et des tuyaux d'alimentation. |
40 |
| 6. Vérifier l'emplacement définitif de la sécheuse. S'assurer que le conduit d'évacuation n'est pas écrasé ou pincé. |
40 |
| 7. Vérifier que la sécheuse est d'aplomb. Voir “Réglage de l'aplomb de la sécheuse”. |
40 |
| 8. Brancher sur une prise à quatre alvéoles reliée à la terre. Mettre l'appareil sous tension. |
40 |
| 9. Retirer toute pellicule de protection ou tout ruban adhésif resté(e) sur la sécheuse. |
40 |
| 10. Lire “Utilisation de la sécheuse”. |
40 |
| 11. Essuyer soigneusement l'intérieur du tambour de la sécheuse avec un chiffon humide pour éliminer toute trace de poussière. |
40 |
| 12. Si vous habitez dans une région où l'eau est dure, il est recommandé d'utiliser un adoucisseur d'eau afin de contrôler les accumulations de calcaire dans la sécheuse. Après un certain temps, les accumulations de calcaire peuvent obstruer di... |
40 |
| 13. Tester le fonctionnement de la sécheuse en sélectionnant un programme de séchage minuté avec chaleur et en mettant la sécheuse en marche. Ne pas sélectionner le modificateur Air Only (air seulement). |
40 |
| Utilisation de la sécheuse |
41 |
| Mise en marche de la sécheuse |
41 |
| 1. Nettoyer le filtre à charpie avant chaque charge. Voir “Nettoyage du filtre à charpie”. |
41 |
| 2. Charger les vêtements dans la sécheuse et fermer la porte. |
41 |
| 3. Appuyer sur POWER (alimentation). |
41 |
| 4. Tourner le bouton au programme sélectionné. Les préréglages pour les programmes automatiques ou minutés s'allument. La durée estimée (programme automatique) ou réelle (programme minuté) du programme apparaît (en minutes) sur l'afficheur. |
41 |
| 5. (ÉTAPE FACULTATIVE) Si désiré, choisir OPTIONS. Pour plus de détails, voir “Options”. |
42 |
| 6. (ÉTAPE FACULTATIVE) Si désiré, appuyer sur END OF CYCLE SIGNAL. Un signal sera émis pour vous annoncer la fin du programme. Pour plus de détails, voir la section “Signal de fin de programme”. |
42 |
| 7. Appuyer sur START (mise en marche). Vérifier que la porte est fermée. |
42 |
| Arrêt, pause ou remise en marche |
43 |
| Pour mettre la sécheuse en pause ou l'arrêter à tout moment |
43 |
| Pour remettre la sécheuse en marche |
43 |
| Conseils pour le séchage et les programmes |
43 |
| Conseils de séchage |
43 |
| Conseils pour les programmes |
43 |
| Témoins lumineux |
43 |
| Sensing (détection) |
43 |
| Wet (mouillé) |
43 |
| Damp (humide) |
43 |
| Cool Down (refroidissement) |
43 |
| Done (programme terminé) |
43 |
| Réglage WRINKLE SHIELD™ |
43 |
| Témoins lumineux |
43 |
| Programmes |
44 |
| Programmes automatiques |
44 |
| Heavy Duty (service intense) |
44 |
| Normal |
44 |
| Casual (tout-aller) |
44 |
| Delicate (articles délicats) |
44 |
| Préréglages des programmes automatiques |
44 |
| Programmes automatiques Type de charge |
44 |
| Température |
44 |
| Programmes à la vapeur |
44 |
| Quick Refresh (rafraîchissement rapide) |
44 |
| Enhanced Touch Up (retouche améliorée) |
44 |
| Préréglages du programme à la vapeur |
44 |
| Programmes minutés Type de charge |
44 |
| Température par défaut* |
44 |
| Durée par défaut (Minutes)* |
44 |
| Programmes minutés |
45 |
| Séchage minuté |
45 |
| Préréglages des programmes minutés |
45 |
| Programmes minutés Type de charge |
45 |
| Température par défaut |
45 |
| Durée par défaut (Minutes) |
45 |
| Modificateurs |
45 |
| Modificateurs des programmes automatiques |
45 |
| Modificateurs des programmes minutés |
45 |
| Air Only (air seulement) |
45 |
| Type de charge |
45 |
| Durée* (Minutes) |
45 |
| Utilisation du réglage Air Only (air seulement) |
45 |
| Options |
45 |
| Drum Light (lampe du tambour) |
46 |
| Réglage WRINKLE SHIELD™ |
46 |
| Damp Dry Signal (signal de séchage humide) |
46 |
| Signal de fin de programme |
46 |
| Signal de fin de programme |
46 |
| Changement des programmes, modificateurs et options |
46 |
| Changement des programmes après avoir appuyé sur Start |
46 |
| 1. Appuyer deux fois sur la touche PAUSE/CANCEL (pause/ annulation). |
46 |
| 2. Sélectionner le programme et les options désirés. |
46 |
| 3. Appuyer sur START (mise en marche). La sécheuse recommence au début du nouveau programme. |
46 |
| Changement des modificateurs et options après avoir appuyé sur Start |
46 |
| 1. Appuyer une fois sur PAUSE/CANCEL (pause/annulation). |
46 |
| 2. Choisir la nouvelle option et/ou les nouveaux modificateurs. |
46 |
| 3. Appuyer sur START pour continuer le programme. |
46 |
| Modification des préréglages de niveau de séchage |
47 |
| 1. Les réglages de niveau de séchage ne peuvent pas être modifiés pendant le fonctionnement de la sécheuse. |
47 |
| 2. Appuyer sur le bouton DRYNESS pendant 5 secondes. La sécheuse émet un signal sonore, et “CF” s'affiche pendant 1 seconde, suivi du réglage de séchage actuel. |
47 |
| 3. Pour sélectionner un nouveau réglage de séchage, appuyer de nouveau sur le bouton DRYNESS jusqu'à ce que le réglage désiré s'affiche. REMARQUE : Pendant une recherche de réglage, le réglage en cours ne clignote pas mais les autres réglag... |
47 |
| 4. Appuyer sur START pour enregistrer le réglage de séchage. |
47 |
| 5. Le réglage de séchage que vous avez sélectionné deviendra le nouveau réglage par défaut pour tous les programmes automatiques. |
47 |
| Option de grille de séchage |
47 |
| Utilisation de la grille de séchage |
47 |
| 1. Ouvrir la porte de la sécheuse. |
47 |
| 2. Placer la grille de séchage dans le tambour de la sécheuse en positionnant la broche arrière sur le rebord du panneau interne arrière de la sécheuse. Baisser le bord avant de la grille de séchage pour bien la fixer à l'avant de la sécheuse. |
47 |
| 3. Placer les articles mouillés sur la grille de séchage. Laisser de l'espace entre les articles pour que l'air puisse atteindre toutes les surfaces. |
47 |
| 4. Fermer la porte. |
48 |
| 5. Appuyer sur le bouton POWER (alimentation). |
48 |
| 6. Sélectionner un programme de séchage minuté et une température (voir tableau suivant). Les articles contenant de la mousse, du caoutchouc ou du plastique doivent être séchés sur une corde à linge ou au moyen du réglage de séchage à l'ai... |
48 |
| 7. Il faut sélectionner une durée de séchage en appuyant sur TIME ADJUST (vers le haut ou vers le bas). Régler de nouveau la durée au besoin pour compléter le séchage. Se référer au tableau suivant. |
48 |
| 8. Appuyer sans relâcher sur le bouton START (pendant environ 1 seconde). |
48 |
| Séchage sur grille |
48 |
| Réglage |
48 |
| Temp. |
48 |
| Durée* |
48 |
| Chandails en laine |
48 |
| Jouets rembourrés ou oreillers |
48 |
| Jouets rembourrés ou oreillers |
48 |
| Chaussures de tennis ou de toile |
48 |
| entretien de la sécheuse |
48 |
| Nettoyage de l'emplacement de la sécheuse |
48 |
| Nettoyage du filtre à charpie |
48 |
| IMPORTANT : |
48 |
| Nettoyage avant chaque charge |
48 |
| 1. Le filtre à charpie est situé au sommet de la sécheuse. Tirer le filtre à charpie vers soi. Enlever la charpie du filtre en la roulant avec les doigts. Ne pas rincer ni laver le filtre pour enlever la charpie. La charpie mouillée s'enlève di... |
48 |
| 2. Remettre le filtre à charpie fermement en place. |
48 |
| Nettoyage au besoin |
48 |
| 1. Enlever la charpie du filtre en la roulant avec les doigts. |
48 |
| 2. Mouiller les deux côtés du filtre à charpie avec de l'eau chaude. |
48 |
| 3. Mouiller une brosse en nylon avec de l'eau chaude et du détergent liquide. Frotter le filtre avec la brosse pour enlever l'accumulation de résidus. |
48 |
| 4. Rincer le filtre à l'eau chaude. |
48 |
| 5. Bien sécher le filtre à charpie avec une serviette propre. Réinstaller le filtre à charpie dans la sécheuse. |
48 |
| Nettoyage de l’intérieur de la sécheuse |
49 |
| 1. Appliquer un nettoyant domestique liquide et ininflammable sur la surface tachée du tambour et frotter avec un linge doux jusqu'à ce que la tache soit enlevée. |
49 |
| 2. Essuyer complètement le tambour avec un linge humide. |
49 |
| 3. Faire culbuter une charge de linge ou de serviettes propres pour sécher le tambour. |
49 |
| Retrait de la charpie accumulée |
49 |
| De l'intérieur de la caisse de la sécheuse |
49 |
| Du conduit d'évacuation |
49 |
| Tuyaux d’arrivée d’eau |
49 |
| Précautions à prendre avant les vacances, un entreposage ou un déménagement |
49 |
| Entretien en cas de non-utilisation ou de période de vacances |
49 |
| 1. Débrancher la sécheuse ou déconnecter la source de courant électrique. |
49 |
| 2. Nettoyer le filtre à charpie. Voir “Nettoyage du filtre à charpie”. |
49 |
| 3. Fermer l'alimentation d'eau de la sécheuse. Ceci aide à éviter les inondations accidentelles (dues à une augmentation de la pression) quand vous êtes absent. |
49 |
| Préparation de la sécheuse pour l'hiver : |
49 |
| 1. Débrancher la sécheuse ou déconnecter la source de courant électrique. |
49 |
| 2. Fermer les robinets d'eau. |
49 |
| 3. Débrancher les tuyaux d'arrivée d'eau des robinets et les vider. |
49 |
| Remise en marche de la sécheuse |
49 |
| 1. Vidanger les canalisations d'eau. Reconnecter les tuyaux d'arrivée d'eau aux robinets. Ouvrir les robinets d'eau. |
49 |
| 2. Brancher la sécheuse ou reconnecter la source de courant électrique. |
49 |
| Précautions à prendre avant un déménagement |
49 |
| 1. Débrancher le cordon d'alimentation électrique. |
49 |
| 2. Fermer le robinet d'eau. |
49 |
| 3. Débrancher le tuyau d'arrivée d'eau du robinet et le vider. Transporter le tuyau séparément. |
49 |
| 4. Veiller à ce que les pieds de nivellement soient fixés solidement à la base de la sécheuse. |
49 |
| 5. Utiliser du ruban adhésif de masquage pour fixer la porte de la sécheuse. |
49 |
| Pour les sécheuses avec câblage direct : |
49 |
| 1. Déconnecter la source de courant électrique. |
49 |
| 2. Déconnecter le câblage. |
49 |
| 3. Fermer le robinet d’eau. |
49 |
| 4. Déconnecter le tuyau d’arrivée d’eau du robinet, puis vidanger le tuyau. Transporter le tuyau séparément. |
49 |
| 5. Veiller à ce que les pieds de nivellement soient solidement fixés à la base de la sécheuse. |
49 |
| 6. Utiliser du ruban de masquage pour fixer la porte de la sécheuse. |
49 |
| Réinstaller la sécheuse |
49 |
| Changement de l’ampoule d’éclairage du tambour |
50 |
| Changement de l'ampoule du tambour |
50 |
| 1. Débrancher la sécheuse ou déconnecter la source de courant électrique. |
50 |
| 2. Ouvrir la porte de la sécheuse. Trouver le couvercle de l'ampoule d'éclairage sur la paroi arrière de la sécheuse. Enlever la vis située au coin inférieur droit du couvercle. Enlever le couvercle. |
50 |
| 3. Tourner l'ampoule dans le sens antihoraire. Remplacer l'ampoule seulement par une ampoule de 10 watts pour appareil électroménager. Réinstaller le couvercle et le fixer avec la vis. |
50 |
| 4. Brancher la sécheuse ou reconnecter la source de courant électrique. |
50 |
| dépannage |
50 |
| Essayer d'abord les solutions suggérées ici ou visiter notre site Web et consulter notre FAQ (Foire aux questions), pour éventuellement éviter le coût d'une visite de service...www.whirlpool.ca |
50 |
| Fonctionnement de la sécheuse |
50 |
| Le sécheuse ne fonctionne pas |
50 |
| Absence de chaleur |
50 |
| Sons inhabituels |
50 |
| La sécheuse affiche un message codé |
50 |
| Résultats de la sécheuse |
51 |
| Le séchage des vêtements n'est pas satisfaisant, les durées de séchage sont trop longues ou la charge est trop chaude |
51 |
| Temps de programme trop court |
52 |
| Charpie sur la charge |
52 |
| Taches sur la charge ou sur le tambour |
52 |
| Charges avec faux plis |
52 |
| Odeurs |
52 |
| Assistance oU Service |
53 |
| Si vous avez besoin de pièces de rechange |
53 |
| Pour trouver des pièces de rechange FSP® dans votre région : |
53 |
| Nos consultants fournissent l'assistance pour : |
53 |
| Pour plus d'assistance |
53 |
| ACCESSOIRES |
53 |
| Produit numéro |
53 |
| Accessoire |
53 |
| Notes |
54 |
| GARANTIE DES APPAREILS DE BUANDERIE DE WHIRLPOOL CORPORATION |
55 |
| GARANTIE LIMITÉE |
55 |
| Pendant un an à compter de la date d'achat, lorsque ce gros appareil ménager est utilisé et entretenu conformément aux instructions jointes à ou fournies avec le produit, Whirlpool Corporation ou Whirlpool Canada LP (ci-après désignées “Whi... |
55 |
| ÉLÉMENTS EXCLUS DE LA GARANTIE |
55 |
| La présente garantie limitée ne couvre pas : |
55 |
| 1. Les pièces de rechange ou la main d'œuvre lorsque ce gros appareil ménager est utilisé à des fins autres que l'usage unifamilial normal ou lorsque les instructions d'installation et/ou les instructions de l'opérateur ou de l'utilisateur four... |
55 |
| 2. Les visites de service pour rectifier l'installation du gros appareil ménager, montrer à l'utilisateur comment utiliser l'appareil, remplacer ou réparer des fusibles ou rectifier le câblage ou la plomberie du domicile. |
55 |
| 3. Les visites de service pour réparer ou remplacer les ampoules électriques, les filtres à air ou les filtres à eau de l'appareil. Les pièces consomptibles ne sont pas couvertes par la garantie. |
55 |
| 4. Les dommages imputables à : accident, modification, usage impropre ou abusif, incendie, inondation, actes de Dieu, installation fautive ou installation non conforme aux codes d'électricité ou de plomberie, ou l'utilisation de produits non appro... |
55 |
| 5. Les défauts apparents, notamment les éraflures, les bosses, fissures ou tout autre dommage au fini du gros appareil ménager, à moins que ces dommages soient dus à des vices de matériaux ou de fabrication et soient signalés à Whirlpool dans... |
55 |
| 6. L'enlèvement et la livraison. Ce gros appareil ménager est conçu pour être réparé à domicile. |
55 |
| 7. Les réparations aux pièces ou systèmes résultant d'une modification non autorisée faite à l'appareil. |
55 |
| 8. Les frais de déplacement et de transport pour le service d'un produit si votre gros appareil ménager est situé dans une région éloignée où un service d'entretien Whirlpool autorisé n'est pas disponible. |
55 |
| 9. La dépose et la réinstallation de votre gros appareil ménager si celui-ci est installé dans un endroit inaccessible ou n'est pas installé conformément aux instructions d'installation fournies par Whirlpool. |
55 |
| 10. Les pièces de rechange ou la main-d'oeuvre pour les gros appareils ménagers dont les numéros de série et de modèle originaux ont été enlevés, modifiés ou qui ne peuvent pas être facilement identifiés. |
55 |
| CLAUSE D'EXONÉRATION DE RESPONSABILITÉ AU TITRE DES GARANTIES IMPLICITES |
55 |
| LES GARANTIES IMPLICITES, Y COMPRIS LES GARANTIES APPLICABLES DE QUALITÉ MARCHANDE OU D'APTITUDE À UN USAGE PARTICULIER, SONT LIMITÉES À UN AN OU À LA PLUS COURTE PÉRIODE AUTORISÉE PAR LA LOI. Certains États et certaines provinces ne permette... |
55 |
| LIMITATION DES RECOURS, EXCLUSION DES DOMMAGES FORTUITS OU INDIRECTS |
55 |
| LE SEUL ET EXCLUSIF RECOURS DU CLIENT DANS LE CADRE DE LA PRÉSENTE GARANTIE LIMITÉE CONSISTE EN LA RÉPARATION PRÉVUE CI-DESSUS. WHIRLPOOL N'ASSUME AUCUNE RESPONSABILITÉ POUR LES DOMMAGES FORTUITS OU INDIRECTS. Certains États et certaines provin... |
55 |
| Si vous résidez à l'extérieur du Canada et des 50 États des États-Unis, contactez votre marchand Whirlpool autorisé pour déterminer si une autre garantie s'applique. |
55 |
| Si vous avez besoin d'un service de réparation, voir d'abord la section “Dépannage” du Guide d'utilisation et d'entretien. Si vous n'êtes pas en mesure de résoudre le problème après avoir consulté la section “Dépannage”, vous pouvez t... |
55 |
| ® Registered Trademark/TM Trademark of Whirlpool, U.S.A., Whirlpool Canada LP Licensee in Canada |
56 |
 1
1 2
2 3
3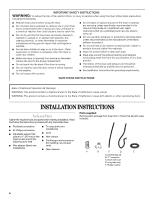 4
4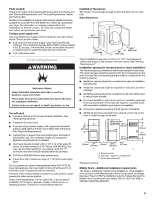 5
5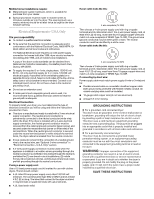 6
6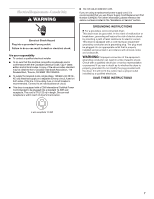 7
7 8
8 9
9 10
10

