Whirlpool WEE745H0FS Installation Guide - Page 13
Direct Wire Installation: Copper or Aluminum Wire, Wire Connection: Direct Wire
 |
View all Whirlpool WEE745H0FS manuals
Add to My Manuals
Save this manual to your list of manuals |
Page 13 highlights
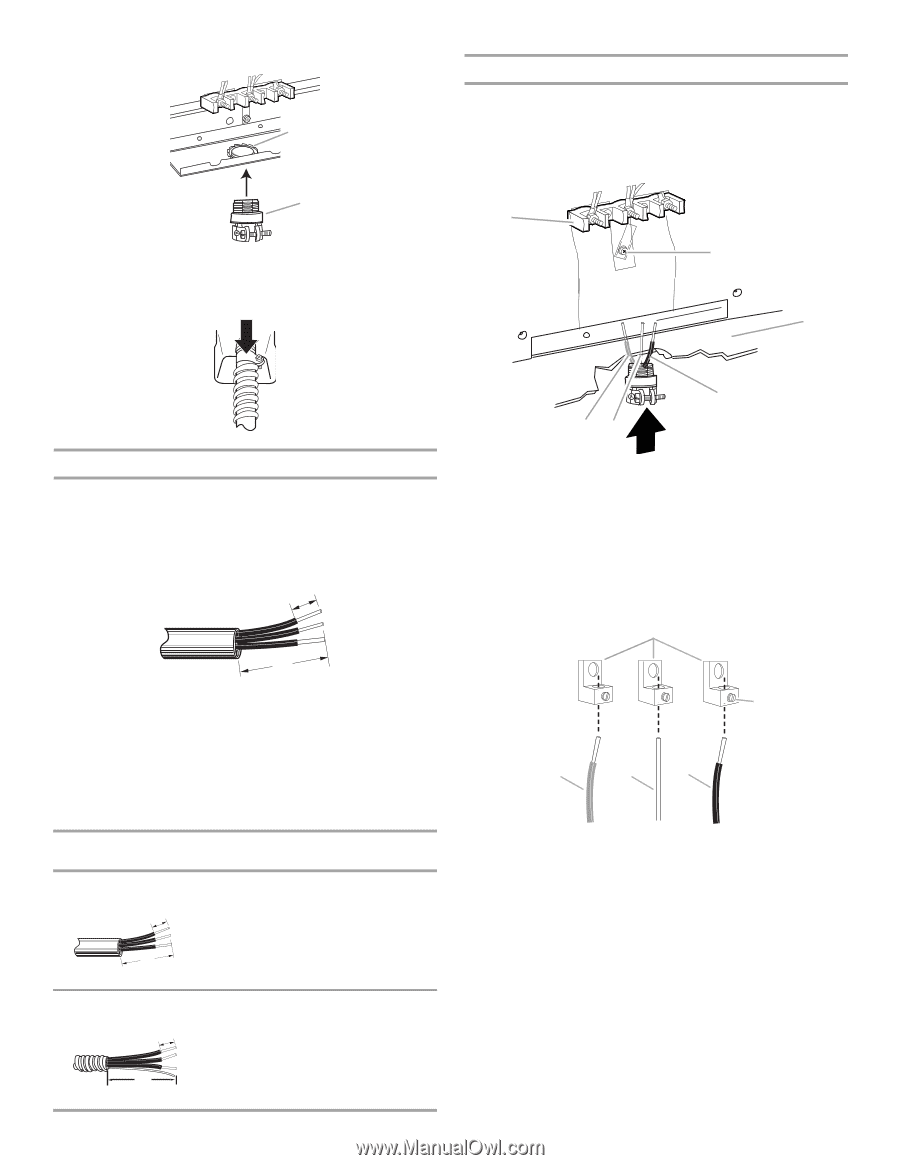
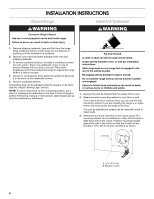
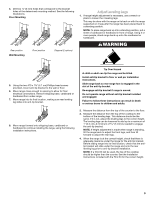
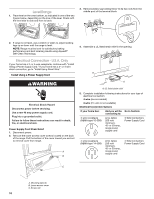
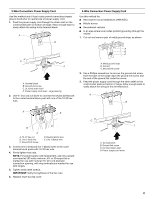
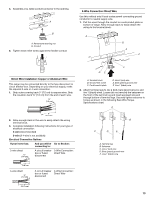
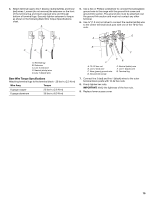
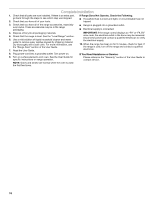
4. Assemble a UL listed conduit connector in the opening. A B A. Removable retaining nut B. Conduit 5. Tighten strain relief screw against the flexible conduit. 3-Wire Connection: Direct Wire Use this method only if local codes permit connecting ground conductor to neutral supply wire. 1. Pull the wires through the conduit on cord/conduit plate on bottom of range. Allow enough slack to easily attach the wiring to the terminal block. A B C Direct Wire Installation: Copper or Aluminum Wire This range may be connected directly to the fuse disconnect or circuit breaker box. Depending on your electrical supply, make the required 3-wire or 4-wire connection. 1. Strip outer covering back 3" (7.6 cm) to expose wires. Strip the insulation back ³⁄₈" (1.0 cm) from the end of each wire. ³⁄₈" (1.0 cm) 3" (7.6 cm) 2. Allow enough slack in the wire to easily attach the wiring terminal block. 3. Complete installation following instructions for your type of electrical connection: 4-wire (recommended) 3-wire (if 4-wire is not available) Electrical Connection Options If your home has: And you will be Go to Section: connecting to: 3-wire direct ³⁄₈" (1.0 cm) A circuit breaker 3-Wire Connection: box or fused Direct Wire disconnect F DE A. Terminal block B. Ground-link screw C. Cord/conduit plate D. Line 2 (red) wire E. Bare (green) ground wire F. Line 1 (black) wire 2. Attach terminal lugs to line 2 (red), bare (green) ground, and line 1 (black) wires. Loosen (do not remove) the setscrew on the front of the terminal lug and insert exposed wire end through bottom of terminal lugs. Securely tighten setscrew to torque as shown in the following Bare Wire Torque Specifications chart. A B C D E A. Terminal lug B. Setscrew C. Line 2 (red) wire D. Bare (green) ground wire E. Line 1 (black) wire 3" (7.6 cm) 4-wire direct ³⁄₈" (1.0 cm) A circuit breaker 4-Wire Connection: box or fused Direct Wire disconnect 5" (12.7 cm) 13
-
 1
1 -
2
-
3
-
4
-
5
-
6
-
7
-
 8
8 -
 9
9 -
 10
10 -
 11
11 -
 12
12 -
 13
13 -
 14
14 -
 15
15 -
 16
16 -
 17
17 -
 18
18 -
19
-
20
-
21
-
22
-
23
-
24
-
25
-
26
-
27
-
28
-
29
-
30
-
31
-
32
 |
 |