Whirlpool WOEC5030LZ Control Guide - Page 4
More Modes
 |
View all Whirlpool WOEC5030LZ manuals
Add to My Manuals
Save this manual to your list of manuals |
Page 4 highlights
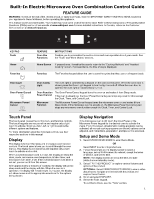
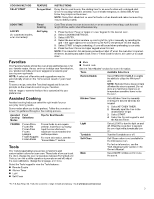
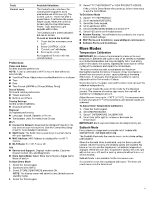
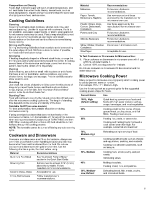
Tools Control Lock Available Selections The Control Lock shuts down the control panel keypads to avoid unintended use of the oven(s). The Control Lock will remain set after a power failure, if set before the power failure occurs. When the control is locked, only the Oven/Microwave Power, Tools, and Oven Light keypads will function. The Control Lock is preset unlocked, but can be locked. To Lock or Unlock the Control: 1. Check that the microwave oven is off. 2. Select CONTROL LOCK. 3. "Control Lock" will display. 4. Scroll up to unlock. No keypads will function with the controls locked. Preferences Times and Dates Set time and date preferences. NOTE: If user is connected to Wi-Fi, time and date will be set automatically. � Your Meal Times: Adjust when breakfast/lunch/dinner is shown � Time � Date � Time Format (AM/PM vs 24 hour [Military Time]) Sound Volume Set sound volume preferences. � Timers and Alerts � Buttons and Effects Display Settings Set the screen brightness. � Display Brightness Regional Set regional preferences. � Language: English, Spanish, or French � Temperature Units: Fahrenheit and Celsius Wi-Fi � Connect to Network: Download the Whirlpool® App from the app store on your mobile phone. See the Connectivity Setup sheet for more detailed instructions. � SAID Code: The SAID code is used to sync a smart device with your appliance. � MAC Address: MAC Address is displayed for the Wi-Fi module. � Wi-Fi Radio: Turn Wi-Fi on or off. Info � Service and Support: Displays model number, Customer Support contact info, and Diagnostics � Store Demo Mode: Select Store Demo Mode to toggle Demo Mode off and on To Start Demo Mode 1. Select the Tools keypad. 2. Scroll and select INFO. 3. Select STORE DEMO MODE and select ON. NOTE: The display screen will show the time (default screen/ standby mode). 4. Select the Tools keypad. 5. Select TRY THE PRODUCT or VIEW PRODUCT VIDEOS. If the unit is in Demo Mode after power up, follow these steps to exit the Demo Mode. To Exit Demo Mode 1. Select TRY THE PRODUCT. 2. Scroll and select EXPLORE. 3. Select the Tools keypad. 4. Scroll and Select INFO. 5. Select STORE DEMO MODE and Select OFF. 6. Select YES on the confirmation screen. � Restore Factory: This will restore your product to the original factory default settings. � Wi-Fi Terms and Conditions: www.whirlpool.com/connect. � Software Terms and Conditions. More Modes Temperature Calibration IMPORTANT: Do not use a thermometer to measure the oven temperature. Elements will cycle on and off as needed to maintain a consistent temperature but may run slightly hot or cool at any point in time due to this cycling. Opening the oven door will affect cycling of the elements and impact the temperature. The oven provides accurate temperatures and has been thoroughly tested at the factory. However, it may cook faster or slower than your previous oven, causing baking or browning differences. If necessary, the temperature calibration can be adjusted in either Fahrenheit or Celsius. On double ovens, the upper oven and the lower oven can each be calibrated independently. A minus sign means the oven will be cooler by the displayed amount. The absence of a minus sign means the oven will be warmer by the displayed amount. Adjust the oven temp up to +/-30°F (+/-18°C). It is recommended to make changes in 5°F (3°C) increments until desired results are achieved. To Adjust Oven Temperature Calibration: 1. Press the Tools keypad. 2. Select MORE MODES. 3. Select TEMPERATURE CALIBRATION. 4. Scroll from left to right to increase or decrease the temperature. IMPORTANT: Each oven calibration can be independently set. Sabbath Mode For guidance on usage and a complete list of models with Sabbath Mode, visit www.star-k.org. The Sabbath Mode sets the oven to remain on in a bake setting until disabled. When the Sabbath Mode is activated, only the Bake cycle will operate. All other cooking and cleaning cycles are disabled. No tones will sound, and the displays will not indicate temperature changes. When the oven door is opened or closed, the oven light will not turn on or off, and the heating elements will not turn on or off immediately. Sabbath Mode is not available for the microwave oven. If a cook timer is set, the countdown will appear. The timer will count down once the timer is set. 4
-
 1
1 -
 2
2 -
 3
3 -
 4
4 -
 5
5 -
 6
6 -
 7
7 -
 8
8 -
 9
9 -
 10
10 -
11
-
12
-
13
-
14
-
15
-
16
-
17
-
18
-
19
-
20
-
21
-
22
-
23
-
24
-
25
-
26
-
27
-
28
-
29
-
30
-
31
-
32
-
33
-
34
-
35
-
36
-
37
-
38
-
39
 |
 |