Xerox 7760GX PhaserMatch and PhaserCal 4.0 User Guide - Page 19
Windows 2000 and Windows XP, Computers with TCP/IP Connections to the Printer - printer driver
 |
UPC - 095205225396
View all Xerox 7760GX manuals
Add to My Manuals
Save this manual to your list of manuals |
Page 19 highlights
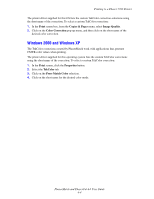
Windows 2000 and Windows XP The TekColor corrections created by PhaserMatch work with applications that generate CMYK or RGB color values when printing. Computers with TCP/IP Connections to the Printer When using a computer with a TCP/IP connection to the printer, the driver lists the TekColor corrections using the short name of the correction. To select a custom TekColor correction for the Phaser 7760 printer: 1. In the Print screen, click the Properties button. 2. Select the TekColor tab. 3. For CMYK profiles, click the Press Match radio button, and then from the Press Match field, select the color correction you want to use for printing. 4. For RGB profiles, click the Office Color radio button, and then from the Office Color field, select the color correction you want to use for printing. 5. Click on the short name for the desired color mode. 6. Click the Paper/Quality tab. 7. Select a print-quality mode. Note: The printer driver's settings for paper and print quality must match the paper type and print quality selected when creating the device link profile and the calibration should have been done using this same print quality and paper type. 8. Ensure the paper in the printer matches the profile you selected. 9. Click OK. To select a custom TekColor correction for the Phaser 7750 printer: 1. In the Print screen, click the Properties button. 2. Select the TekColor tab. 3. Click the Press Match radio button, and then from the Press Match field, select the color correction you want to use for printing. Note: CMYK and RGB color profiles appear in the Press Match field. Click on the short name for the desired color mode. 4. Click on the short name for the desired color mode. 5. Click the Paper/Quality tab. 6. Select a print-quality mode. Note: The printer driver's settings for paper and print quality must match the paper type and print quality selected when creating the device link profile and the calibration should have been done using this same print quality and paper type. PhaserMatch and PhaserCal 4.0 User Guide 4-2
-
 1
1 -
2
-
3
-
4
-
5
-
6
-
7
-
8
-
9
-
10
-
11
-
12
-
13
-
 14
14 -
 15
15 -
 16
16 -
 17
17 -
 18
18 -
 19
19 -
 20
20 -
 21
21 -
 22
22 -
 23
23 -
 24
24 -
25
-
26
-
27
-
28
-
29
-
30
-
31
-
32
-
33
-
34
-
35
 |
 |
