Xerox 8560MFP User Guide - Page 121
Scanning Originals at the Printer, Scanning to the Public Folder, Scanning to a Private Folder
 |
UPC - 095205428841
View all Xerox 8560MFP manuals
Add to My Manuals
Save this manual to your list of manuals |
Page 121 highlights
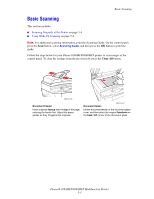
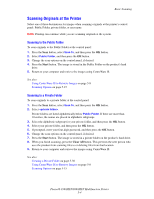
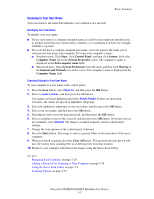
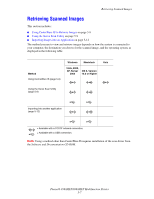
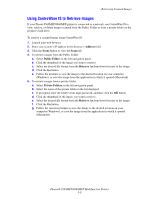
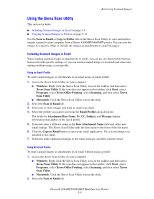
Basic Scanning Scanning Originals at the Printer Select one of three destinations for images when scanning originals at the printer's control panel: Public Folder, private folder, or user name. Note: Printing can continue while you are scanning originals at the system. Scanning to the Public Folder To scan originals to the Public Folder at the control panel: 1. Press the Scan button, select Scan To, and then press the OK button. 2. Select Public Folder, and then press the OK button. 3. Change the scan options on the control panel, if desired. 4. Press the Start button. The image is stored in the Public Folder on the product's hard drive. 5. Return to your computer and retrieve the images using CentreWare IS. See also: Using CentreWare IS to Retrieve Images on page 5-8 Scanning Options on page 5-15 Scanning to a Private Folder To scan originals to a private folder at the control panel: 1. Press the Scan button, select Scan To, and then press the OK button. 2. Select . Private folders are listed alphabetically below Public Folder. If there are more than 10 entries, the names are placed in alphabetic subgroups. 3. Select the alphabetic subgroup for your private folder, and then press the OK button. 4. Select your private folder, and then press the OK button. 5. If prompted, enter your four-digit password, and then press the OK button. 6. Change the scan options on the control panel, if desired. 7. Press the Start button. The image is stored in a private folder on the product's hard drive. 8. When you finish scanning, press the Clear All button. This prevents the next person who uses the product from scanning files to or deleting files from that location. 9. Return to your computer and retrieve the images using CentreWare IS. See also: Creating a Private Folder on page 5-30 Using CentreWare IS to Retrieve Images on page 5-8 Scanning Options on page 5-15 Phaser® 8560MFP/8860MFP Multifunction Printer 5-4
-
 1
1 -
2
-
3
-
4
-
5
-
6
-
7
-
8
-
9
-
10
-
11
-
12
-
13
-
14
-
15
-
16
-
17
-
18
-
19
-
20
-
21
-
22
-
23
-
24
-
25
-
26
-
27
-
28
-
29
-
30
-
31
-
32
-
33
-
34
-
35
-
36
-
37
-
38
-
39
-
40
-
41
-
42
-
43
-
44
-
45
-
46
-
47
-
48
-
49
-
50
-
51
-
52
-
53
-
54
-
55
-
56
-
57
-
58
-
59
-
60
-
61
-
62
-
63
-
64
-
65
-
66
-
67
-
68
-
69
-
70
-
71
-
72
-
73
-
74
-
75
-
76
-
77
-
78
-
79
-
80
-
81
-
82
-
83
-
84
-
85
-
86
-
87
-
88
-
89
-
90
-
91
-
92
-
93
-
94
-
95
-
96
-
97
-
98
-
99
-
100
-
101
-
102
-
103
-
104
-
105
-
106
-
107
-
108
-
109
-
110
-
111
-
112
-
113
-
114
-
115
-
 116
116 -
 117
117 -
 118
118 -
 119
119 -
 120
120 -
 121
121 -
 122
122 -
 123
123 -
 124
124 -
 125
125 -
 126
126 -
127
-
128
-
129
-
130
-
131
-
132
-
133
-
134
-
135
-
136
-
137
-
138
-
139
-
140
-
141
-
142
-
143
-
144
-
145
-
146
-
147
-
148
-
149
-
150
-
151
-
152
-
153
-
154
-
155
-
156
-
157
-
158
-
159
-
160
-
161
-
162
-
163
-
164
-
165
-
166
-
167
-
168
-
169
-
170
-
171
-
172
-
173
-
174
-
175
-
176
-
177
-
178
-
179
-
180
-
181
-
182
-
183
-
184
-
185
-
186
-
187
-
188
-
189
-
190
-
191
-
192
-
193
-
194
-
195
-
196
-
197
-
198
-
199
-
200
-
201
-
202
-
203
-
204
-
205
-
206
-
207
-
208
-
209
-
210
-
211
-
212
-
213
-
214
-
215
-
216
-
217
-
218
-
219
-
220
-
221
-
222
-
223
-
224
-
225
-
226
-
227
-
228
-
229
-
230
-
231
-
232
-
233
-
234
-
235
-
236
-
237
-
238
-
239
-
240
-
241
-
242
-
243
-
244
-
245
-
246
-
247
-
248
-
249
-
250
-
251
-
252
-
253
-
254
-
255
-
256
-
257
-
258
-
259
-
260
-
261
-
262
-
263
-
264
-
265
-
266
-
267
-
268
-
269
-
270
-
271
-
272
-
273
-
274
-
275
-
276
-
277
-
278
-
279
-
280
-
281
 |
 |