Xerox M118 User Guide - Page 172
Paper Jams, contact the Xerox Welcome Center.
 |
UPC - 095205219258
View all Xerox M118 manuals
Add to My Manuals
Save this manual to your list of manuals |
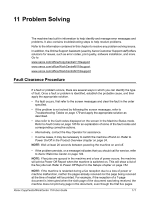
Page 172 highlights
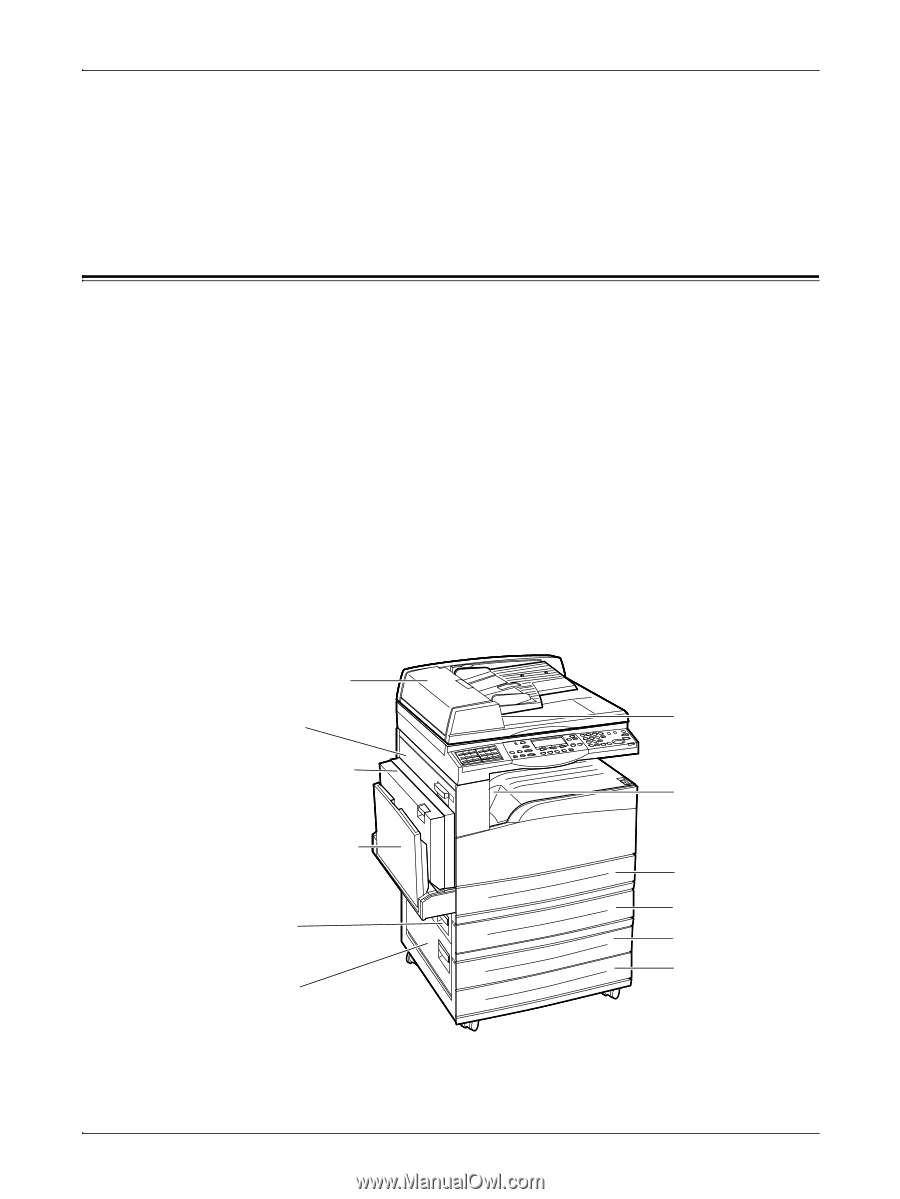
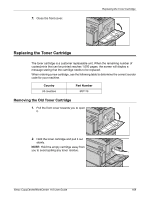
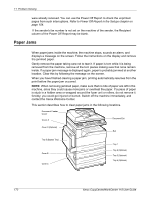
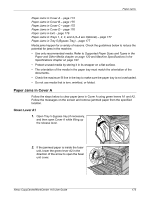
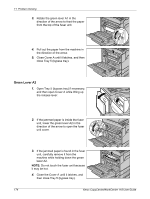
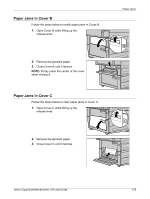
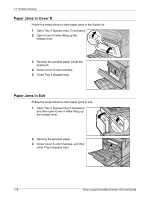
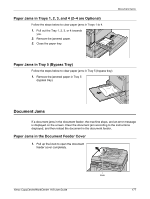
11 Problem Solving were already received. You can use the Power Off Report to check the unprinted pages from such interruptions. Refer to Power Off Report in the Setups chapter on page 154. If the sender's fax number is not set on the machine of the sender, the Recipient column of the Power Off Report may be blank. Paper Jams When paper jams inside the machine, the machine stops, sounds an alarm, and displays a message on the screen. Follow the instructions on the display and remove the jammed paper. Gently remove the paper taking care not to tear it. If paper is torn while it is being removed from the machine, remove all the torn pieces making sure that none remain inside. If a paper jam message is displayed again, paper is probably jammed at another location. Clear this by following the message on the screen. When you have finished clearing a paper jam, printing automatically resumes from the point before the paper jam occurred. NOTE: When removing jammed paper, make sure that no bits of paper are left in the machine, since they could cause more jams or overheat the paper. If a piece of paper is stuck in a hidden area or wrapped around the fuser unit or rollers, do not remove it forcibly; you could get injured or burned. Switch off the machine immediately, and contact the Xerox Welcome Center. This section describes how to clear paper jams in the following locations. Document Feeder Cover Cover A Document Exit Cover D (Optional) D Tray 5 (Bypass Tray) Cover B Cover C A C B Exit Tray 1 Tray 2 (Optional) Tray 3 (Optional) Tray 4 (Optional) 172 Xerox CopyCentre/WorkCentre 118 User Guide
-
 1
1 -
2
-
3
-
4
-
5
-
6
-
7
-
8
-
9
-
10
-
11
-
12
-
13
-
14
-
15
-
16
-
17
-
18
-
19
-
20
-
21
-
22
-
23
-
24
-
25
-
26
-
27
-
28
-
29
-
30
-
31
-
32
-
33
-
34
-
35
-
36
-
37
-
38
-
39
-
40
-
41
-
42
-
43
-
44
-
45
-
46
-
47
-
48
-
49
-
50
-
51
-
52
-
53
-
54
-
55
-
56
-
57
-
58
-
59
-
60
-
61
-
62
-
63
-
64
-
65
-
66
-
67
-
68
-
69
-
70
-
71
-
72
-
73
-
74
-
75
-
76
-
77
-
78
-
79
-
80
-
81
-
82
-
83
-
84
-
85
-
86
-
87
-
88
-
89
-
90
-
91
-
92
-
93
-
94
-
95
-
96
-
97
-
98
-
99
-
100
-
101
-
102
-
103
-
104
-
105
-
106
-
107
-
108
-
109
-
110
-
111
-
112
-
113
-
114
-
115
-
116
-
117
-
118
-
119
-
120
-
121
-
122
-
123
-
124
-
125
-
126
-
127
-
128
-
129
-
130
-
131
-
132
-
133
-
134
-
135
-
136
-
137
-
138
-
139
-
140
-
141
-
142
-
143
-
144
-
145
-
146
-
147
-
148
-
149
-
150
-
151
-
152
-
153
-
154
-
155
-
156
-
157
-
158
-
159
-
160
-
161
-
162
-
163
-
164
-
165
-
166
-
 167
167 -
 168
168 -
 169
169 -
 170
170 -
 171
171 -
 172
172 -
 173
173 -
 174
174 -
 175
175 -
 176
176 -
 177
177 -
178
-
179
-
180
-
181
-
182
-
183
-
184
-
185
-
186
-
187
-
188
-
189
-
190
-
191
-
192
-
193
-
194
-
195
-
196
-
197
-
198
-
199
-
200
-
201
-
202
-
203
-
204
-
205
-
206
-
207
-
208
-
209
-
210
-
211
-
212
-
213
-
214
-
215
-
216
-
217
-
218
-
219
-
220
-
221
-
222
-
223
-
224
-
225
-
226
-
227
-
228
-
229
-
230
 |
 |