Yamaha 800 Owner's Manual - Page 6
Caution
 |
View all Yamaha 800 manuals
Add to My Manuals
Save this manual to your list of manuals |
Page 6 highlights
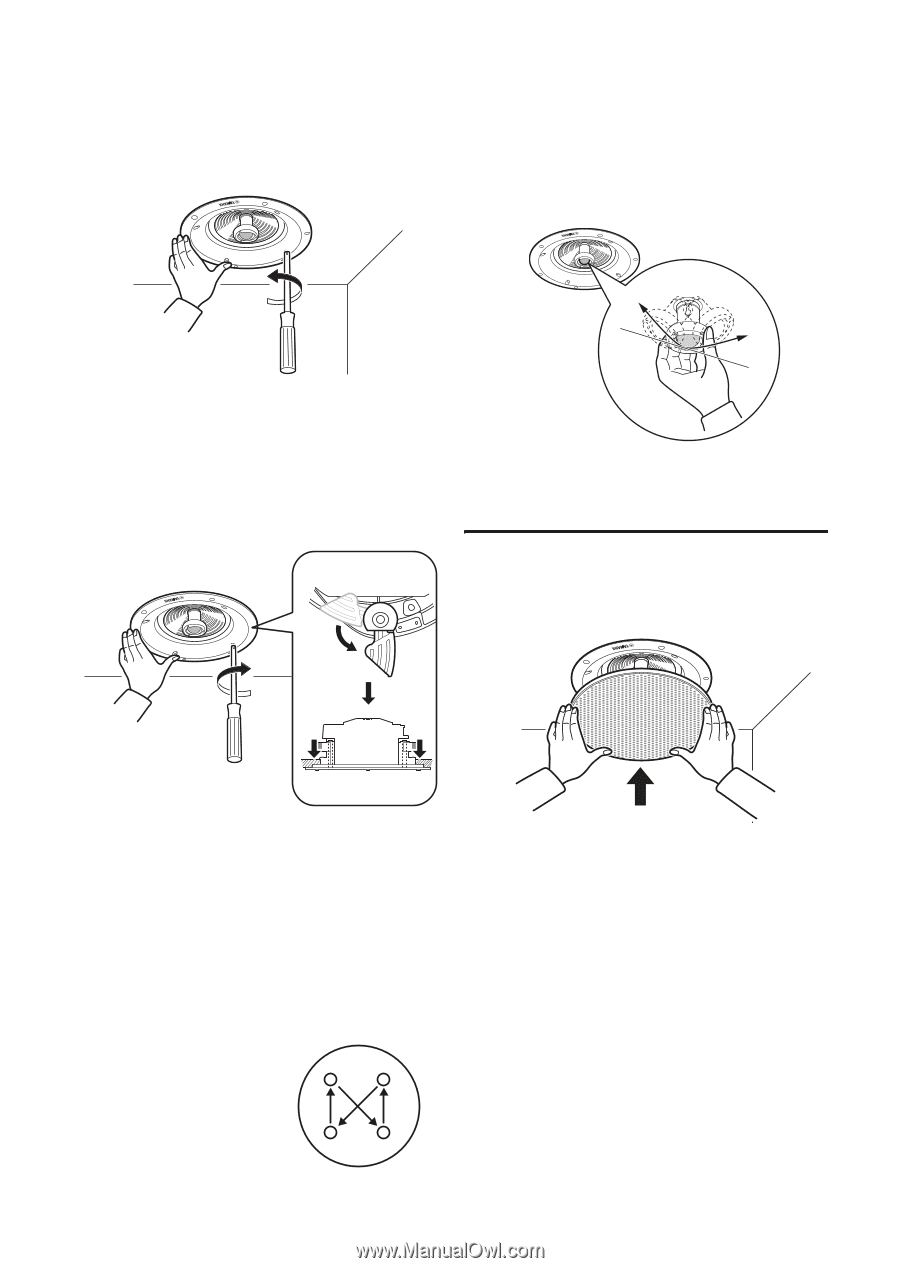
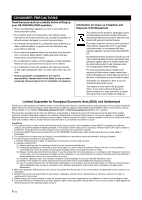
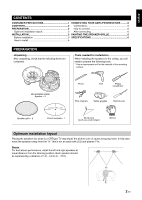
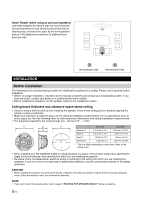
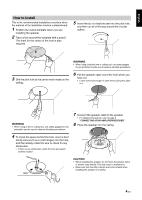
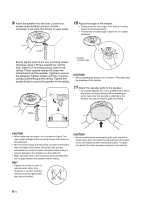
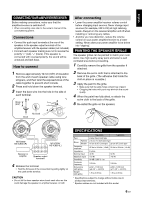
9 Insert the speaker into the hole. Loosen four screws approximately one turn counter- clockwise. It will allow the clamps to open easily. 10 Adjust the angle of the tweeter. • Gently press the outer edge of the tweeter housing toward the listening position. • This tweeter movable angle is about 15° in multiple directions. Loosen *15° Evenly tighten each of the four mounting screws clockwise using a Philips screwdriver. (At this time, these four mounting clamps open in the ceiling. These opened clamps will press the ceiling board and the speaker together to secure the speaker.) Tighten screws until the mounting clamps sufficiently grip the ceiling. Tighten the screws firmly to secure the speaker to the ceiling. *15° * Tweeter movable angle CAUTION • When adjusting the tweeter, do not rotate it. This may cause the breakage of the tweeter. 11 Attach the speaker grille to the speaker. • As several magnets are on the speaker frame, attach the grille to the frame directly. When attaching the grille, make sure that the grille is attached to the speaker securely to keep the grille from falling. Tighten CAUTION • When tightening the screws, do not screw too tightly. This may cause breakage of the mounting clamps and fracture of the wallboard. • We recommend using only hand tools as power screwdrivers may over-tighten the screws. Should you use a power screwdriver be certain to select a very low torque setting to prevent damage to the speaker or to the wallboard. • Make sure that none of the screws are loose and that there are no gaps between the speaker and the ceiling. HINT • Tighten the screws in order of opposite sides rather than clockwise or counter-clockwise direction (such as right and left, then top and bottom). CAUTION • Be very careful when removing the grille, as it may fall or cause injury. Also, try to place an equal amount of pressure on the circumference when removing the grille. The grille may bend if too much pressure is placed in one location. 5 En
-
 1
1 -
 2
2 -
 3
3 -
 4
4 -
 5
5 -
 6
6 -
 7
7 -
 8
8
 |
 |