Yamaha CDC-906 Owner's Manual - Page 7
Preparations
 |
View all Yamaha CDC-906 manuals
Add to My Manuals
Save this manual to your list of manuals |
Page 7 highlights
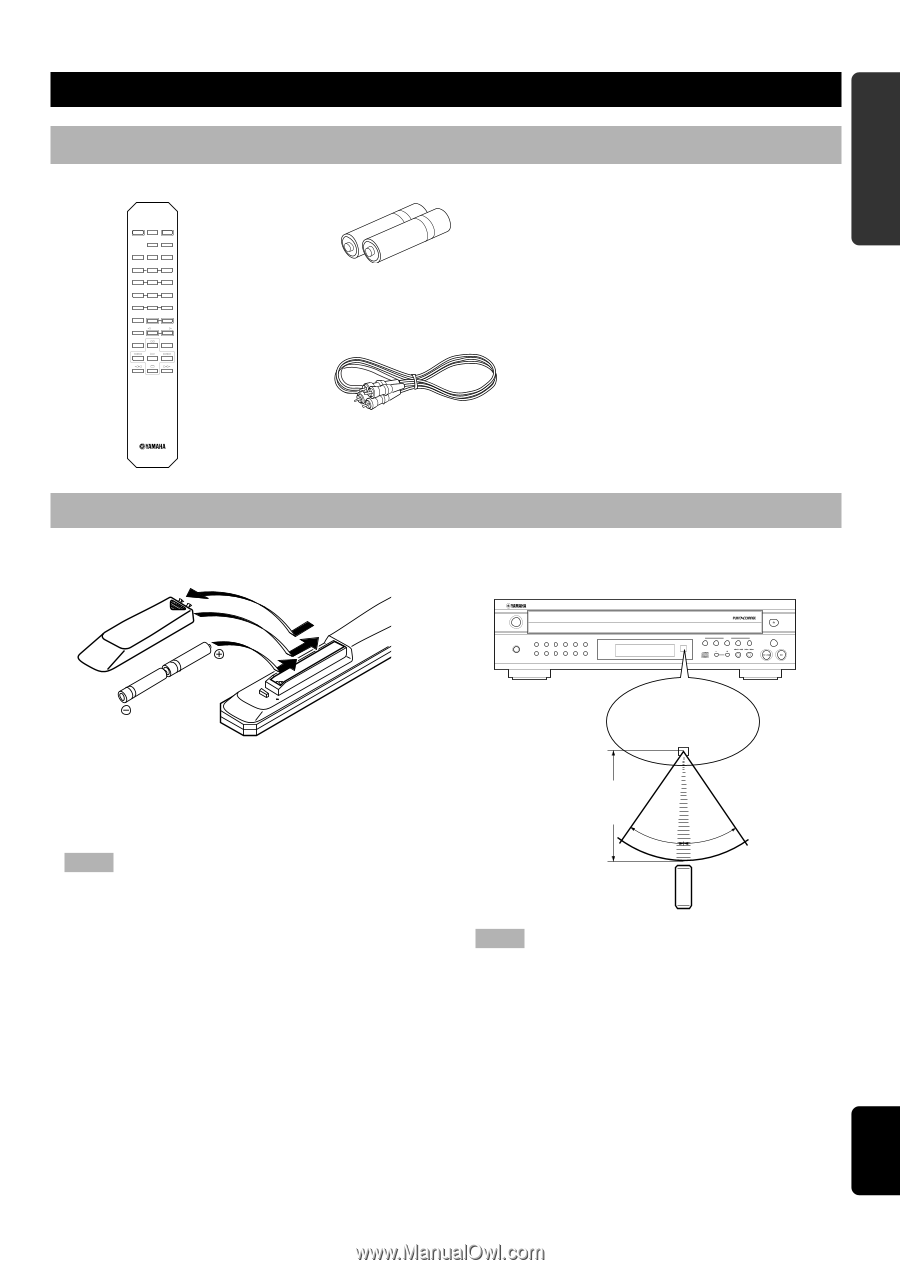
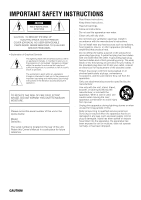
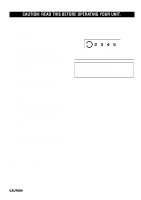
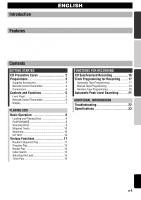
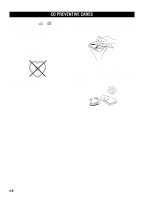
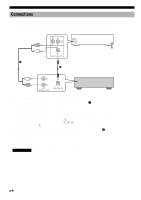
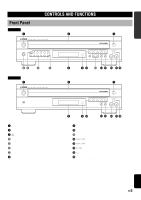
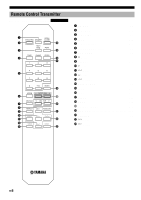
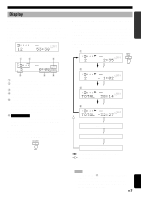
GETTING STARTED PREPARATIONS Supplied Accessories Remote Control Transmitter Batteries (size AA, UM-3, R6) (2) OPEN/ SYNCHRO DIMMER CLOSE TEXT/ TIME PEAK TAPE CLEAR PROG 1 2 3 4 5 6 - - 7 8 9 0 -10 INDEX MODE - OUTPUT LEVEL - DISC SCAN DISC SKIP REPEAT RANDOM RCA Pin Cable Remote Control Transmitter s Battery installation 1 3 2 s Remote control transmitter operation range NATURAL SOUND COMPACT DISC PLAYER POWER PHONES PROG 1 2 3 4 5 +10 6 7 8 9 0 PEAK DISC 1 2 3 4 5 OUTPUT LEVEL PLAYXCHANGE s Battery replacement If you find that the remote control transmitter must be used closer to the main unit, the batteries are weak. Replace both batteries with new ones. Notes • Use only AA, R6, UM-3 batteries for replacement. • Be sure the polarities are correct. (See the illustration inside the battery compartment.) • Remove the batteries if the remote control transmitter will not be used for an extended period of time. • If batteries leak, dispose of them immediately. Avoid touching the leaked material or letting it come in contact with clothing, etc. Clean the battery compartment thoroughly before installing new batteries. Remote control sensor Within approximately 6 m (19.7 feet) 30° 30° Notes • There should be no large obstacles between the remote control transmitter and the main unit. • If the remote control sensor is directly illuminated by strong lighting (especially an inverter type of fluorescent lamp, etc.), it might cause the remote control transmitter not to work correctly. In this case, reposition the main unit to avoid direct lighting. E-3 English
-
 1
1 -
 2
2 -
 3
3 -
 4
4 -
 5
5 -
 6
6 -
 7
7 -
 8
8 -
 9
9 -
 10
10 -
 11
11 -
 12
12 -
13
-
14
-
15
-
16
-
17
-
18
-
19
-
20
-
21
-
22
-
23
-
24
-
25
-
26
-
27
-
28
 |
 |