Yamaha CLP-150 Installation Guide - Page 8
MIDI port setting MIDI SETUP - software
 |
View all Yamaha CLP-150 manuals
Add to My Manuals
Save this manual to your list of manuals |
Page 8 highlights
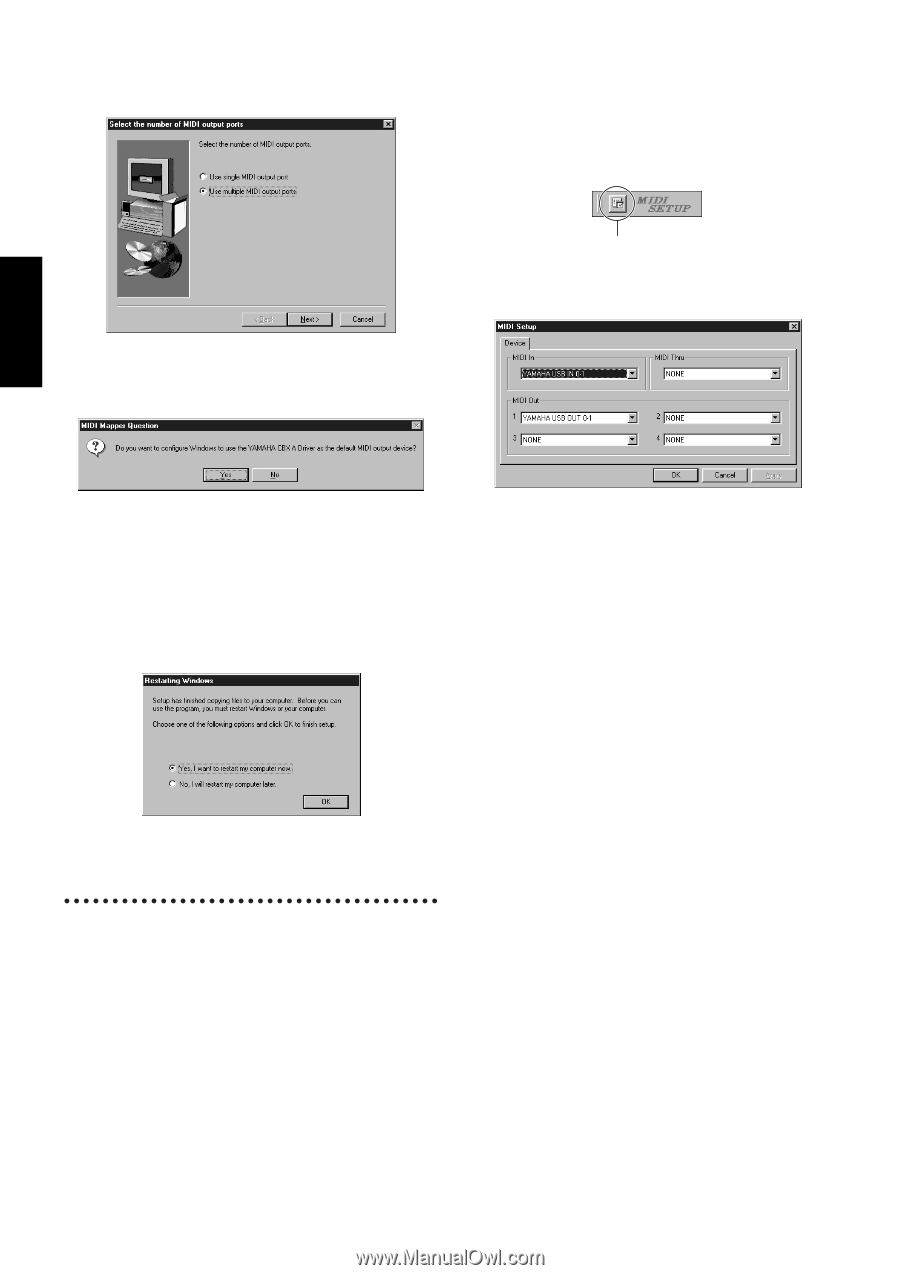
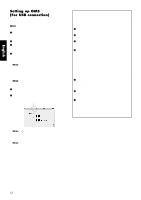
English 7 Click the radio button to the left of the COM port to use. Normally you will use COM1. Click [Next]. "Select the number of MIDI output ports" will appear. MIDI port setting (MIDI SETUP) Before setting the MIDI port on the File Utility, you should set the MIDI port from the MIDI SETUP toolbar. 1 Start the File Utility. 2 Click the MIDI Setup button in the Toolbar called up via step #1. MIDI Setup button 3 In the MIDI Setup window called up via step#2, click the [w] button at the right end of each box and make the port settings as shown. 8 Click the radio button to the left of the "Use multiple MIDI output ports" and click [Next]. The MIDI driver will be installed, and the "MIDI Mapper Question" window will appear. 9 Click [Yes]. The system displays the following message "Set the HOST SELECT switch on a tone module to PC-2." 0 Click [OK]. A message will inform you that setup has been completed. A In order for the newly installed YAMAHA CBX Driver to take effect, make sure that "Yes, I want to restart my computer now" is installed, and click [OK]. The computer will restart. n In order for MIDI ports to be available here, you'll need to select the relevant MIDI port within the application software -File Utility. This is the port that you'll use in the various software. For details on setting the MIDI port, refer to the PDF manual of File Utility. The driver has been installed. File Utility, MIDI Setup Once you've installed these software programs, you can use your computer to access and organize data stored to media connected to the Clavinova (Storage memory and (CLP-170 only) floppy disk). 1 Double-click on the "FileUtil_" folder in the CD-ROM. "Setup.exe" file will be displayed. 2 Double-click on the "Setup.exe" file. The File Utility setup dialog will be displayed. 3 Execute the installation by following the on-screen directions. For details, refer to the on-line Help or the PDF owner's manual. 8
-
 1
1 -
2
-
 3
3 -
 4
4 -
 5
5 -
 6
6 -
 7
7 -
 8
8 -
 9
9 -
 10
10 -
 11
11 -
 12
12 -
 13
13 -
14
-
15
-
16
-
17
-
18
-
19
-
20
 |
 |