Yamaha CLP-295GP Owner's Manual - Page 111
CLP-295GP: Keyboard Stand Assembly
 |
View all Yamaha CLP-295GP manuals
Add to My Manuals
Save this manual to your list of manuals |
Page 111 highlights
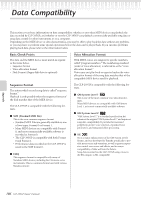
CLP-295GP: Keyboard Stand Assembly CAUTION • Be careful not to confuse parts, and be sure to install all parts in the correct orientation. Please assemble in accordance with the sequence given below. • Assembly should be carried out by at least two persons. • Be sure to use the correct screw size, as indicated below. Use of incorrect screws can damage the stand. • Be sure to tighten all screws upon completing the assembly of each unit. • To disassemble, reverse the assembly sequence given below. Have a Phillips-head (+) screwdriver ready. TIP The CLP-295GP features an iAFC (Instrumental Active Field Control) effect. This produces sound from the speaker located on the bottom face of the Clavinova, enhancing the reverberation and spaciousness of the sound when you open the lid with the longer stay (page 15). In order to optimize the iAFC effect, please observe the following: • Perform the automatic adjustment after you turn on the power of the Clavinova for the first time, and after each time you re-locate the Clavinova. (page 84) • Do not block the speaker located on the bottom face of the Clavinova. 1. Remove all parts from the box. Confirm that all parts shown in the illustration are included. Main unit Lean the unit against the wall as shown at right. How to position the main unit CAUTION Be careful not to pinch your fingers. Be sure to position the keyboard side on the bottom. Spread a large soft cloth, such as a blanket, on the floor. Place the unit on the cloth with the key cover closed and the keyboard side on the bottom and lean the unit against the wall so that the unit will not fall or slip. Place a soft cloth against the wall to protect the instrument and the wall from scratches. CAUTION Do not place the main unit with the rear side facing down. CAUTION Do not lay the main unit upside down on the floor. CAUTION Do not position the main unit so that its bottom is in contact with floor. Legs Pedal box 6 × 40 mm fixing screws × 12 AC power cord Cord holder 6 × 20 mm fixing screws × 4 Appendix CLP-295GP Owner's Manual 111
-
 1
1 -
2
-
3
-
4
-
5
-
6
-
7
-
8
-
9
-
10
-
11
-
12
-
13
-
14
-
15
-
16
-
17
-
18
-
19
-
20
-
21
-
22
-
23
-
24
-
25
-
26
-
27
-
28
-
29
-
30
-
31
-
32
-
33
-
34
-
35
-
36
-
37
-
38
-
39
-
40
-
41
-
42
-
43
-
44
-
45
-
46
-
47
-
48
-
49
-
50
-
51
-
52
-
53
-
54
-
55
-
56
-
57
-
58
-
59
-
60
-
61
-
62
-
63
-
64
-
65
-
66
-
67
-
68
-
69
-
70
-
71
-
72
-
73
-
74
-
75
-
76
-
77
-
78
-
79
-
80
-
81
-
82
-
83
-
84
-
85
-
86
-
87
-
88
-
89
-
90
-
91
-
92
-
93
-
94
-
95
-
96
-
97
-
98
-
99
-
100
-
101
-
102
-
103
-
104
-
105
-
 106
106 -
 107
107 -
 108
108 -
 109
109 -
 110
110 -
 111
111 -
 112
112 -
 113
113 -
 114
114 -
 115
115 -
 116
116 -
117
-
118
-
119
-
120
-
121
-
122
-
123
-
124
 |
 |
