Yamaha CVP-509 Owner's Manual - Page 28
Other character-entry operations, OK button to actually enter the new name
 |
View all Yamaha CVP-509 manuals
Add to My Manuals
Save this manual to your list of manuals |
Page 28 highlights
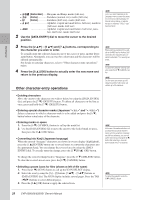
Starting Up • (kana-kan) ......Hiragana and Kanji, marks (full size) • (kana Katakana (normal size), marks (full size) • (kana Katakana (half size), marks (half size) • Alphabet (capital and small letters, full size), numbers (full size), marks (full size) • Alphabet (capital and small letters, half size), num- bers (half size), marks (half size) 2 Use the [DATA ENTRY] dial to move the cursor to the desired position. 3 Press the [2 ▲▼] - [6 ▲▼] and [7 ▲] buttons, corresponding to the character you wish to enter. To actually enter the selected character, move the cursor or press another letterinput button. Alternately, you can wait for a short time and the characters will be entered automatically. For details on entering characters, refer to "Other character-entry operations" below. 4 Press the [8 ▲] (OK) button to actually enter the new name and return to the previous display. Other character-entry operations NOTE Even if you select Japanese as the Language, when you enter the characters in the lyrics editing display, the Internet Setting display, or website, the type of characters "CASE"/"case" may be entered. NOTE When entering a password for a website or the WEP key for wireless LAN connection, the characters are converted to asterisks (*) for security purposes. NOTE To cancel the character-entering operation, press the [8 ▼] (CANCEL) button. NOTE The file name can contain up to 41 characters and the folder name can contain up to 50 characters. • Deleting characters Move the cursor to the character you wish to delete by using the [DATA ENTRY] dial, and press the [7 ▼] (DELETE) button. To delete all characters on the line at once, press and hold the [7 ▼] (DELETE) button. • Entering special character marks (Japanese "< >" and "< >") Select a character to which a character mark is to be added and press the [6 ▼] button before actual entry of the character. • Entering marks or space 1. Press the [6 ▼] (SYMBOL) button to call up the mark list. 2. Use the [DATA ENTRY] dial to move the cursor to the desired mark or space, then press the [8 ▲] (OK) button. • Converting into Kanji (Japanese language) When the entered "hiragana" characters are shown in reverse display (highlighted), press the [1 ▲]/[ENTER] button one or several times to convert the characters into the appropriate kanji. You can change the reversed area by using the [DATA ENTRY] dial. To actually enter the change, press the [1 ▼]/[8 ▲] (OK) button. NOTE In the case of characters which are not accompanied by special character marks (with the exception of kanakan and half-size katakana), you can call up the mark list by pressing the [6 ▼] button after selecting a character (before actual entry of a character). To change the converted kanji back to "hiragana," press the [7 ▼] (DELETE) button. To clear the reversed area at once, press the [8 ▼] (CANCEL) button. • Selecting custom icons for files (shown at left of file name) 1. Press the [1 ▼] (ICON) button to call up the ICON SELECT display. 2. Select the icon by using the [A] - [J] buttons, [3 ▲▼] - [5 ▲▼] buttons or [DATA ENTRY] dial. The ICON display includes several pages. Press the TAB [E][F] buttons to select different pages. 3. Press the [8 ▲] (OK) button to apply the selected icon. NOTE To cancel the operation, press the [8 ▼] (CANCEL) button. 28 CVP-509/505/503/501 Owner's Manual
-
 1
1 -
2
-
3
-
4
-
5
-
6
-
7
-
8
-
9
-
10
-
11
-
12
-
13
-
14
-
15
-
16
-
17
-
18
-
19
-
20
-
21
-
22
-
 23
23 -
 24
24 -
 25
25 -
 26
26 -
 27
27 -
 28
28 -
 29
29 -
 30
30 -
 31
31 -
 32
32 -
 33
33 -
34
-
35
-
36
-
37
-
38
-
39
-
40
-
41
-
42
-
43
-
44
-
45
-
46
-
47
-
48
-
49
-
50
-
51
-
52
-
53
-
54
-
55
-
56
-
57
-
58
-
59
-
60
-
61
-
62
-
63
-
64
-
65
-
66
-
67
-
68
-
69
-
70
-
71
-
72
-
73
-
74
-
75
-
76
-
77
-
78
-
79
-
80
-
81
-
82
-
83
-
84
-
85
-
86
-
87
-
88
-
89
-
90
-
91
-
92
-
93
-
94
-
95
-
96
-
97
-
98
-
99
-
100
-
101
-
102
-
103
-
104
-
105
-
106
-
107
-
108
-
109
-
110
-
111
-
112
-
113
-
114
-
115
-
116
-
117
-
118
-
119
-
120
-
121
-
122
-
123
-
124
-
125
-
126
-
127
-
128
-
129
-
130
-
131
-
132
-
133
-
134
-
135
-
136
-
137
-
138
 |
 |
