Yamaha DTX500 Owner's Manual - Page 27
Change the Tuning Pitch, Change the Pan
 |
UPC - 086792942155
View all Yamaha DTX500 manuals
Add to My Manuals
Save this manual to your list of manuals |
Page 27 highlights
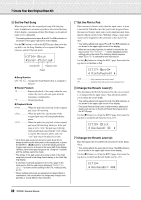
7 Create Your Own Original Drum Kit 2-3. The letter "˙" displayed next to "äkick" indicates layer number 1, and "¶" indicates layer number 2. Two voices can be output (in a layer) through one input source. Select the voice to be edited here. KIT2~~~äkick~~~˙ Layer number "K01:OakCustom~, 2-4. Next, decide the Drum Voice category. Drum Voice categories are the same as those used in the user click sound setting (p. 17). ● Voice Category K: Kick S: Snare T: Tom C: Cymbal H: Hi-hat P: Percussion E: Effect Here, select "K: Kick". Press the [] buttons to move the flashing cursor to the Voice Category and rotate the jog dial to select "K". NOTICE • An asterisk "*" will appear next to "KIT" in the display if data is changed. This asterisk will disappear after the Store operation (p. 32) is carried out. If a different Drum Kit is selected, etc., before carrying out the Store operation, the current settings will return to their original condition. If you want to keep changes made to the data, make sure to carry out the Store operation. 2-5. Next, let's select a Drum Voice. Press the [] buttons so that the voice number flashes, then rotate the jog dial and assign a Drum Voice. The voice number and voice name will be displayed. Here, select "K02:MapleCustm." * If the voice number is set to "00," "NoAssign" is dis- played as the voice name and no sound will be produced. KIT2*~~äkick~~~˙ "K02:MapleCustm, NOTE • When Drum Voices are set for both layers 1 and 2, layer icon ˙ or ¶ is shown in the upper right hand corner of the KIT3 to KIT10 displays. Move the flashing cursor to this icon (if necessary) and rotate the jog dial to change the layer to be edited. • When a Drum Voice is assigned to either of the layers 1 and 2 (the other is set to "NoAssign"), the layer icon is not shown in the KIT3 to KIT10 displays. The layer which has a Drum Voice is the target layer for editing. • When Drum Voices are not assigned for either layer 1 or 2 ("NoAssign"), "---" will be shown in the KIT3 to KIT18 displays and the settings cannot be made. Now you've selected the Drum Voice that will be used as the base for your original Drum Voice. Next, let's edit this Drum Voice and create your original bass Drum Voice. Select and set the display that you want to be edited from page 3 to page 25 in the KIT screen. Store the data when you change the settings! Make sure to store the data after any settings have been changed. For information about how to save, see steps 26. If a different drum kit is selected, etc., before carrying out the Store Operation, the current settings will return to their original condition. If you want to keep changes made to the data, make sure to carry out the Store Operation. 3 Change the Volume This determines the volume of the Drum Voice that is output when the pad is hit. Use this to adjust the volume balance among the other pads. Use the [>] button to call up the KIT3 page, then rotate the jog dial to set the volume (0-127). KIT3*~~äkick~~~˙ "~~Volume=120~~, 4 Change the Tuning (Pitch) This determines the tuning (pitch) of the Drum Voice. Use the [>] button to call up the KIT4 page, then rotate the jog dial to set the tuning in semitones (-24.0 to 0 to +24.0). KIT4*~~äkick~~~˙ "~~Tune=-~3.0~~, 5 Change the Pan This determines the Drum Voice's pan setting (the voice's position within the stereo field). Use the [>] button to call up the page KIT5, then rotate the jog dial to set the voice's pan position. The range is from "L64" (hard left) to "C" (center) to "R63" (hard right). As you rotate the dial, notice the voice change its position within the stereo field according to the setting. KIT5*~~äkick~~~˙ "~~~~Pan=L~5~~~, 27 DTX500 Owner's Manual
-
 1
1 -
2
-
3
-
4
-
5
-
6
-
7
-
8
-
9
-
10
-
11
-
12
-
13
-
14
-
15
-
16
-
17
-
18
-
19
-
20
-
21
-
 22
22 -
 23
23 -
 24
24 -
 25
25 -
 26
26 -
 27
27 -
 28
28 -
 29
29 -
 30
30 -
 31
31 -
 32
32 -
33
-
34
-
35
-
36
-
37
-
38
-
39
-
40
-
41
-
42
-
43
-
44
-
45
-
46
-
47
-
48
 |
 |
