Yamaha DTXPLORER Owner's Manual - Page 15
Create Your Own Original Click Set, Set the Click Measure Break, Set the Click Voice Set, Sound - hi hat
 |
View all Yamaha DTXPLORER manuals
Add to My Manuals
Save this manual to your list of manuals |
Page 15 highlights
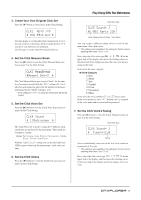
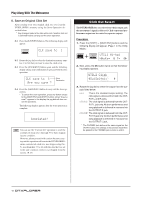
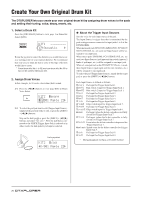
3. Create Your Own Original Click Set Press the [>] button to view page 2 in the Click Setting. CLK2 A"=9 «=9 - »=6 ......=4 Œ=2 , Use this display to set the individual volume levels (0 to 9) for each of the five click beats. Set the volume level to "0" if you don't want the beat to be produced. Use this page to create your own original click set. 4. Set the Click Measure Break Press the [>] button to view the [Click Measure Break] section on page 3 in the Click Setting. CLK3 MeasBreak -Meas=1 Brk=3 , The Click Measure Break puts a muted "break" for the number of measures decided with the "Brk" setting (off, 1 to 9) after the metronome has played for the number of measures determined by the "Meas" setting (1 to 9). * If the setting "Brk=off" is used, the metronome will not be muted. 5. Set the Click Voice Set Press the [>] button to view the [Click Voice Set] section on page 4 in the Click Setting. CLK4 Sound - 1:Metronome , The Click Voice Set is used to assign the 5 different click sounds that are produced by the metronome. The sounds are changed as a group. Range: Metronome, Wood Block, Percussion, Agogo, Stick, Pulse, UserClick With the "UserClick" setting you can use the CLK5 and CLK6 pages to fine-tune the metronome's click voice settings. 6. Set the Click Voices Press the [>] button to view the [Click Voice] section on page 5 in the Click Setting. Play Along With The Metronome Click Value Type CLK5 Sound= « -K/001 Maple 22, Voice Category/Voice Number Voice Name You can assign a different drum voice to each of the metronome's five click voices. * This setting is not available if the setting for CLK4 is set to anything other than "UserClick". First, select the click value type (A in the upper half of the display, then move the flashing cursor to the lower half of the display and select the voice you want to assign to the click. First, select the voice category. ● Voice Category K: Kick S: Snare T: Tom C: Cymbal H: Hi-hat P: Percussion E: Effect Next, select the voice number (0, 1 to 127)/voice name. If the voice number is set to "0", "NoAssign" is assigned to the voice name and no sound will be produced. 7. Set the Click Voice's Tuning Press the [>] button to view the [Click Tuning] section on page 6 in the Click Setting. Click Value Type CLK6 Sound= « - Tune=+12.0 Tuning You can individually tune each of the five click sounds in increments of 10-cents. * This setting is not available if the setting for CLK4 is set to anything other than "UserClick". First, select the click voice type (A in the upper half of the display, and then move the flashing cursor to the lower half of the display and set the tuning (-24 to 0 to +24). 15
-
 1
1 -
2
-
3
-
4
-
5
-
6
-
7
-
8
-
9
-
 10
10 -
 11
11 -
 12
12 -
 13
13 -
 14
14 -
 15
15 -
 16
16 -
 17
17 -
 18
18 -
 19
19 -
 20
20 -
21
-
22
-
23
-
24
-
25
-
26
-
27
-
28
-
29
-
30
-
31
-
32
-
33
-
34
-
35
-
36
 |
 |
