Yamaha HTR-5150 Owner's Manual - Page 14
Connections, Connections With Other Components - owners manual
 |
View all Yamaha HTR-5150 manuals
Add to My Manuals
Save this manual to your list of manuals |
Page 14 highlights
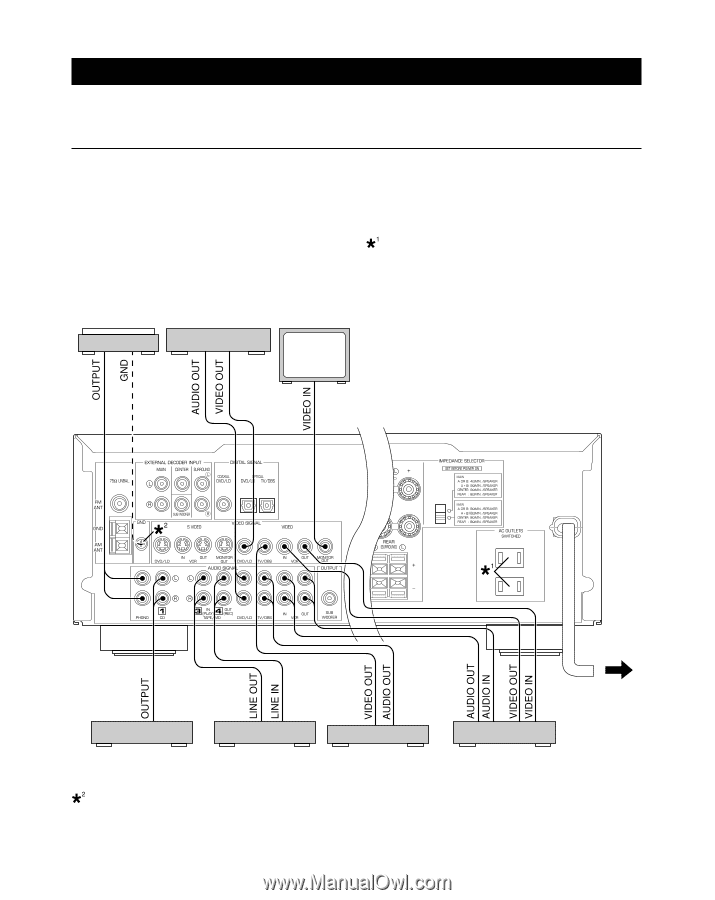
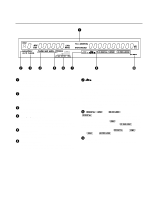
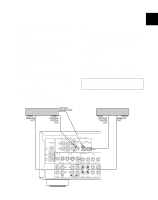
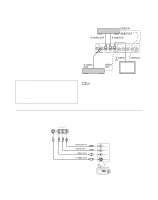
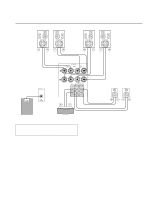
CONNECTIONS Never plug in this unit and other components until all connections have been completed. CONNECTIONS WITH OTHER COMPONENTS Use RCA-type pin plug cables for connecting audio/video components with the exception described later. When making connections between this unit and other components, be sure all connections are made correctly, that is to say L (left) to L, R (right) to R, "+" to "+" and "-" to "-". Also, refer to the owner's manual for each component to be connected to this unit. * If you have YAMAHA components numbered as !, #, $, etc. on the rear panel, connections can be made easily by making sure to connect the output (or input) terminals of each component to the same-numbered terminals of this unit. AC OUTLET(S) (SWITCHED) U.S.A., Canada and China models 2 OUTLETS Australia model 1 OUTLET Turntable DVD player, LD player, etc. Monitor TV Use these to connect the power cords from your components to this unit. The power to the AC OUTLET(S) is controlled by this unit's STANDBY/ON or the provided remote control's POWER and STANDBY. These outlets will supply power to any connected component whenever this unit is turned on. The maximum power (total power consumption of components) that can be connected to the AC OUTLET(S) is 100 watts. (U.S.A. model) To AC outlet CD player Tape deck, MD recorder, etc. TV/DBS tuner VCR (Video cassette recorder) GND terminal (for turntable use) C. onnecting the ground (earth) wire of the turntable to the GND terminal will normally minimize hum, but in some cases, better results may be obtained with the ground wire disconnected. 14
-
 1
1 -
2
-
3
-
4
-
5
-
6
-
7
-
8
-
 9
9 -
 10
10 -
 11
11 -
 12
12 -
 13
13 -
 14
14 -
 15
15 -
 16
16 -
 17
17 -
 18
18 -
 19
19 -
20
-
21
-
22
-
23
-
24
-
25
-
26
-
27
-
28
-
29
-
30
-
31
-
32
-
33
-
34
-
35
-
36
-
37
-
38
-
39
-
40
-
41
-
42
-
43
-
44
-
45
-
46
-
47
-
48
-
49
-
50
-
51
-
52
-
53
-
54
-
55
-
56
-
57
-
58
-
59
-
60
-
61
-
62
-
63
 |
 |