Yamaha HTR-6030 Owner's Manual - Page 17
Setting the speaker impedance (U.S.A. and Canada models only), Connecting to the FRONT A terminals - connections
 |
View all Yamaha HTR-6030 manuals
Add to My Manuals
Save this manual to your list of manuals |
Page 17 highlights
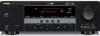
PREPARATION ■ Connecting to the FRONT A terminals 2 1 Red: positive (+) Black: negative (-) 3 Connections Setting the speaker impedance (U.S.A. and Canada models only) Caution If you are to use 6 ohm speakers, set "SP IMP." to "6Ω MIN" as follows BEFORE using this unit. 1 Loosen the knob. 2 Insert the bare end of the speaker wire into the hole on the terminal. 3 Tighten the knob to secure the wire. Connecting the banana plug (except Europe, Korea and Asia models) The banana plug is a single-pole electrical connector widely used to terminate speaker cables. First, tighten the knob and then insert the banana plug connector into the end of the corresponding terminal. 1 Make sure this unit is turned off. See page 18 for details about turning on or off this unit. 2 Press and hold 0TONE CONTROL and then press 1STANDBY/ON to turn on this unit. This unit turns on, an the advanced setup menu appears in the front panel display. 3 Press APROGRAM l / h repeatedly to select "SP IMP.". The following display appears in the front panel display. Banana plug SP IMP.- 8 MIN ■ Connecting to the FRONT B, CENTER, and SURROUND terminals 4 Press BSTRAIGHT repeatedly to select "6Ω MIN". The following display appears in the front panel display. Red: positive (+) Black: negative (-) 1 Press down the tab. 2 Insert the bare end of the speaker wire into the hole on the terminal. 3 Release the tab to secure the wire. SP IMP.- 6 MIN 5 Press 1STANDBY/ON to confirm your selection and set this unit to the standby mode. Note The setting you made is reflected next time you turn on this unit. English 13 En
-
 1
1 -
2
-
3
-
4
-
5
-
6
-
7
-
8
-
9
-
10
-
11
-
 12
12 -
 13
13 -
 14
14 -
 15
15 -
 16
16 -
 17
17 -
 18
18 -
 19
19 -
 20
20 -
 21
21 -
 22
22 -
23
-
24
-
25
-
26
-
27
-
28
-
29
-
30
-
31
-
32
-
33
-
34
-
35
-
36
-
37
-
38
-
39
-
40
-
41
-
42
-
43
-
44
-
45
-
46
-
47
-
48
-
49
-
50
-
51
-
52
-
53
-
54
-
55
-
56
-
57
-
58
-
59
-
60
-
61
-
62
-
63
-
64
-
65
-
66
-
67
-
68
-
69
-
70
-
71
-
72
-
73
-
74
-
75
-
76
-
77
-
78
 |
 |
