Yamaha MDX-793 Owner's Manual - Page 14
RECORDING, Insert an MD., Press, repeatedly to select the input
 |
View all Yamaha MDX-793 manuals
Add to My Manuals
Save this manual to your list of manuals |
Page 14 highlights
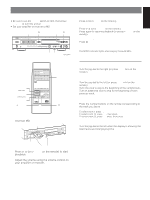
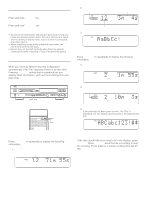
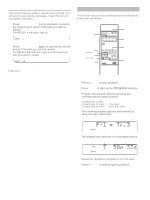
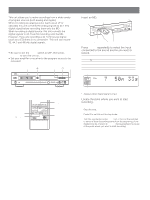
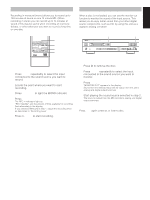
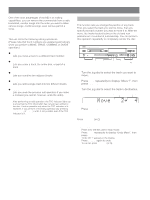
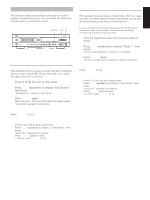
RECORDING This unit allows you to make recordings from a wide variety of program sources (both analog and digital). When recording an analog source (such as an LP or cassette) this unit converts the analog signals to 44.1 kHz digital signal before recording them onto the MD. When recording a digital source, this unit converts the digital signals to 44.1 kHz for recording onto the MD. However, If you are recording a 44.1 kHz source signal (such as a CD) there is no conversion. This unit can record 32, 44.1 and 48 kHz digital signals. Preparations • Be sure to set the TIMER switch to OFF, then press POWER to turn this unit on. • Set your amplifier or receiver to the program source to be recorded. 1 ) 6 &4 NATURAL SOUND MINIDISC RECORDER MDX-793 POWER TIMER OFF REC PLAY 0EJECT 3˜8 7 REC RANDOM S/P REPEAT A-B DISPLAY SCROLL TITLE CHARA. DELETE CANCEL EDIT 4 - SET ENTER ¢ + 1 SEARCH ¡ INPUT REC LEVEL PHONES LEVEL 0 10 0 10 2 REC LEVEL 6 & STOP TITLE CHAR. NUMBER DELETE SET SEARCH !⁄ M-MARK MONO/ST INPUT SKIP $› REC TIME SYNC PLAY PAUSE STOP REC ‹ * & ? CD-P s MDX M-MARK 2 4 1 Insert an MD. Label facing up NATURAL SOUND MINIDISC RECORDER MDX-793 0 Arrow pointed toward disc insertion slot 2 Press INPUT repeatedly to select the input connected to the sound source you want to record. For LINE IN 4 DIGITAL IN COAXIAL DIGITAL IN OPTICAL 1 DIGITAL IN OPTICAL 2 Select ANALOG DIGITAL COAX. DIGITAL OPT. 1 DIGITAL OPT. 2 Input indicator ANALOG DISC TRACK DIGITAL TOTAL OPT. 1 2 REMAIN COAX. 3244.148 RANDOM kHz PROGRAM REPEAT A-BSF (Source) sampling frequency indicators* * Appears when digital signal is input. 3 Locate the point where you want to start recording. • When recording from a blank MD Skip this step. • To start recording from the end of a previous recording. Press & to set this unit to stop mode. • To record over a previous recording. Turn the jog dial (or press SKIP $ or › on the remote) to select a track (recording starts from the beginning of the deleted track), or press * PAUSE during playback to pause at the point where you want to start recording. 14
-
 1
1 -
2
-
3
-
4
-
5
-
6
-
7
-
8
-
 9
9 -
 10
10 -
 11
11 -
 12
12 -
 13
13 -
 14
14 -
 15
15 -
 16
16 -
 17
17 -
 18
18 -
 19
19 -
20
-
21
-
22
-
23
-
24
-
25
-
26
-
27
-
28
-
29
 |
 |