Yamaha MDX-793 Owner's Manual - Page 19
ERASE, Disc Erase, Track Erase, Press, to set this unit to stop mode., then press, again.
 |
View all Yamaha MDX-793 manuals
Add to My Manuals
Save this manual to your list of manuals |
Page 19 highlights
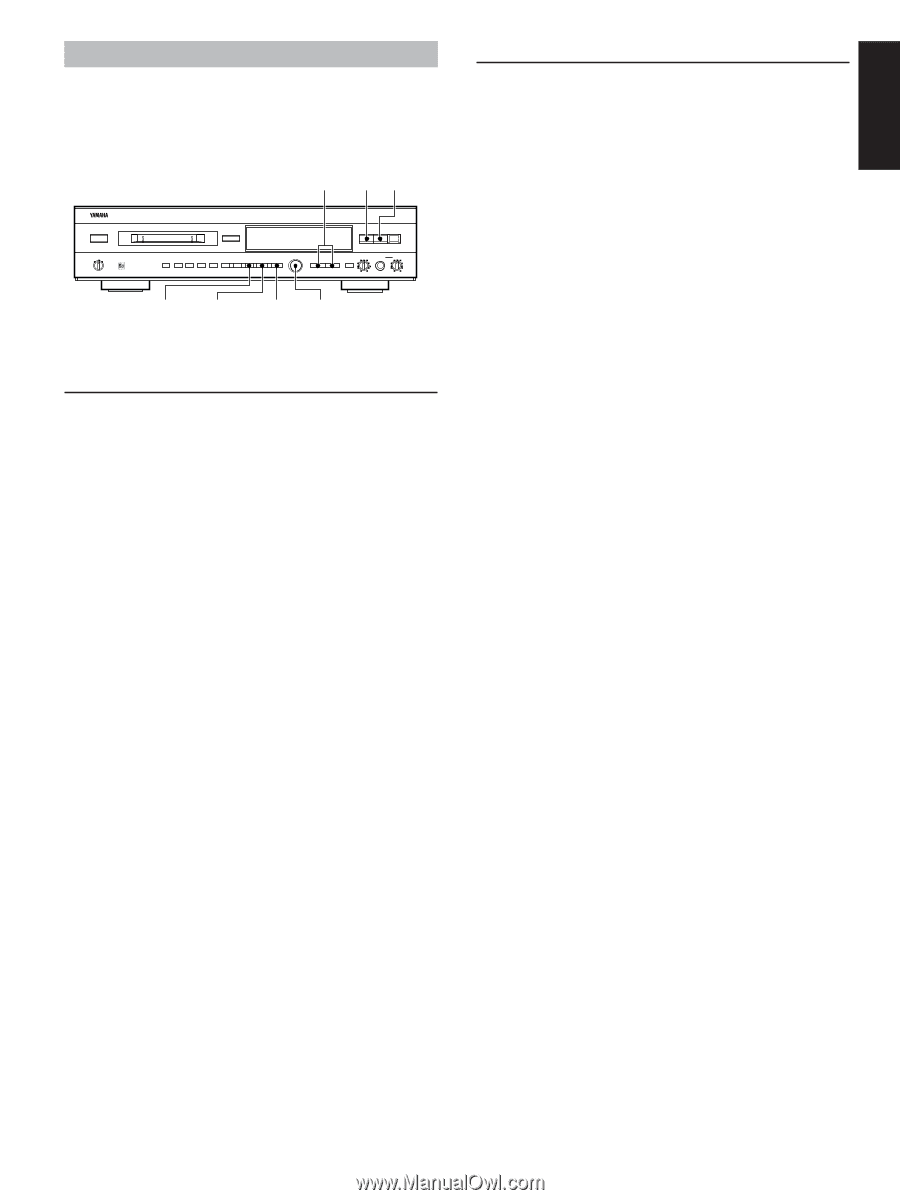
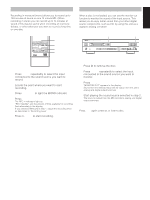
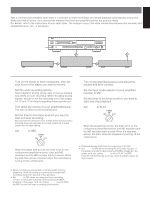
ENGLISH ERASE The ability to erase sound without having to re-record is another convenient function. You can erase the entire disc, a single track, or just part of a track. SEARCH ! ⁄ #/* & NATURAL SOUND MINIDISC RECORDER MDX-793 POWER TIMER OFF REC PLAY 0EJECT 3˜8 7 REC RANDOM S/P REPEAT A-B DISPLAY SCROLL TITLE CHARA. DELETE CANCEL EDIT 4 - SET ENTER ¢ + 1 SEARCH ¡ INPUT REC LEVEL PHONES LEVEL 0 10 0 10 CANCEL EDIT ENTER Jog dial Disc Erase This operation lets you erase all audio and title (character) data to create a blank MD. Please note that once erased, this data cannot be recovered. 1 Press & to set this unit to stop mode. 2 Press EDIT repeatedly to display "Disc Erase?", then press ENTER. "DiscEraseOK?" appears in the display. 3 Press ENTER again. When all audio, name and title data has been erased "Complete" appears momentarily. To cancel before erasing the entire disc Press CANCEL (or &). To undo ERASE 1 Press & to set this unit to stop mode. 2 Press EDIT repeatedly to display "Undo Erase", then press ENTER. "Undo OK ?" appears in the display. 3 Press ENTER again to undo. To cancel, press CANCEL (or &). Track Erase This operation lets you erase a single track. After you erase the track, the total number of tracks decreases by one and all tracks following that track are renumbered. If you plan to erase two or more tracks To avoid confusion you should always erase from higher track numbers to lower track numbers. This prevents accidental renumbering of tracks you plan to erase. 1 Turn the jog dial to select the track you want to erase. 2 Press EDIT repeatedly to display "Erase ?", then press ENTER. "(track number) EraseOK?" appears in the display. 3 Press ENTER again. The track is erased and "Complete" appears momentarily. To cancel before erasing the track Press CANCEL (or &). To undo ERASE 1 Press & to set this unit to stop mode. 2 Press EDIT repeatedly to display "Undo Erase", then press ENTER. "Undo OK ?" appears in the display. 3 Press ENTER again to undo. To cancel, press CANCEL (or &). Continued on next page 19
-
 1
1 -
2
-
3
-
4
-
5
-
6
-
7
-
8
-
9
-
10
-
11
-
12
-
13
-
 14
14 -
 15
15 -
 16
16 -
 17
17 -
 18
18 -
 19
19 -
 20
20 -
 21
21 -
 22
22 -
 23
23 -
 24
24 -
25
-
26
-
27
-
28
-
29
 |
 |