Yamaha PSR-170 Owner's Manual - Page 35
Select the part you wish to work on left or right and the, Lesson step., Start the Lesson.
 |
View all Yamaha PSR-170 manuals
Add to My Manuals
Save this manual to your list of manuals |
Page 35 highlights
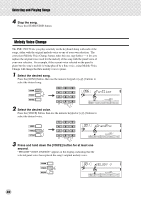
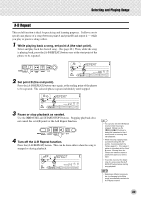
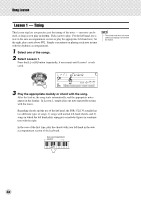
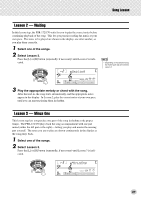
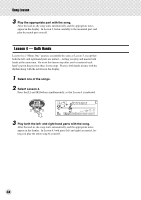
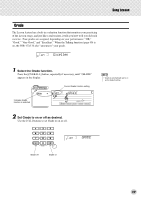
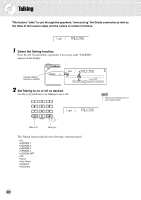
Song Lesson 2 Select the part you wish to work on (left or right) and the Lesson step. If you want to work on the right-hand part, press the [R] button; to work on the left, press the [L] button. Pressing either button repeatedly cycles through the available Lesson steps in order: Lesson 1 → Lesson 2 → Lesson 3 → Off → Lesson 1, etc. The selected Lesson step is indicated in the display. L 1 Timing L 2 Waiting L 3 MinusOne 006 FurElise (Song Lesson off) r1 Timing r2 Waiting r3 MinusOne 006 FurElise (Song Lesson off) To select Lesson 4, press both [L] and [R] buttons simultaneously. Lr4 BothHand • When the Talking function (page 40) is on, the PSR-172/170 "announces" the current Lesson step. • When a DJ song is selected, the left (L) and right (R) lessons are identical. 3 Start the Lesson. The Lesson and song playback start automatically (following a lead-in count) as soon as the Lesson step is selected. When the Lesson is finished, your performance "grade" is shown in the display (if the Grade function is turned on; page 39). After a short pause, the Lesson begins again automatically. r1 * ** *_ 001 7 4 Press the [START/STOP] button to stop the Lesson. Asterisks appear indicating the timing at which you should play the notes. The line of asterisks represents one full measure. Sixteenth notes are indicated by an alternating asterisk and sharp sign. * # Indicates that the timing is to be played as two sixteen notes. The PSR-172/170 exits from the Lesson feature automatically when the [START/STOP] button is pressed. 35
-
 1
1 -
2
-
3
-
4
-
5
-
6
-
7
-
8
-
9
-
10
-
11
-
12
-
13
-
14
-
15
-
16
-
17
-
18
-
19
-
20
-
21
-
22
-
23
-
24
-
25
-
26
-
27
-
28
-
29
-
 30
30 -
 31
31 -
 32
32 -
 33
33 -
 34
34 -
 35
35 -
 36
36 -
 37
37 -
 38
38 -
 39
39 -
 40
40 -
41
-
42
-
43
-
44
-
45
-
46
-
47
-
48
-
49
-
50
-
51
-
52
-
53
-
54
-
55
-
56
-
57
-
58
-
59
-
60
-
61
-
62
-
63
-
64
 |
 |
