Yamaha TSX-20 Owners Manual - Page 10
Installation
 |
View all Yamaha TSX-20 manuals
Add to My Manuals
Save this manual to your list of manuals |
Page 10 highlights
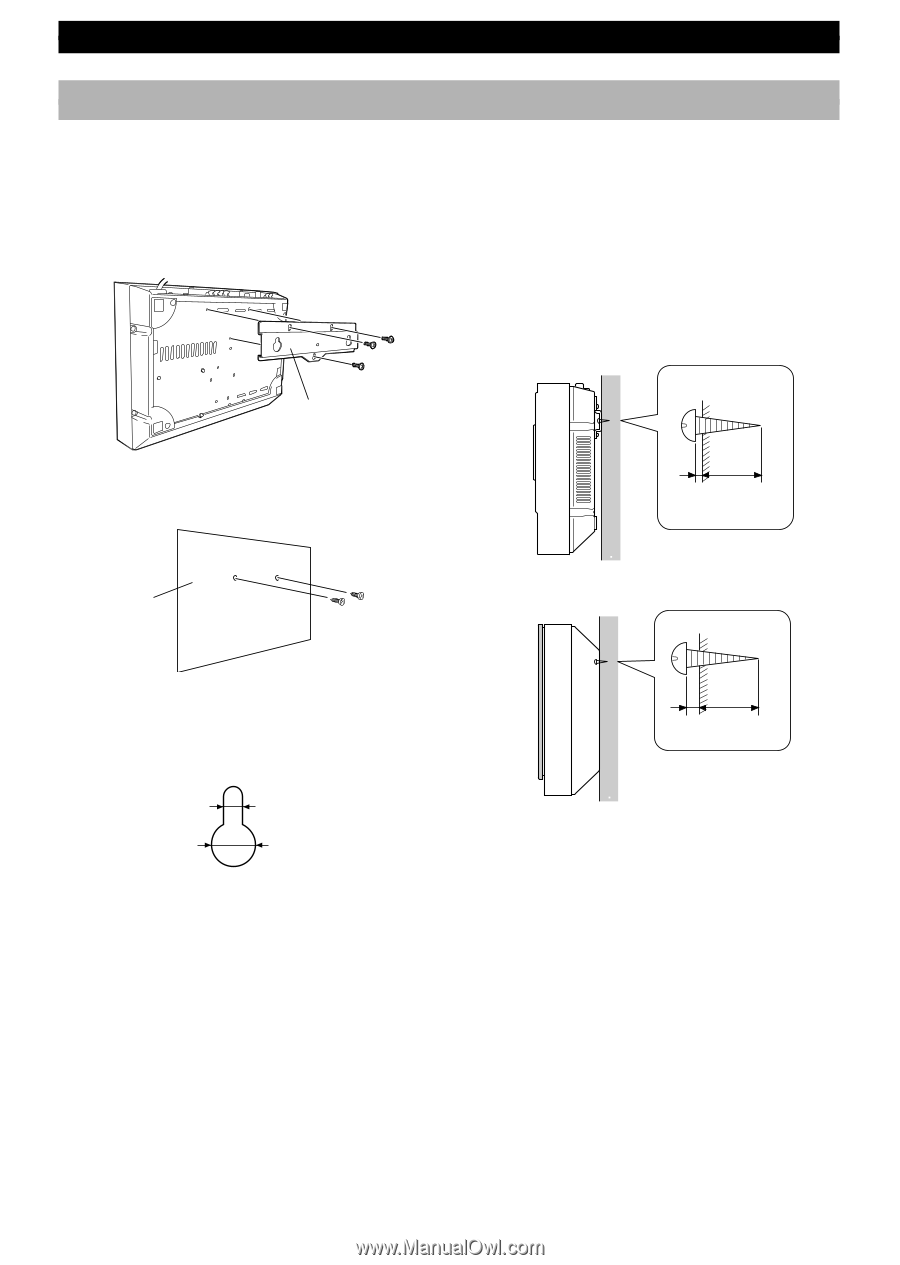
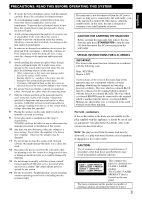
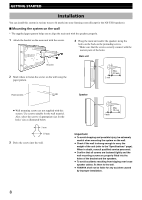
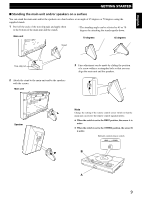
GETTING STARTED Installation You can install this system in various ways to fit neatly into your listening room (Except for the NX-TS20 speakers). I Mounting the system on the wall * The supplied paper pattern helps you to align the main unit with the speakers properly. 1 Attach the bracket on the main unit with the screws. 4 Hang the main unit and/or the speakers using the holes on the back on the protruding screws. * Make sure that the screws securely connect with the narrow parts of the holes. Main unit Bracket 2 Mark where to fasten the screws on the wall using the paper pattern. Min. 20 mm 2 mm Paper pattern Speaker ● Wall mounting screws are not supplied with this system. Use screws suitable for the wall material. Also, select the screws of appropriate size for the holes' size as illustrated below. 5 mm 10 mm 3 Drive the screws into the wall. 4 mm Min. 20 mm Important ● To avoid dropping and possible injury, be extremely careful when mounting the system on the wall. ● Check if the wall is strong enough to carry the weight of the unit (refer to the "Specifications" page). When in doubt, consult qualified service personnel. ● Confirm that all screws are fastened tightly and the wall mounting screws are properly fitted into the holes of the bracket and the speakers. ● To avoid accidents resulting from tripping over loose speaker cables, fix them to the wall. ● YAMAHA shall not be liable for any accident caused by improper installation. 8
-
 1
1 -
2
-
3
-
4
-
 5
5 -
 6
6 -
 7
7 -
 8
8 -
 9
9 -
 10
10 -
 11
11 -
 12
12 -
 13
13 -
 14
14 -
 15
15 -
16
-
17
-
18
-
19
-
20
-
21
-
22
-
23
-
24
-
25
-
26
-
27
-
28
 |
 |