Zanussi Z816WT85BI User Manual - Page 15
Product Description
 |
View all Zanussi Z816WT85BI manuals
Add to My Manuals
Save this manual to your list of manuals |
Page 15 highlights
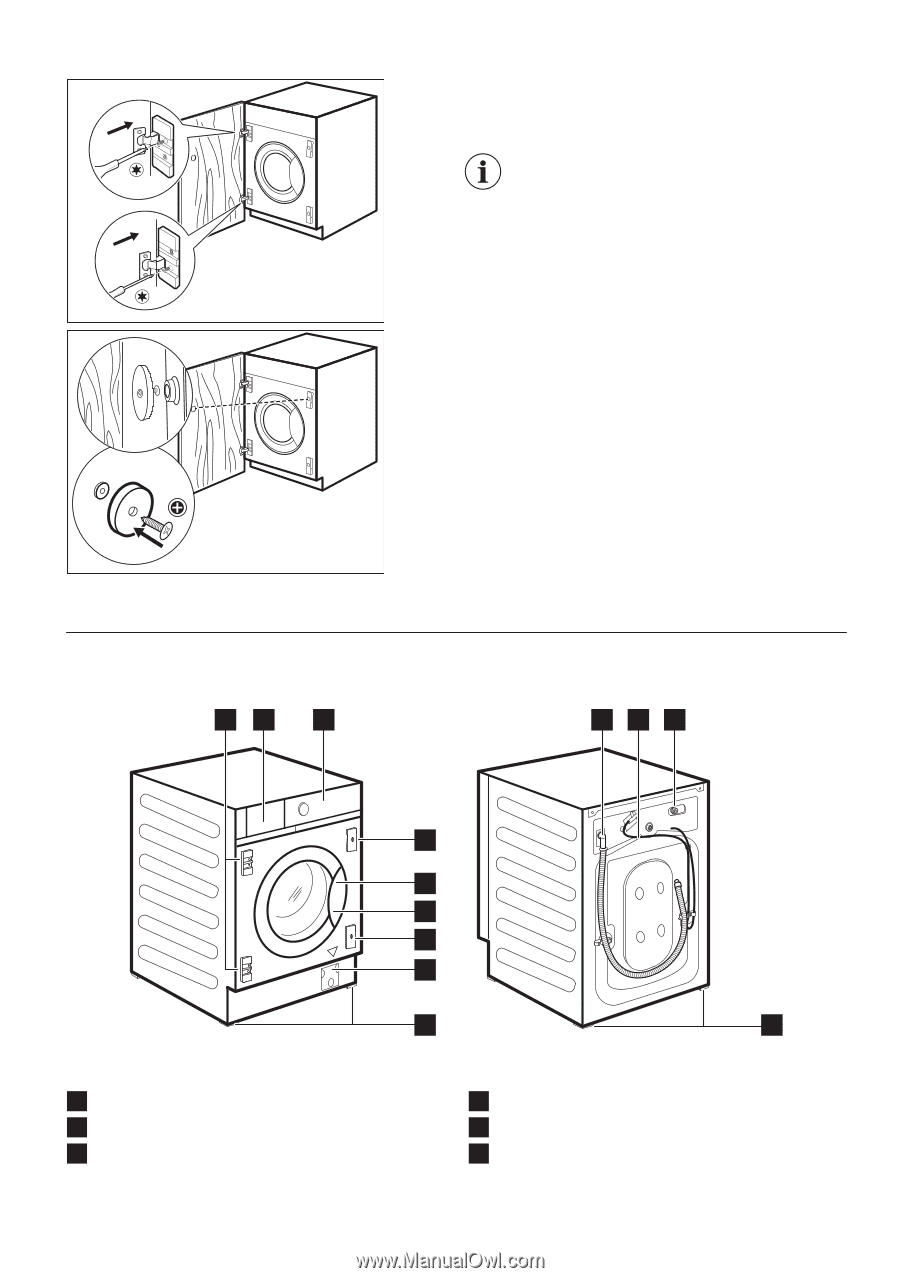
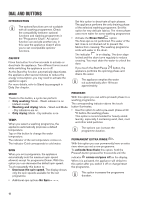
Mounting the door Fix the hinges to the hinge supports on the appliance by means of the two supplied screws B. The hinges can be adjusted to compensate for possible uneven thickness of the door. 1 N 2 ED C PRODUCT DESCRIPTION APPLIANCE OVERVIEW 12 3 Counter-magnet The appliance is pre set for a magnetic closure. For a correct closure: 1. Position the screw C and the counter-magnet D on the magnetic plate N. Lean the cupboard door against the screw until it leaves a mark. 2. Open the cupboard door and screw the counter-magnet D (steel disk + rubber ring E) with the screw C in the inner side of the cupboard door, where the screw left the mark as described in the first step. 10 11 12 1 Hinge supports 2 Detergent dispenser 3 Control panel 4 5 6 7 8 9 4 Magnetic plate 5 Door handle 6 Rating plate 13 15
-
 1
1 -
2
-
3
-
4
-
5
-
6
-
7
-
8
-
9
-
 10
10 -
 11
11 -
 12
12 -
 13
13 -
 14
14 -
 15
15 -
 16
16 -
 17
17 -
 18
18 -
 19
19 -
 20
20 -
21
-
22
-
23
-
24
-
25
-
26
-
27
-
28
-
29
-
30
-
31
-
32
-
33
-
34
-
35
-
36
-
37
-
38
-
39
-
40
-
41
-
42
-
43
-
44
 |
 |