Zanussi ZHT610X User Manual - Page 5
Part 1 - Installation Instructions, Fig. 1 - parts
 |
View all Zanussi ZHT610X manuals
Add to My Manuals
Save this manual to your list of manuals |
Page 5 highlights
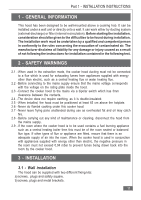
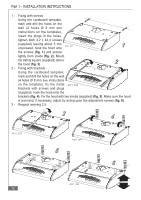
Part 1 - INSTALLATION INSTRUCTIONS 1 - Fixing with screws Using the cardboard template, mark and drill the holes on the wall (2 holes Ø 8 mm see instructions on the template), insert the plugs in the holes, tighten both 4,2 x 44,4 screws (supplied) leaving about 5 mm 1 unscrewed, hook the hood onto the screws (fig. 1) and secure tightly from inside (fig. 2). Mount the safety square (supplied) above the hood (fig. 3). 2 2 - Fixing with brackets Using the cardboard template, mark and drill the holes on the wall (4 holes Ø 8 mm see instructions on the template), fix the metal brackets with screws and plugs (supplied), hook the hood onto the brackets (fig. 4). Fix the hood with two knobs (supplied) (fig. 5). Make sure the hood is level and, if necessary, adjust by acting upon the adjustment screws (fig. 6). 3 - Respect warning 2.5. 3 4 5 6 401_05a 12
-
 1
1 -
 2
2 -
 3
3 -
 4
4 -
 5
5 -
 6
6 -
 7
7 -
 8
8 -
 9
9 -
 10
10
 |
 |
