Zanussi ZRB35315WA Product Manaul - Page 12
Green and Yellow
 |
View all Zanussi ZRB35315WA manuals
Add to My Manuals
Save this manual to your list of manuals |
Page 12 highlights
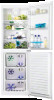
distance between the top of the cabinet and the wall unit must be at least 100 mm . Ideally, however, the appliance should not be positioned below overhanging wall units. Accurate levelling is ensured by one or more adjustable feet at the base of the cabinet. Warning! It must be possible to disconnect the appliance from the mains power supply; the plug must therefore be easily accessible after installation. A B C D E min 100mm A B Important! The wires in the mains lead are coloured in accordance with the following code: A Green and Yellow: C Brown: D Blue: Earth Live Neutral 20mm Levelling When placing the appliance ensure that it stands level. This can be achieved by two adjustable feet at the bottom in front. Electrical Connection Caution! Any electrical work required to install this appliance should be carried out by a qualified electrician or competent person. Warning! This appliance must be earthed. The manufacturer declines any liability should these safety measures not be observed. 12 As the colours of the wires in the mains lead of this appliance may not correspond with the coloured markings identifying the terminals in your plug, proceed as follows: 1. Connect the wire coloured green and yellow to the terminal marked either with the letter "E" or by the earth symbol or coloured green and yellow. 2. Connect the wire coloured blue to the terminal either marked with the letter "N" or coloured black. 3. Connect the wire coloured brown to the terminal either marked with the "L" or coloured red. 4. Check that no cut, or stray strands of wire is present and the cord clamp E is secure over the outer sheath. 5. Make sure the electricity supply voltage is the same as that indicated on the appliance rating plate. 6. Switch on the appliance. The appliance is supplied with a 13 amp plug fitted B. In the event of having to change the www.zanussi.com
-
 1
1 -
2
-
3
-
4
-
5
-
6
-
 7
7 -
 8
8 -
 9
9 -
 10
10 -
 11
11 -
 12
12 -
 13
13 -
 14
14 -
 15
15 -
 16
16
 |
 |
