Zanussi ZUNN18ES1 User Manual - Page 8
Location, 3 Electrical Connection, ENGLISH
 |
View all Zanussi ZUNN18ES1 manuals
Add to My Manuals
Save this manual to your list of manuals |
Page 8 highlights
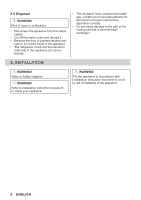
Overall space required in use ³ D3 mm 1071 ³ the height, width and depth of the appliance including the handle, plus the space necessary for free circulation of the cooling air, plus the space necessary to allow door opening to the minimum angle permitting removal of all internal equipment * including the width of the bottom hinges (8 mm) 3.2 Location To ensure appliance's best functionality, you should not install the appliance in a place with direct sunlight. Do not install the appliance close to radiators or cookers, ovens, or hobs, unless otherwise specified in the installation instructions. Make sure that air can circulate freely around the back of the cabinet. This appliance should be installed in a dry, well ventilated indoor position. This appliance is intended to be used at ambient temperature ranging from 10°C to 43°C. 3.3 Electrical Connection CAUTION! Any electrical work required to install this appliance should be carried out by a qualified electrician or competent person. WARNING! This appliance must be earthed. The manufacturer declines any liability should these safety measures not be observed. The wires in the mains lead are coloured in accordance with the following code: A B C D E The correct operation of the appliance can only be guaranteed within the specified temperature range. If you have any doubts regarding where to install the appliance, please turn to the vendor, to our customer service or to the nearest Authorised Service Centre. It must be possible to disconnect the appliance from the mains power supply. The plug must therefore be easily accessible after installation. • A - green and yellow: Earth • C - brown: Live • D - blue: Neutral As the colours of the wires in the mains lead of this appliance may not correspond with the coloured markings identifying the terminals in your plug, proceed as follows: 1. Connect the wire coloured green and yellow to the terminal marked either with the letter "E" or by the earth symbol or coloured green and yellow. 2. Connect the wire coloured blue to the terminal either marked with the letter "N" or coloured black. 3. Connect the wire coloured brown to the terminal either marked with the "L" or coloured red. 4. Check that no cut, or stray strands of wire is present and the cord clamp (E) is secure over the outer sheath. 8 ENGLISH
-
 1
1 -
2
-
 3
3 -
 4
4 -
 5
5 -
 6
6 -
 7
7 -
 8
8 -
 9
9 -
 10
10 -
 11
11 -
 12
12 -
 13
13 -
14
-
15
-
16
-
17
-
18
-
19
-
20
 |
 |
