ZyXEL IES-5112 Series User Guide - Page 19
Hardware Installation and Connections, 2.1 General Installation Instructions, 2.2 Main Chassis
 |
View all ZyXEL IES-5112 Series manuals
Add to My Manuals
Save this manual to your list of manuals |
Page 19 highlights
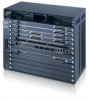
CHAPTER 2 Hardware Installation and Connections This chapter describes how to install and connect the IES-6000M and line cards. 2.1 General Installation Instructions Perform the installation as follows: • Make sure the IES's power switches are in the OFF position. • Install the main chassis as detailed in this chapter. Make sure you connect the frame grounds before you make any other connections. • If line cards are not already installed, follow the procedure in the next section to install them. • Refer to Section 2.6 on page 47 for instructions on making connections with Telco-50 connectors. • Refer to Section 2.7 on page 57 for instructions on making alarm connections. • Refer to Section 2.8 on page 59 for instructions on making power connections and turning on the IES. 2.2 Main Chassis Installation This section explains how to install the main chassis on a rack. If you are installing the main chassis without a splitter chassis, you can install the main chassis on a desktop instead. 2.2.1 Rack-mounted Installation Requirements Make sure the rack will safely support the combined weight of all the equipment it contains. • Use a #2 Phillips screwdriver to install the screws. IES-5106M / IES-5112M / IES-6000M User's Guide 19
-
 1
1 -
2
-
3
-
4
-
5
-
6
-
7
-
8
-
9
-
10
-
11
-
12
-
13
-
 14
14 -
 15
15 -
 16
16 -
 17
17 -
 18
18 -
 19
19 -
 20
20 -
 21
21 -
 22
22 -
 23
23 -
 24
24 -
25
-
26
-
27
-
28
-
29
-
30
-
31
-
32
-
33
-
34
-
35
-
36
-
37
-
38
-
39
-
40
-
41
-
42
-
43
-
44
-
45
-
46
-
47
-
48
-
49
-
50
-
51
-
52
-
53
-
54
-
55
-
56
-
57
-
58
-
59
-
60
-
61
-
62
-
63
-
64
-
65
-
66
-
67
-
68
-
69
-
70
-
71
-
72
-
73
-
74
-
75
-
76
-
77
-
78
-
79
-
80
-
81
-
82
-
83
-
84
-
85
-
86
-
87
-
88
 |
 |
