ZyXEL ONU-6100B-22 User Guide - Page 8
Align the holes on the back of the ONU-6100B-2x with
 |
View all ZyXEL ONU-6100B-22 manuals
Add to My Manuals
Save this manual to your list of manuals |
Page 8 highlights
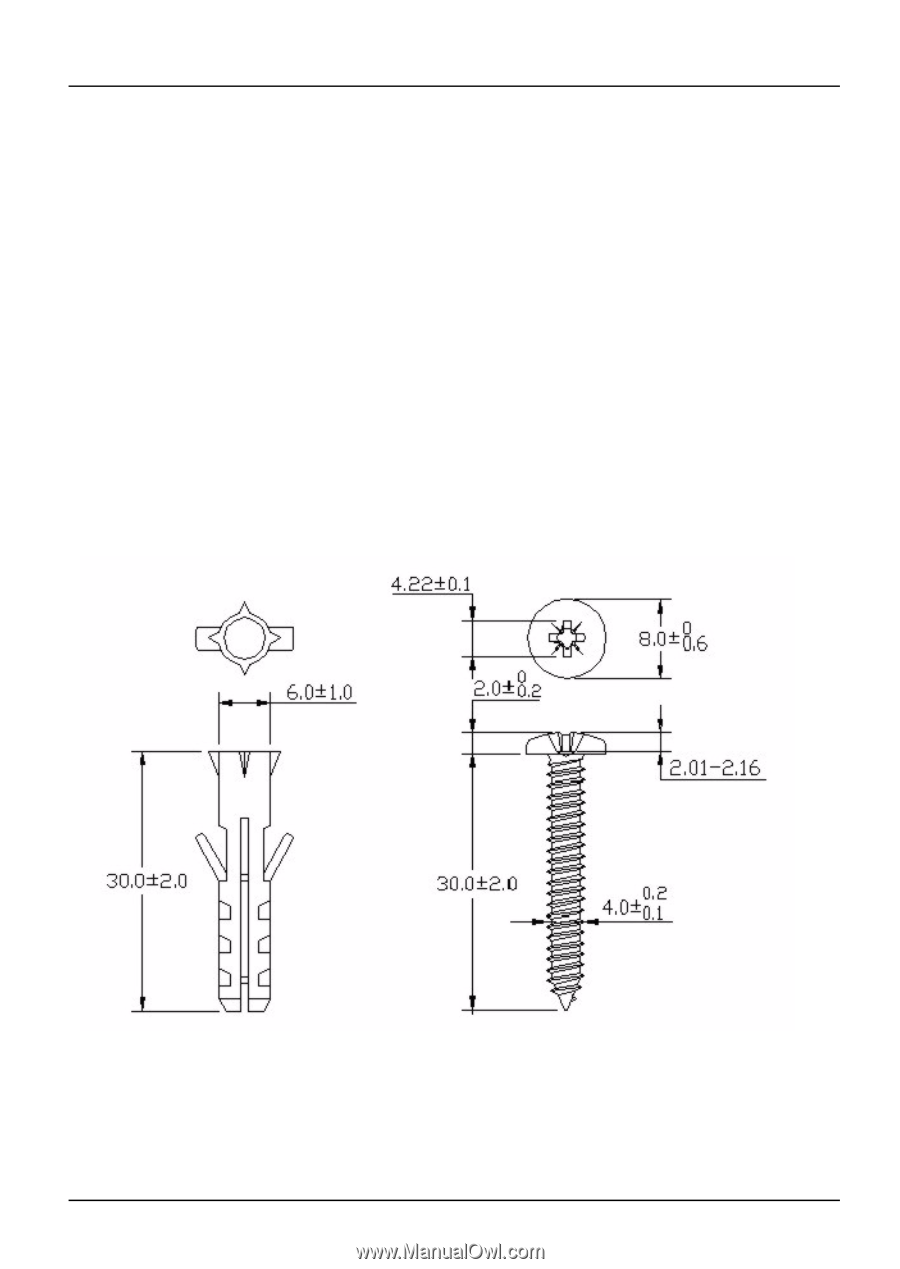
ONU-6100B-2x Series User's Guide 3 Do not insert the screws all the way into the wall. Leave a small gap of about 0.5 cm between the heads of the screws and the wall. 4 Make sure the screws are snugly fastened to the wall. They need to hold the weight of the ONU-6100B-2x with the connection cables. 5 Align the holes on the back of the ONU-6100B-2x with the screws on the wall. Hang the ONU-6100B-2x on the screws. The following are dimensions of an M4 tap screw and masonry plug used for wall mounting. All measurements are in millimeters (mm). 8
-
 1
1 -
2
-
 3
3 -
 4
4 -
 5
5 -
 6
6 -
 7
7 -
 8
8 -
 9
9 -
 10
10 -
 11
11 -
 12
12 -
 13
13 -
14
-
15
-
16
-
17
-
18
-
19
-
20
 |
 |
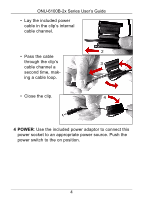
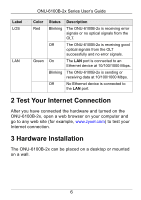
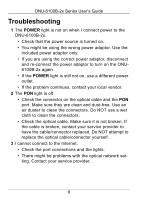
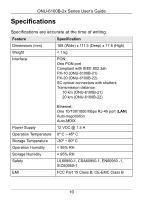
ONU-6100B-2x Series User’s Guide
8
3
Do not insert the screws all the way into the wall. Leave a
small gap of about 0.5 cm between the heads of the
screws and the wall.
4
Make sure the screws are snugly fastened to the wall.
They need to hold the weight of the ONU-6100B-2x with
the connection cables.
5
Align the holes on the back of the ONU-6100B-2x with the
screws on the wall. Hang the ONU-6100B-2x on the
screws.
The following are dimensions of an M4 tap screw and
masonry plug used for wall mounting. All measurements are
in millimeters (mm).