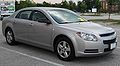
2008 Chevrolet Malibu Owner's Manual - Page 338
2008 Chevrolet Malibu Manual
Page 338 highlights
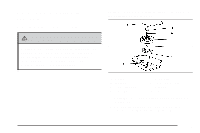
3. Place the jack over the bolt on the floor, making sure in contacts the bolt and thread the jack retainer nut until in contacts the jack. 4. With the valve stem up, place the tire on the compartment floor with the rear of the tire beneath the trim panel (tire may not lay completely flat). 5. Line up the center hole of the wheel with the bolt. 6. With the yellow cap in place to prevent the wheel from being scratched, screw the bolt extension onto the bolt through the wheel nut hole. 7. Remove the yellow cap from the bolt extension. 8. Secure the tire and wheel with the larger wing nut. The compact spare is for temporary use only. Replace the compact spare tire with a full-size tire as soon as you can. Compact Spare Tire on page 5-88. See the storage instructions label to replace your compact into your trunk properly. After installing the compact spare on the vehicle, stop as soon as possible and make sure the spare tire is correctly inflated. The compact spare is made to perform well at speeds up to 65 mph (105 km/h) for distances up to 3,000 miles (5 000 km), so you can finish your trip and have the full-size tire repaired or replaced at your convenience. Of course, it is best to replace the spare with a full-size tire as soon as possible. The spare tire will last longer and be in good shape in case it is needed again. Notice: When the compact spare is installed, do not take your vehicle through an automatic car wash with guide rails. The compact spare can get caught on the rails. That can damage the tire and wheel, and maybe other parts of your vehicle. Do not use the compact spare on other vehicles. And do not mix the compact spare tire or wheel with other wheels or tires. They will not fit. Keep the spare tire and its wheel together. Notice: Tire chains will not fit your compact spare. Using them can damage your vehicle and can damage the chains too. Do not use tire chains on your compact spare. Compact Spare Tire Although the compact spare tire was fully inflated when the vehicle was new, it can lose air after a time. Check the inflation pressure regularly. It should be 60 psi (420 kPa). 5-88
-
 1
1 -
2
-
3
-
4
-
5
-
6
-
7
-
8
-
9
-
10
-
11
-
12
-
13
-
14
-
15
-
16
-
17
-
18
-
19
-
20
-
21
-
22
-
23
-
24
-
25
-
26
-
27
-
28
-
29
-
30
-
31
-
32
-
33
-
34
-
35
-
36
-
37
-
38
-
39
-
40
-
41
-
42
-
43
-
44
-
45
-
46
-
47
-
48
-
49
-
50
-
51
-
52
-
53
-
54
-
55
-
56
-
57
-
58
-
59
-
60
-
61
-
62
-
63
-
64
-
65
-
66
-
67
-
68
-
69
-
70
-
71
-
72
-
73
-
74
-
75
-
76
-
77
-
78
-
79
-
80
-
81
-
82
-
83
-
84
-
85
-
86
-
87
-
88
-
89
-
90
-
91
-
92
-
93
-
94
-
95
-
96
-
97
-
98
-
99
-
100
-
101
-
102
-
103
-
104
-
105
-
106
-
107
-
108
-
109
-
110
-
111
-
112
-
113
-
114
-
115
-
116
-
117
-
118
-
119
-
120
-
121
-
122
-
123
-
124
-
125
-
126
-
127
-
128
-
129
-
130
-
131
-
132
-
133
-
134
-
135
-
136
-
137
-
138
-
139
-
140
-
141
-
142
-
143
-
144
-
145
-
146
-
147
-
148
-
149
-
150
-
151
-
152
-
153
-
154
-
155
-
156
-
157
-
158
-
159
-
160
-
161
-
162
-
163
-
164
-
165
-
166
-
167
-
168
-
169
-
170
-
171
-
172
-
173
-
174
-
175
-
176
-
177
-
178
-
179
-
180
-
181
-
182
-
183
-
184
-
185
-
186
-
187
-
188
-
189
-
190
-
191
-
192
-
193
-
194
-
195
-
196
-
197
-
198
-
199
-
200
-
201
-
202
-
203
-
204
-
205
-
206
-
207
-
208
-
209
-
210
-
211
-
212
-
213
-
214
-
215
-
216
-
217
-
218
-
219
-
220
-
221
-
222
-
223
-
224
-
225
-
226
-
227
-
228
-
229
-
230
-
231
-
232
-
233
-
234
-
235
-
236
-
237
-
238
-
239
-
240
-
241
-
242
-
243
-
244
-
245
-
246
-
247
-
248
-
249
-
250
-
251
-
252
-
253
-
254
-
255
-
256
-
257
-
258
-
259
-
260
-
261
-
262
-
263
-
264
-
265
-
266
-
267
-
268
-
269
-
270
-
271
-
272
-
273
-
274
-
275
-
276
-
277
-
278
-
279
-
280
-
281
-
282
-
283
-
284
-
285
-
286
-
287
-
288
-
289
-
290
-
291
-
292
-
293
-
294
-
295
-
296
-
297
-
298
-
299
-
300
-
301
-
302
-
303
-
304
-
305
-
306
-
307
-
308
-
309
-
310
-
311
-
312
-
313
-
314
-
315
-
316
-
317
-
318
-
319
-
320
-
321
-
322
-
323
-
324
-
325
-
326
-
327
-
328
-
329
-
330
-
331
-
332
-
 333
333 -
 334
334 -
 335
335 -
 336
336 -
 337
337 -
 338
338 -
 339
339 -
 340
340 -
 341
341 -
 342
342 -
 343
343 -
344
-
345
-
346
-
347
-
348
-
349
-
350
-
351
-
352
-
353
-
354
-
355
-
356
-
357
-
358
-
359
-
360
-
361
-
362
-
363
-
364
-
365
-
366
-
367
-
368
-
369
-
370
-
371
-
372
-
373
-
374
-
375
-
376
-
377
-
378
-
379
-
380
-
381
-
382
-
383
-
384
-
385
-
386
-
387
-
388
-
389
-
390
-
391
-
392
-
393
-
394
-
395
-
396
-
397
-
398
-
399
-
400
-
401
-
402
-
403
-
404
-
405
-
406
-
407
-
408
-
409
-
410
-
411
-
412
 |
 |