1999 Nissan Maxima Owner's Manual - Page 38
1999 Nissan Maxima Manual
Page 38 highlights
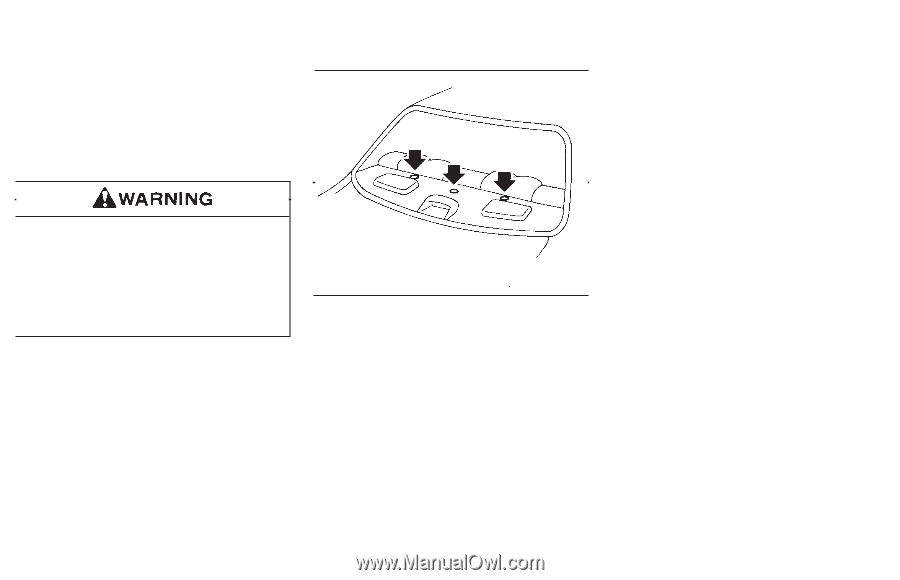
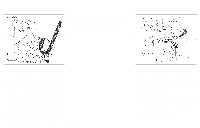
Bolt diameter: 8.0 mm Bolt length: more than 1.18 in (30 mm) Thread pitch: 1.25 mm Secure the top strap to the attaching bolt which provides the straightest installation of the top strap. There are pre-cut circles at each anchor point location that should break away from the shelf support material when pressure is applied to them. Remove the bolt after you feel the pre-cut circle separate from the shelf support material. 2. Cut a small slit through the parcel shelf fabric at the anchor point location. Reach through the fabric with a tool such as a pair of needle-nose pliers and remove the precut circle in the parcel shelf support material. SPA0117 Child restraint anchor points are designed to withstand only those loads imposed by correctly fitted child restraints. Under no circumstances are they to be used for adult seat belts or harnesses. 3. Install the bolt through the top strap hook and into the anchor point nut. 4. Be sure to follow all of the instructions that accompany the top strap attaching hardware. Your NISSAN dealer can assist you with the installation of your child restraint. Anchor point locations Anchor points are located under the rear parcel shelf finisher. To use attaching hardware for child restraints with top straps, follow these instructions carefully: 1. Open the trunk and find the anchor point nuts on the under side of the rear parcel shelf. Thread a bolt (8.0 mm diameter, 1.25 mm pitch) up through the nut behind the seating position where the child restraint will be installed and use it to break through the rear parcel shelf support material. Seats, restraints and supplemental air bag systems 1-31
-
 1
1 -
2
-
3
-
4
-
5
-
6
-
7
-
8
-
9
-
10
-
11
-
12
-
13
-
14
-
15
-
16
-
17
-
18
-
19
-
20
-
21
-
22
-
23
-
24
-
25
-
26
-
27
-
28
-
29
-
30
-
31
-
32
-
 33
33 -
 34
34 -
 35
35 -
 36
36 -
 37
37 -
 38
38 -
 39
39 -
 40
40 -
 41
41 -
 42
42 -
 43
43 -
44
-
45
-
46
-
47
-
48
-
49
-
50
-
51
-
52
-
53
-
54
-
55
-
56
-
57
-
58
-
59
-
60
-
61
-
62
-
63
-
64
-
65
-
66
-
67
-
68
-
69
-
70
-
71
-
72
-
73
-
74
-
75
-
76
-
77
-
78
-
79
-
80
-
81
-
82
-
83
-
84
-
85
-
86
-
87
-
88
-
89
-
90
-
91
-
92
-
93
-
94
-
95
-
96
-
97
-
98
-
99
-
100
-
101
-
102
-
103
-
104
-
105
-
106
-
107
-
108
-
109
-
110
-
111
-
112
-
113
-
114
-
115
-
116
-
117
-
118
-
119
-
120
-
121
-
122
-
123
-
124
-
125
-
126
-
127
-
128
-
129
-
130
-
131
-
132
-
133
-
134
-
135
-
136
-
137
-
138
-
139
-
140
-
141
-
142
-
143
-
144
-
145
-
146
-
147
-
148
-
149
-
150
-
151
-
152
-
153
-
154
-
155
-
156
-
157
-
158
-
159
-
160
-
161
-
162
-
163
-
164
-
165
-
166
-
167
-
168
-
169
-
170
-
171
-
172
-
173
-
174
-
175
-
176
-
177
-
178
-
179
-
180
-
181
-
182
-
183
-
184
-
185
-
186
-
187
-
188
-
189
-
190
-
191
-
192
-
193
-
194
-
195
-
196
-
197
-
198
-
199
-
200
-
201
-
202
-
203
-
204
-
205
-
206
-
207
-
208
-
209
-
210
-
211
-
212
-
213
-
214
-
215
-
216
-
217
-
218
-
219
-
220
-
221
-
222
-
223
-
224
-
225
-
226
-
227
-
228
-
229
-
230
-
231
-
232
-
233
 |
 |