3Com 3C17203 Getting Started Guide - Page 31
Automatic IP Configuration, Automatic Setup, - user guide
 |
UPC - 662705363738
View all 3Com 3C17203 manuals
Add to My Manuals
Save this manual to your list of manuals |
Page 31 highlights
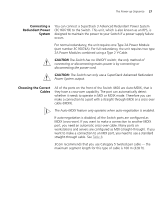
Setting Up Overview 31 Automatic IP Configuration By default the Switch tries to configure itself with IP information without requesting user intervention. It tries to obtain an IP address from a DHCP or BootP server on the network. If neither server is found, the Switch will configure itself with an IP address in the range 169.254.1.0 to 169.254.254.255. This is known as Auto-IP and is the same mechanism used by Windows 98 and Windows 2000. IP addresses configured by Auto-IP are temporary as they cannot be routed but are useful for small networks which are not connected to other networks, or for initial configuration. However, as soon as a DHCP or BootP server is detected, the Switch will configure itself with the IP address allocated by that server. When using automatic IP configuration it is important that the IP address of the Switch is static, otherwise you will not know what the IP address is and it will be difficult to manage. Most DHCP and BootP servers allow static IP addresses to be configured so that you know what IP address will be allocated to the Switch. Refer to the documentation that accompanies your DHCP/BootP server. For a detailed description of how automatic IP configuration operates, please refer to the Implementation Guide that accompanies your Switch. You should use the automatic IP configuration method if: ■ your network uses DHCP or BootP to allocate IP addresses, or ■ flexibility is needed. If the Switch is re-deployed onto a different subnet, it will automatically reconfigure itself with an appropriate IP address, instead of you having to manually reconfigure the Switch. If you use the automatic IP configuration method, you need to view the automatically allocated IP information before you can begin management. Work through the "Automatic Setup" section on page 38 and use 3Com Network Supervisor or connect to the console port to discover the automatically allocated IP information.
-
 1
1 -
2
-
3
-
4
-
5
-
6
-
7
-
8
-
9
-
10
-
11
-
12
-
13
-
14
-
15
-
16
-
17
-
18
-
19
-
20
-
21
-
22
-
23
-
24
-
25
-
 26
26 -
 27
27 -
 28
28 -
 29
29 -
 30
30 -
 31
31 -
 32
32 -
 33
33 -
 34
34 -
 35
35 -
 36
36 -
37
-
38
-
39
-
40
-
41
-
42
-
43
-
44
-
45
-
46
-
47
-
48
-
49
-
50
-
51
-
52
-
53
-
54
-
55
-
56
-
57
-
58
-
59
-
60
-
61
-
62
-
63
-
64
-
65
-
66
-
67
-
68
-
69
-
70
-
71
-
72
-
73
-
74
-
75
-
76
 |
 |
