3Com 3CRWE80096A User Guide - Page 12
Connecting the Standard Antenna, Placing the Access Point
 |
UPC - 662705441221
View all 3Com 3CRWE80096A manuals
Add to My Manuals
Save this manual to your list of manuals |
Page 12 highlights
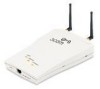
6 CHAPTER 2: INSTALLING THE ACCESS POINT selecting the final location and be sure to allow for routing the antenna cable as required. Do not install the access point in wet or dusty areas without protection. Make sure the temperature ranges between -20˚ C to 55˚ C (-4˚ F to 131˚ F). Connecting the Standard Antenna The access point is supplied with standard detachable antennas. These should be attached before the access point is installed. 1 Carefully unpack the standard detachable antennas. 2 Screw an antenna into each of the sockets in the access point housing. 3 Hand-tighten the antennas. 4 Position the antennas so they turn out and away from the access point at a 45-degree angle. As a rule, the initial orientation of the antennas should be perpendicular to the floor. After network startup, you may need to adjust the antennas to fine-tune coverage in your area. Depending on the coverage required for your site, you may want to replace the standard detachable antennas with one of the external antennas available for use with the access point. See "Selecting A Different Antenna" on page 11. Placing the Access Point The access point can be placed on a flat surface such as a table or desktop or it can be mounted on a wall or to the T-rail grid of an acoustical ceiling. If you choose a flat surface, select one that is clear of obstructions and provides good reception. Place the access point and adjust the antenna so that the arms point up and away from the access point at a 45˚ angle.
-
 1
1 -
2
-
3
-
4
-
5
-
6
-
 7
7 -
 8
8 -
 9
9 -
 10
10 -
 11
11 -
 12
12 -
 13
13 -
 14
14 -
 15
15 -
 16
16 -
 17
17 -
18
-
19
-
20
-
21
-
22
-
23
-
24
-
25
-
26
-
27
-
28
-
29
-
30
-
31
-
32
-
33
-
34
-
35
-
36
-
37
-
38
-
39
-
40
-
41
-
42
-
43
-
44
-
45
-
46
-
47
-
48
-
49
-
50
-
51
-
52
-
53
-
54
-
55
-
56
-
57
-
58
 |
 |
