3Com 3CRWE80096A User Guide - Page 14
Mounting on a Ceiling, point down and away from the access point at a 45˚ angle.
 |
UPC - 662705441221
View all 3Com 3CRWE80096A manuals
Add to My Manuals
Save this manual to your list of manuals |
Page 14 highlights
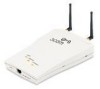
RESET TO POWER SUPPLY 8 CHAPTER 2: INSTALLING THE ACCESS POINT Mounting on a Ceiling To mount an access point to the T-rail grid of an acoustical ceiling, you must first attach the mounting bracket to the access point as shown. Align the T-rail grips with the ceiling T-rail, adjusting them so they grip the T-rail snugly. Tighten the screws on the T-rail grip. Position the antenna so that the arms point down and away from the access point at a 45˚ angle. NOTE: After installation, there may be some play in the fit of the T-rail grips on the T-rail. This is likely due to the size of the T-rails but should not prevent a secure grip. RESET TO POWER SUPPLY POWER WIRELESS ETHERNET
-
 1
1 -
2
-
3
-
4
-
5
-
6
-
7
-
8
-
 9
9 -
 10
10 -
 11
11 -
 12
12 -
 13
13 -
 14
14 -
 15
15 -
 16
16 -
 17
17 -
 18
18 -
 19
19 -
20
-
21
-
22
-
23
-
24
-
25
-
26
-
27
-
28
-
29
-
30
-
31
-
32
-
33
-
34
-
35
-
36
-
37
-
38
-
39
-
40
-
41
-
42
-
43
-
44
-
45
-
46
-
47
-
48
-
49
-
50
-
51
-
52
-
53
-
54
-
55
-
56
-
57
-
58
 |
 |

8
C
HAPTER
2: I
NSTALLING
THE
A
CCESS
P
OINT
Mounting on a Ceiling
To mount an access point to the T-rail grid of an acoustical ceiling, you must first
attach the mounting bracket to the access point as shown.
Align the T-rail grips with the ceiling T-rail, adjusting them so they grip the T-rail
snugly. Tighten the screws on the T-rail grip. Position the antenna so that the arms
point down and away from the access point at a 45˚ angle.
NOTE: After installation, there may be some play in the fit of the T-rail grips on the
T-rail. This is likely due to the size of the T-rails but should not prevent a secure
grip.
RESET
TO POWER SUPPLY
POWER
WIRELESS
ETHERNET
RESET
TO POWER SUPPLY