Acer U5200 User Manual
Acer U5200 Manual
 |
View all Acer U5200 manuals
Add to My Manuals
Save this manual to your list of manuals |
Acer U5200 manual content summary:
- Acer U5200 | User Manual - Page 1
Acer Projector U5200/N210/PN-X10/U5300W/N220/ PN-W10 Series User's Guide - Acer U5200 | User Manual - Page 2
Acer Incorporated. All Rights Reserved. Acer Projector U5200/N210/PN-X10/U5300W/N220/PN-W10 Series User's Guide manual or supplementary documents and publications. This company makes no representations or warranties, either expressed or implied, with respect to the contents hereof and specifically - Acer U5200 | User Manual - Page 3
Follow all warnings and instructions marked on the product. the power cord before removing the power supply unit from the projector. • If the system has multiple sources of power, disconnect as they may touch dangerous voltage points or short-out parts that could result in a fire or electric shock. - Acer U5200 | User Manual - Page 4
product on a vibrating surface. • Never use it under sporting, exercising, or any vibrating environment which will probably cause unexpected short current or damage rotor devices, lamp. Using electrical power • This product should be operated from the type of power indicated on the marking label. If - Acer U5200 | User Manual - Page 5
, indicating a need for service • the product does not operate normally after following the operating instructions Note: Adjust only those Do not look into the projector's lens when the lamp is on. The bright light may hurt your eyes. • Turn on the projector first and then signal sources. - Acer U5200 | User Manual - Page 6
and follow all changing instructions. • Reset the "Lamp Hour Reset" function from the Onscreen Display "Management" menu after replacing the lamp module. • Do not attempt to disassemble this projector. There are dangerous high voltages inside which may hurt you. The only user serviceable part is the - Acer U5200 | User Manual - Page 7
people speaking near you. Disposal instructions Do not throw this electronic device into the acer-group.com/public/ Sustainability/sustainability01.htm Mercury advisory For projectors or electronic products containing an LCD/CRT monitor or display: "Lamp(s) contain Mercury, Dispose Properly." Lamp - Acer U5200 | User Manual - Page 8
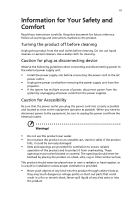
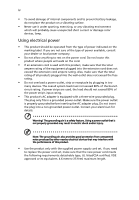
. • Place in direct sunlight. Precautions Follow all warnings, precautions and maintenance as recommended in this user's guide to maximize the life of your unit. Warning: • Do not look into the projector's lens when the lamp is on. The bright light may hurt your eyes. • To reduce the risk of fire or - Acer U5200 | User Manual - Page 9
Turning Off the Projector 9 Adjusting the Projected Image 10 Adjusting the Height of the Projected Image 10 How to Optimize Image Size and Distance 11 How to Get a Preferred Image Size by Adjusting Distance and Zoom 13 User Controls 15 Installation Menu 15 Acer Empowering Technology - Acer U5200 | User Manual - Page 10
Troubleshooting 29 LED & Alarm Definition Listing 33 Replacing the Lamp 34 Ceiling Mount Installation 35 Specifications 38 Compatibility Modes 40 Regulations and safety notices 44 - Acer U5200 | User Manual - Page 11
digital zoom and pan move function • Microsoft® Windows® 2000, XP, 7, Vista® OS compliant • LAN settings enable remote management of projectors via a web browser • Ability to display 3D images • Top-loading lamp design allows easy lamp replacement • Ultra-short-throw feature is good for installation - Acer U5200 | User Manual - Page 12
Power cord VGA cable Composite video cable Security card Acer Projector User's guide (CD-ROM) Remote control Quick Start Guide Quick start guide Battery x 2 Acer Projector Gateway Dust filter (Optional) Quick Start Guide Acer Projector Gateway (CD- Acer Projector Gateway ROM) quick start - Acer U5200 | User Manual - Page 13
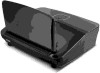
English Projector Overview Projector Outlook Front / upper side 1 3 4 5 3 2 6 7 8 4 # Description 1 Mirror 2 Focus ring 3 Projection lens 4 Remote control receiver Rear side # Description 5 Tilt adjusting wheel 6 Mirror door release button 7 Control panel 8 - Acer U5200 | User Manual - Page 14
Receives the signal emitted from the remote control Enables unique Acer functions: eView, eTimer, eOpening, ePower Management. Temp "Turning the Projector On/ Off" section. Lamp indicator LED Selects items or makes adjustments to your selection. Automatically synchronizes the projector to the input - Acer U5200 | User Manual - Page 15
signals to the projector. Refer to the "Turning the Projector On/Off" section. To pause the screen image. Automatically synchronizes the projector to the input source selection. This function is not available with the projector. Selects the media files in four directions. Increases/decreases the volume - Acer U5200 | User Manual - Page 16
RGB, YPbPr (480p/576p/720p/1080i/1080p), and YCbCr (480i/576i). To change source to Component video. This connector supports YPbPr. To change source to SD/USB A. This projector supports various formats for photo/audio/video files. To change source to HDMI™/DVI (for the model with HDMI™/DVI connector - Acer U5200 | User Manual - Page 17
English USB 7 Getting Started Connecting the Projector 11 RS232 10 RS232 7 10 1 VGA Microphone Display DVD player, Set-top 5 box, HDTV receiver D-Sub 13 12V DC cable Note: To ensure the projector works well with your computer, please make sure the timing of the display mode is compatible with - Acer U5200 | User Manual - Page 18
to release the mirror door. 2 Ensure that the power cord and signal cable are securely connected. The Power LED will light red. 3 Turn on the projector by pressing (POWER) on the control panel or remote control, and the Power indicator LED will turn blue. 4 Turn on your source (computer, notebook - Acer U5200 | User Manual - Page 19
indicator will turn solid red. Contact your local dealer or service center. • "Fan failed. Lamp will automatically turn off soon." This onscreen message indicates that the fan has failed. The lamp will automatically turn off, the projector will automatically shut down, and the LED temp indicator - Acer U5200 | User Manual - Page 20
English 10 Adjusting the Projected Image Adjusting the Height of the Projected Image The projector is equipped with an elevator foot for adjusting the image height. To raise the image: Use Tilt adjusting wheel to fine-tune the display angle. - Acer U5200 | User Manual - Page 21
Optimize Image Size and Distance Consult the table below to find the optimal image sizes achievable when the projector is positioned at a desired distance from the screen. • U5200/N210/PN-X10 If the projector is 50 cm from the screen, good image quality is possible for image sizes around 138". Note - Acer U5200 | User Manual - Page 22
English 12 • U5300W/N220/PN-W10 If the projector is 50 cm from the screen, good image quality is possible for image sizes around 163". Note: Remind as below figure, the space of 285 - Acer U5200 | User Manual - Page 23
The table below shows how to achieve a desired image size by adjusting either the position or the zoom ring. • U5200/N210/PN-X10 To obtain an image size of 120" set the projector at a distance 39 cm from the screen. B&C 39 cm Desired distance A 120" Desired image size D Height: 247 cm From - Acer U5200 | User Manual - Page 24
14 • U5300W/N220/PN-W10 To obtain an image size of 120" set the projector at a distance 28 cm from the screen. English B&C 28 cm Desired distance A 120" Desired image size D Height: 210 cm From base to top of image - Acer U5200 | User Manual - Page 25
the control panel or 2 Press "MENU" on the control panel or remote control to launch the OSD for projector installation and maintenance. 3 The background pattern acts as a guide to adjust the calibration and alignment settings, such as screen size and distance, focus and more. 4 The Installation - Acer U5200 | User Manual - Page 26
Acer eOpening Management" allows users to change the Startup Screen to their personalized image. Please refer to the "Onscreen Display (OSD) Menus" section for more details. Press " " to launch "Acer ePower Management". "Acer ePower Management"provides you one shortcut to save the lamp and projector - Acer U5200 | User Manual - Page 27
English 17 Onscreen Display (OSD) Menus The projector has multilingual Onscreen Display (OSD) menus that allow you to make image adjustments and MENU" on the control panel or remote control again. It will close and the projector will automatically save the new settings. Main menu Submenu Setting - Acer U5200 | User Manual - Page 28
with higher brightness. • Standard: For common environment. • Video: For playing video in a bright environment. • Education: For education environment. • User: Memorize user's settings. Use this function to choose a proper color according to the wall. There are several choices, including white - Acer U5200 | User Manual - Page 29
input image as limited color range data. • Full Range: Processes the input image as full color range data. Note: "Saturation" and "Tint" functions are not supported under computer, or HDMI (PC) mode. Note: "HDMI Color Range" is only available when the input signal is HDMI. - Acer U5200 | User Manual - Page 30
behind a translucent screen. • Rear-Ceiling: When you select this function, the projector reverses and inverts the image at same time. You can project from behind a signal aspect ratio and zooms in by 1.333 times. Manually adjusts image distortion caused by tilting projection (±15 degrees). - Acer U5200 | User Manual - Page 31
move the image down. to move the image up. Frequency Changes the projector's refresh rate to match the frequency of your computer's graphics card. If . Choose "On" to enable DLP 3D function. • DLP 3D Select this item while using DLP 3D glasses, quad buffer 3D (NVIDIA/ATI...) graphics card and - Acer U5200 | User Manual - Page 32
DLP 3D is enabled. Setting Menu Location Startup Screen Chooses the OSD menu location on the display screen. Use this function to select your desired startup screen. If you change the setting, it will take effect when you exit the OSD menu. • Acer: The default startup screen of your Acer projector - Acer U5200 | User Manual - Page 33
use as the startup screen, follow the instructions below. Notice: Before proceeding with the Change the "Startup Screen" from the default setting "Acer" to "User". • Press "Screen Capture" to customize the input signal or when you restart the projector. Closed Caption Note: This screen capture - Acer U5200 | User Manual - Page 34
the security function. You have to enter password depending on the "Security Mode". Please refer to "User Password" section for details. • If "Off" is selected, you can switch on the projector without password. Timeout (Min.) Once "Security" is set to "On", you can set timeout function. • Press - Acer U5200 | User Manual - Page 35
printed on the Security Card that came with your projector. This unique password will be accepted by the projector no matter what the administrator password is. • If the Security Card is lost, please contact your local Acer service center. Lock User Startup Screen • The default value is "Off". If - Acer U5200 | User Manual - Page 36
26 Management English ECO Mode High Altitude Choose "On" to dim the projector lamp, which will also lower the power consumption, reduce noise, and extend the lamp life. Choose "Off" to return to the normal mode. Choose "On" to turn on the High Altitude mode. When this function is turned on, the - Acer U5200 | User Manual - Page 37
volume. • Choose "On" to turn mute on. • Choose "Off" to turn mute off. • Select this function to adjust the notification volume when turning the projector on/off. • Select this function to adjust the volume of any warning notifications. Timer Location Sets the location of the timer on the screen. - Acer U5200 | User Manual - Page 38
English 28 Timer Start (or Stop) Timer Period (Minutes) Timer Volume Timer Display Press to start or stop the timer. Press to adjust the timer period. Select this function to adjust the notification volume when the timer function is enabled and time is up. Press to choose a timer display - Acer U5200 | User Manual - Page 39
29 Appendices English Troubleshooting If you experience a problem with your Acer projector, refer to the following troubleshooting guide. If the problem persists, please contact your local reseller or service center. Image Problems and Solutions # Problem Solution 1 No image appears • Make - Acer U5200 | User Manual - Page 40
use. Each has a different way to be reactivated. Refer to your computer's manual for detailed information. • If you are using an Apple® Mac® OS (2.4 to 149 cm) from the U5200/N210/PN-X10 projector, or 0.8 to 48 inches (2.1 to 121 cm) from the U5300W/N220/PNW10 projector. Refer to the "How to Get - Acer U5200 | User Manual - Page 41
11 Image is reversed • Select "Image > Projection" on the OSD and adjust the projection direction. Problems with the Projector # Condition Solution 1 The projector stops responding If possible, turn off the projector, then to all controls unplug the power cord and wait at least 30 seconds - Acer U5200 | User Manual - Page 42
32 English OSD Messages # Condition 1 Message Message Reminder Fan Fail - the system fan is not working. Fan Fail. Lamp will automatically turn off soon. Projector Overheated - the projector has exceeded its recommended operating temperature and must be allowed to cool down before it is used. - Acer U5200 | User Manual - Page 43
(Thermal failure) Error (Fan lock failure) Power LED Red Blue V -- --- Quick flashing V V Quick flashing -- -- -- V -- V Lamp LED Red -- ---- -- --- Error (Lamp breakdown) -- Error (Color wheel -- failure) V V V Quick flashing 33 Temp LED Red -----V Quick flashing --- English - Acer U5200 | User Manual - Page 44
Use a screwdriver to remove the screw(s) from the cover, and then pull out the lamp. The projector will detect the lamp life itself. It will show you a warning message "Lamp is approaching the end of its useful life in full power operation. Replacement Suggested!" When you see this message, change - Acer U5200 | User Manual - Page 45
: Warning: To ensure the stability of the mirror, do not install the projector near any air/heating vents. 1 Drill four holes into a solid, structurally Secure the ceiling rod using the appropriate type of cylinder screws. Short Rod Ceiling Mount Base - Attach to ceiling Long Rod Screw Type - Acer U5200 | User Manual - Page 46
- For heat dissipation Note: It is recommended that you keep a reasonable space between the bracket and the projector to allow for proper heat distribution. Use two washers for extra support, if deemed necessary. 4 Attach the ceiling bracket to the ceiling rod. Screw Type A 50 mm length /8 mm - Acer U5200 | User Manual - Page 47
appropriate type of screw and washer for each model is listed in the table below. 3 mm diameter screws are enclosed in the screw pack. Models U5200/N210/PN-X10/U5300W/ N220/PN-W10 Screw Type B Diameter (mm) Length (mm) 3 25 Washer Type Large Small V V 127 mm 124 mm Screw M3 Depth - Acer U5200 | User Manual - Page 48
lens Projection screen size (diagonal) Projection distance Throw ratio Horizontal scan rate Vertical refresh scan rate Lamp type Keystone correction Digital zoom Audio Weight Dimensions (W x D x H) Power supply Power consumption Operating temperature DLP™ • U5200/N210/PN-X10: Native: XGA (1024 - Acer U5200 | User Manual - Page 49
x 1 Battery x 2 (for the remote control) User's guide (CD-ROM) x 1 Quick start guide x 1 Security card x 1 Composite video cable x 1 Acer Projector Gateway (CD-ROM) x 1 Acer Projector Gateway quick start guide x 1 Dust filter x 1 *Design and specifications are subject to change without notice. - Acer U5200 | User Manual - Page 50
40 English Compatibility Modes 1 VGA Analog - PC Signal Mode VGA_60 VGA_72 VGA_75 VGA_85 VGA_70 VGA_85 SVGA_56 SVGA_60 SVGA_72 SVGA_75 SVGA_85 XGA_60 XGA_70 XGA_75 XGA_85 SXGA_70 SXGA_75 SXGA_85 SXGA_60 SXGA_72 SXGA_75 SXGA_85 QuadVGA_60 QuadVGA_75 SXGA+_60 UXGA_60 Mac G4 MAC13 Mac G4 MAC16 Mac - Acer U5200 | User Manual - Page 51
41 English MAC19 1024 x 768@75Hz MAC21 1152 x 870@75Hz WXGA_60 1280 x 768 WXGA_75 WXGA_85 WXGA_60 1280 x 720 WXGA_60 1280 x 800 WXGA+_60 1440 x 900 1680 x 1050_60 1680 x 1050 1920 x 1080_RB 1920 x1080 1920 x 1080_EIA 1920 x1080 acer_16:9 1366 x 768 acer_timing 1024 x 600 - Acer U5200 | User Manual - Page 52
English 42 SXGA_85 SXGA_60 SXGA_72 SXGA_75 SXGA_85 QuadVGA_60 QuadVGA_75 SXGA+_60 UXGA_60 Mac G4 MAC13 Mac G4 MAC16 Mac G4 MAC19 MAC21 WXGA_60 WXGA_75 WXGA_85 WXGA_60 WXGA_60 WXGA+_60 1680x1050_60 1920x1080_RB 1920x1080_EIA acer_16:9 acer_timing VGA_120 SVGA_120 XGA_120 480i 576i 480p 576p 720p_60 - Acer U5200 | User Manual - Page 53
43 English 1080i_60 1080i_50 1080p 1080P 1080p 1080p 3 Component Signal 60 50 60 50 24 23.98 33.75 28.13 67.5 56.26 27.00 26.97 Mode 480i 480p 576i 576p 720p 720p 1080i 1080i 1080p 1080p 1080p 1080p Resolution 720 x 480 720 x 480 720 x 576 720 x 576 1280 x 720 1280 x 720 1920 x 1080 1920 x - Acer U5200 | User Manual - Page 54
notice This device has been tested and found to comply with not installed and used in accordance with the instructions, may cause harmful interference to radio communications. can be determined by turning the device off and on, the user is encouraged to try to correct the interference by one or - Acer U5200 | User Manual - Page 55
003 du Canada. Declaration of Conformity for EU countries Acer hereby, declares that this projector series is in compliance with the essential requirements and other GHz band To prevent radio interference to the licensed service, this device is intended to be operated indoors and installation outdoors is - Acer U5200 | User Manual - Page 56
English 46 List of applicable countries This device must be used in strict accordance with the regulations and constraints in the country of use. For further information, please contact a local office in the country of use. Please see http://ec.europa.eu/enterprise/rtte/implem.htm for the latest - Acer U5200 | User Manual - Page 57
) Italy Tel: +39-02-939-921, Fax: +39-02 9399-2913, www.acer.it Hereby declare that: Product: Projector Trade Name: Acer Model Number: QNX0013/QWX0016/N210/PN-X10/N220/PN-W10 series Machine Type: U5200/U5300W series Is compliant with the essential requirements and other relevant provisions - Acer U5200 | User Manual - Page 58
English 48 Acer Incorporated 8F, 88, Sec. 1, Hsin Tai Wu Rd., Hsichih Taipei Hsien 221, Taiwan The standards listed below are 328 -. EN301 893 (Applicable to 5GHz high performance RLAN). Year to begin affixing CE marking 2010. Easy Lai /Manager Regulation Center, Acer Inc. Dec. 13, 2010 Date - Acer U5200 | User Manual - Page 59
for this declaration: Product: Model Number: Machine Type: Name of Responsible Party: Address of Responsible Party: Contact Person: Phone No.: Fax No.: DLP Projector QNX0013/QWX0016/N210/PN-X10/ N220/PN-W10 U5200/U5300W series Acer America Corporation 333 West San Carlos St. San Jose, CA 95110
-
 1
1 -
 2
2 -
 3
3 -
 4
4 -
 5
5 -
 6
6 -
 7
7 -
8
-
9
-
10
-
11
-
12
-
13
-
14
-
15
-
16
-
17
-
18
-
19
-
20
-
21
-
22
-
23
-
24
-
25
-
26
-
27
-
28
-
29
-
30
-
31
-
32
-
33
-
34
-
35
-
36
-
37
-
38
-
39
-
40
-
41
-
42
-
43
-
44
-
45
-
46
-
47
-
48
-
49
-
50
-
51
-
52
-
53
-
54
-
55
-
56
-
57
-
58
-
59
 |
 |

Acer Projector
U5200/N210/PN-X10/U5300W/N220/
PN-W10 Series
User's Guide