Alpine CDA-9847 Owners Manual - Page 17
Setup - aux input
 |
View all Alpine CDA-9847 manuals
Add to My Manuals
Save this manual to your list of manuals |
Page 17 highlights
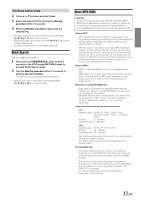
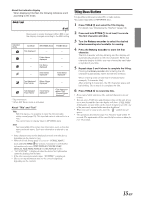
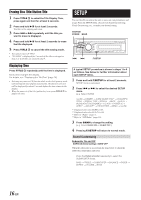
Erasing Disc Title/Station Title 1 Press TITLE to select the Title Display. Then, press again and hold for at least 2 seconds. 2 Press and hold -/J for at least 2 seconds. The title in the display will blink. 3 Press g or f repeatedly until the title you want to erase is displayed. 4 Press and hold -/J for at least 2 seconds to erase the title displayed. 5 Press TITLE to cancel the title erasing mode. • You cannot erase CD-TEXT. • "NO DATA" is displayed for 2 seconds if the title is not input in step 2, or if all titles are erased in step 4. SETUP You can flexibly customize the unit to suit your own preferences and usage. From the SETUP menu, choose from Sound Customizing, Visual Customizing, etc., to make your desired setting. SOURCE/ POWER BAND gf F/SETUP Displaying Time Press TITLE repeatedly until the time is displayed. Each press changes the display. For details, see "Displaying the Title/Text" (page 14). • Selecting any tuner or CD function while in the clock priority mode will interrupt the time display momentarily. The function selected will be displayed for about 5 seconds before the time returns to the display. • When the power is off but the ignition key is on, press TITLE to display the time. A typical SETUP procedure is shown in steps 1 to 4 as follows. See below for further information about each SETUP menu. 1 Press and hold F/SETUP for at least 2 seconds. SETUP mode is activated. 2 Press g or f to select the desired SETUP menu. (e.g. Select SUBW) ILLUMI → DIMMER → SUBW (SUBW SYS)*1 → CDDA/MP3/ CDDA → SCROLL TYPE→ SCROLL → MUTE → AUX IN → (AUXILIARY/TV/VCR/GAME)*2 → D-AUX → POWER IC → AREA*3 → XM ADF*4 → H510/OTHER → DEMO → ILLUMI *1 Displayed only when SUBW is ON. *2 Displayed only when AUX IN is ON. *3 Refer to "Radio" (page 7). *4 Refer to "SAT Radio" (page 20). 3 Press BAND to change the setting. (e.g. Select SUBW ON or SUBW OFF.) 4 Pressing F/SETUP will return to normal mode. Sound Customizing Subwoofer On and Off SUBW ON (Initial setting) / SUBW OFF When the subwoofer is on, perform the steps below to adjust the subwoofer output phase and level. Press the Rotary encoder repeatedly to select the SUBWOOFER mode. BASS → TREBLE → SUBWOOFER → BALANCE → FADER → DEFEAT → VOLUME → BASS 16-EN
-
 1
1 -
2
-
3
-
4
-
5
-
6
-
7
-
8
-
9
-
10
-
11
-
 12
12 -
 13
13 -
 14
14 -
 15
15 -
 16
16 -
 17
17 -
 18
18 -
 19
19 -
 20
20 -
 21
21 -
 22
22 -
23
-
24
-
25
-
26
-
27
-
28
-
29
-
30
-
31
-
32
-
33
-
34
-
35
-
36
-
37
-
38
-
39
-
40
-
41
-
42
-
43
-
44
-
45
-
46
-
47
-
48
-
49
-
50
-
51
-
52
-
53
-
54
-
55
-
56
-
57
-
58
-
59
-
60
-
61
-
62
-
63
-
64
-
65
-
66
-
67
-
68
-
69
-
70
-
71
-
72
-
73
-
74
-
75
-
76
-
77
-
78
-
79
-
80
-
81
-
82
-
83
-
84
-
85
-
86
-
87
-
88
-
89
-
90
-
91
-
92
-
93
-
94
-
95
-
96
-
97
 |
 |