Alpine DVR-C320R Owners Manual - Page 17
Installing the rear camera
 |
View all Alpine DVR-C320R manuals
Add to My Manuals
Save this manual to your list of manuals |
Page 17 highlights
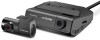
Installing the product 3 Set the vertical angle of the camera appropriately. To confirm the camera angle, record a video after installation and check the video using the Alpine navigation/display audio system or the ALPINE Recording Viewer application. If necessary, adjust the camera angle again. 2.2 Installing the rear camera Refer to the following instructions to properly install the rear camera. 2.2.1 Selecting an installation location Select a location on the rear windshield where there is no defrost grid wire and the camera can record the entire rear view. • For vehicles with a sunshade attached to the rear windshield, you must select a location where using the sunshade will not interfere with camera operation. • The adhesive part of the rear camera should not touch the defrost grid. 17
-
 1
1 -
2
-
3
-
4
-
5
-
6
-
7
-
8
-
9
-
10
-
11
-
 12
12 -
 13
13 -
 14
14 -
 15
15 -
 16
16 -
 17
17 -
 18
18 -
 19
19 -
 20
20 -
 21
21 -
 22
22 -
23
-
24
-
25
-
26
-
27
-
28
-
29
-
30
-
31
-
32
-
33
-
34
-
35
-
36
-
37
-
38
-
39
-
40
-
41
-
42
-
43
-
44
-
45
-
46
 |
 |
