Asus V2-AE1 User Guide
Asus V2-AE1 Manual
 |
View all Asus V2-AE1 manuals
Add to My Manuals
Save this manual to your list of manuals |
Asus V2-AE1 manual content summary:
- Asus V2-AE1 | User Guide - Page 1
Vintage2-AE1 Barebone System - Asus V2-AE1 | User Guide - Page 2
Product warranty or service will not be extended if: (1) the product is repaired, modified or altered, unless such repair, modification of alteration is authorized in writing by ASUS; or (2) the serial number of the product is defaced or missing. ASUS PROVIDES THIS MANUAL "AS IS" WITHOUT WARRANTY - Asus V2-AE1 | User Guide - Page 3
Table of contents Notices vi Safety information vii About this guide viii System package contents x Chapter 1: System introduction 1.1 Welcome 2-3 2.4 Central Processing Unit (CPU 2-4 2.4.1 Overview 2-4 2.4.2 Installling the CPU 2-4 2.4.3 Installing the CPU fan and heatsink assembly ........ - Asus V2-AE1 | User Guide - Page 4
3: Starting up 3.1 Installing an operating system 3-2 3.2 Powering up 3-2 3.3 Support CD information 3-2 3.3.1 Drivers menu 3-3 3.3.2 Utilities menu 3-4 3.3.3 Make Disk menu 3-5 3.3.4 Manuals menu 3-6 3.3.5 ASUS Contact information 3-7 3.3.6 Other information 3-7 3.4 Software information - Asus V2-AE1 | User Guide - Page 5
JumperFree Configuration 5-14 5.4.2 USB Configuration 5-15 5.4.3 CPU Configuration 5-16 5.4.4 Chipset 5-17 5.4.5 Onboard Devices 5.5.2 Repost Video on S3 Resume 5-26 5.5.3 ACPI 2.0 Support 5-26 5.5.4 ACPI APIC Support 5-26 5.5.5 APM Configuration 5-27 5.5.6 Hardware Monitor 5-29 - Asus V2-AE1 | User Guide - Page 6
. This equipment generates, uses and can radiate radio frequency energy and, if not installed and used in accordance with manufacturer's instructions, may cause harmful interference to radio communications. However, there is no guarantee that interference will not occur in a particular installation - Asus V2-AE1 | User Guide - Page 7
in any area where it may become wet. Place the product on a stable surface. • If you encounter technical problems with the product, contact a qualified service technician or your retailer. Lithium-Ion Battery Warning C A U T I O N: Danger of explosion if battery is incorrectly replaced. Replace only - Asus V2-AE1 | User Guide - Page 8
About this guide Audience This guide provides general information and installation instructions about the ASUS Vintage2-AE1 barebone system. This guide is intended for experienced users and integrators with hardware knowledge of personal computers. How this guide is organized This guide contains the - Asus V2-AE1 | User Guide - Page 9
Conventions used in this guide W A R N I N G : Information to prevent injury to yourself when trying to complete a task. C A U T I O N : Information to prevent damage to the components when trying to complete a task. I M P O R T A N T : Instructions that you MUST follow to complete a task. N O T E : - Asus V2-AE1 | User Guide - Page 10
is damaged or missing, contact your retailer immediately. 1 . A S U S V i n t a g e 2 - A E 1 b a r e b o n e s y s t e m with • ASUS motherboard • 300 W PFC power supply unit • ASUS chassis • Front panel I/O board • Wireless module (optional) 2. Cable • AC power cable 3. Support CD 4. User guide x - Asus V2-AE1 | User Guide - Page 11
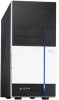
System introduction Chapter 1 This chapter gives a general description of the barebone system. The chapter presents the system features including introduction on the front and rear panel, and internal components. ASUS Vintage2-AE1 - Asus V2-AE1 | User Guide - Page 12
for choosing the ASUS Vintage2-AE1! The ASUS Vintage2-AE1 is an all-in-one barebone system with a powerful computing capability, expandability, and versatile connectivity. The system comes in a stylish mini-tower casing and powered by the ASUS motherboard. The system motherboard supports the latest - Asus V2-AE1 | User Guide - Page 13
. 6. Hard disk drive activity LED. 7 . P o w e r b u t t o n. Press this button to turn the system on. 8 . R e s e t b u t t o n. Press this button to reboot the system without turning off the power. ASUS Vintage2-AE1 1-3 - Asus V2-AE1 | User Guide - Page 14
1.3 Rear panel The system rear panel includes the power connector and several I/O ports that allow convenient connection of devices. 1 2 13 14 3 4 5 6 7 15 8 16 9 10 11 14 12 17 1 . P o w e r c o n n e c t o r . This connector is for the power cable and plug. 2 . V o l t a g e s e l e c - Asus V2-AE1 | User Guide - Page 15
200-240 V, set the switch to 230 V. Setting the switch to 115 V in a 230 V environment or 230 V in a 115 V environment will seriously damage the system! ASUS Vintage2-AE1 1-5 - Asus V2-AE1 | User Guide - Page 16
reference. Proceed to Chapter 2 for instructions on installing additional system components. 5 13 3V Lithium Cell CMOS Power PCIEX1 A8V-MQ CLRTC ALC653 PCI1 SB_PWR PCI2 12 disk drive bay 5. Power supply unit 6. CPU socket 7. DIMM sockets 8. ASUS motherboard 9. Chassis fan 10. AGP slot 11 - Asus V2-AE1 | User Guide - Page 17
Basic installation Chapter 2 This chapter provides step-by-step instructions on how to install components in the system. ASUS Vintage2-AE1 - Asus V2-AE1 | User Guide - Page 18
install in the system. Basic components to install: 1. Central processing unit (CPU) 2. DDR Dual Inline Memory Module (DIMM) 3. Expansion card(s) 4. 5. Optical drive 6. Floppy disk drive Tool Phillips (cross) screw driver 2.2 Before you proceed Take note of the following precautions before you - Asus V2-AE1 | User Guide - Page 19
-like tabs on the right side of the assembly are exposed. 5. Remove the front panel assembly, then set aside. Air duct 1 2 1 2 3 4 Hinge-like tab Hook ASUS Vintage2-AE1 2-3 - Asus V2-AE1 | User Guide - Page 20
a specific corner on the socket to G o l d t r i a n g l e ensure correct installation. Vintage2-AE1 does not support dual-core processors. 2.4.2 Installling the CPU To install a CPU: 1. Locate the CPU socket on the motherboard. ® CPU Socket 939 2. Unlock the socket by pressing the lever sideways - Asus V2-AE1 | User Guide - Page 21
. The CPU fits only in one correct orientation. DO NOT force the CPU into the socket to prevent bending the pins and damaging the CPU! 5. When the CPU is in place, push down the socket lever to secure the CPU. The lever clicks on the side tab to indicate that it is locked. ASUS Vintage2-AE1 2-5 - Asus V2-AE1 | User Guide - Page 22
optimum thermal condition and performance. • Your boxed CPU heatsink and fan assembly should come with installation instructions for the CPU, heatsink, and the retention mechanism. If the instructions in this section do not match the CPU documentation, follow the latter. • The retention module - Asus V2-AE1 | User Guide - Page 23
: 1. Place the heatsink on top of the installed CPU. Make sure that the fan and heatsink assembly perfectly fits . 1 2 5 4 3 5. Connect the CPU fan cable to the connector labeled CPU_FAN on the motherboard. Do not forget to connect the CPU fan connector! Hardware monitoring error can occur if you - Asus V2-AE1 | User Guide - Page 24
memory modules from the same vendor. • Due to chipset limitation, this motherboard does not support DIMM modules with less than or equal to 128 Mb memory chips. Recommended memory configurations CPU Mode Single-core Dual-core Single-channel Dual-channel Single-channel Single-channel Dual-channel - Asus V2-AE1 | User Guide - Page 25
CL DIMM support AB - • - - •• 2 - •• - • - • - •• - •• 3ECC - •• - •• 3 •• 3 •• 3 •• - •• - •• 3 •• - •• 3 •• 3 •• 3 •• 2 •• 2 •• 2.5 •• 3 •• 3 •• 3 •• 2.5 2.5 2.5 2.5 3 3 3 3 3 2.5 2.5 3 3 3 3 2.5 2.5 3 - 2.5 2.5 - - ASUS - Asus V2-AE1 | User Guide - Page 26
module inserted into either slot, in a Single-channel memory configuration. B - supports one pair of modules inserted into both slots as one pair of Dual-channel memory configuration. Visit the ASUS website (www.asus.com) for the latest Qualified Vendors List. 2-10 Chapter 2: Basic installation - Asus V2-AE1 | User Guide - Page 27
. Locked retaining clip 2.5.3 Removing a DIMM To remove a DIMM: 2 1. Simultaneously press the 1 retaining clips outward to unlock the DIMM. 1 DDR DIMM notch Support the DIMM lightly with your fingers when pressing the retaining clips. The DIMM might get damaged when it flips out with extra - Asus V2-AE1 | User Guide - Page 28
Expansion slots In the future, you may need to install expansion cards. The following sub-sections describe the slots and the expansion cards that they support. Make sure to unplug the power cord before adding or removing expansion cards. Failure to do so may cause you physical injury and damage - Asus V2-AE1 | User Guide - Page 29
card. Refer to the tables below. 3. Install the software drivers for the expansion card. Standard interrupt assignments IRQ Priority 0 - -- - - - When using PCI cards on shared slots, ensure that the drivers support "Share IRQ" or that the cards do not need IRQ assignments; otherwise, conflicts - Asus V2-AE1 | User Guide - Page 30
installed on the PCI Express x1 slot. 2.6.5 AGP 8X slot This motherboard has an Accelerated Graphics Port (AGP) slot that supports AGP 8X (+0.8V) and AGP 4X (+1.5V) cards. When you buy an AGP card, make sure that you ask for one with +0.8V or +1.5V specification. • Install only +0.8V or +1.5V - Asus V2-AE1 | User Guide - Page 31
2.6.6 Wireless LAN module (optional) This motherboard supports an optional LAN module that allows you to set up a wireless network and exchange section "3.4.5 Using the Wireless LAN module" for information on the Wireless LAN utility and device driver installation. ASUS Vintage2-AE1 2-15 - Asus V2-AE1 | User Guide - Page 32
2.7 Installing storage drives 2.7.1 Optical drive The system supports up to two 5.25" optical drives such as CD-ROM, CD-RW, DVD-ROM, and DVD-RW drives. To install an optical drive: 1. Place the - Asus V2-AE1 | User Guide - Page 33
2.7.2 Floppy disk drive The system supports a 3.5" floppy disk drive. To install a floppy disk drive: 1. Place the chassis upright, then remove the lower cable to the floppy disk drive connector (labeled FLOPPY) on the motherboard. See page 4-6 for the connector location. ASUS Vintage2-AE1 2-17 - Asus V2-AE1 | User Guide - Page 34
2.7.3 Hard disk drive The system supports a 3.5" IDE or SATA hard disk drive. To install a hard disk drive: 1. Place the chassis upright, then remove the upper 3.5" drive bay metal plate cover. 2. Insert - Asus V2-AE1 | User Guide - Page 35
- PWR Ground Reset Ground System panel connector IDE_LED RESET PWRSW * Requires an ATX power supply. *The extra 2-pin power LED is for other Vintage2 models. ASUS Vintage2-AE1 2-19 - Asus V2-AE1 | User Guide - Page 36
bay cover locks. 2. Press the locks outward to release the bay cover. 3. Push the bay cover inward, then set it aside. 4. Follow the same instructions to remove the 3.5" drive bay cover. 2.10 Reinstalling the front panel assembly and side cover To reinstall the front panel assembly and side cover - Asus V2-AE1 | User Guide - Page 37
Chapter 3 This chapter helps you power up the system and install drivers and utilities from the support CD. ASUS Vintage2-AE1 Starting up - Asus V2-AE1 | User Guide - Page 38
CD that came with the system contains useful software and several utility drivers that enhance the system features. The contents of the support CD are subject to change at any time without notice. Visit the ASUS website regularly for updates. Place the CD in the optical drive. The CD automatically - Asus V2-AE1 | User Guide - Page 39
Adapter driver. USB 2.0 Driver Installs the USB 2.0 driver. Realtek RTL8187 Wireless Ethernet Driver Installs the wireless LAN driver for the optional wireless LAN module. The screen display and drivers option may not be the same for different operating system versions. ASUS Vintage2-AE1 3-3 - Asus V2-AE1 | User Guide - Page 40
supports. ASUS PC Probe II This smart utility monitors the fan speed, CPU temperature, and system voltages, and alerts you of any detected problems Service Provider (ISP). ASUS Cool 'n' Quiet Utility This item installs the ASUS Cool 'n' Quiet utility. ASUS Screen Saver Installs the ASUS screen - Asus V2-AE1 | User Guide - Page 41
includes Microsoft Direct X 9.0c. If your system is Microsoft Windows XP Service Pack 2-embedded, skip Microsoft Direct X 9.0c installation. Anti-virus utility menu allows you to make a RAID driver disk. Make VIA RAID Driver Disk Allows you to create a VIA RAID driver disk. ASUS Vintage2-AE1 3-5 - Asus V2-AE1 | User Guide - Page 42
3.3.4 Manuals menu The Make Disk menu allows you to make a RAID driver disk. RTL8187 Wireless LAN User's Manual Allows you to open the Realtek® RTL8187 Wireless LAN user's manual. 3-6 Chapter 3: Starting up - Asus V2-AE1 | User Guide - Page 43
t tab to display the ASUS contact information. You can also find this information on the inside front cover of this user guide. 3.3.6 Other information The icons on the top right corner of the screen give additional information on the motherboard and the contents of the support CD. Click an icon to - Asus V2-AE1 | User Guide - Page 44
Browse this CD Displays the support CD contents in graphical format. Technical support Form Displays the ASUS Technical Support Request Form that you have to fill out when requesting technical support. Filelist Displays the contents of the support CD and a brief description of each in text format. - Asus V2-AE1 | User Guide - Page 45
3.4 Software information Most of the applications in the support CD have wizards that will conveniently guide you through the installation. View the online help or readme file that came with the software for more information. 3.4.1 ASUS PC Probe II PC Probe II is a utility that monitors the - Asus V2-AE1 | User Guide - Page 46
e n t a t i o n window Opens the hard disk drive, memory, CPU usage window Shows/Hides the P r e f e r e n c e section Minimizes the application Closes the application Sensor alert When a system sensor detects a problem, the main window right handle turns red, as the illustrations below show. When - Asus V2-AE1 | User Guide - Page 47
panels The hardware monitor panels display the current value of a system sensor such as fan rotation, CPU temperature, and voltages. The hardware monitor panels come in two display modes: hexagonal (large) and rectangular . Click to increase value Click to decrease value ASUS Vintage2-AE1 3-11 - Asus V2-AE1 | User Guide - Page 48
Monitoring sensor alert The monitor panel turns red when a component value exceeds or is lower than the threshold value. Refer to the illustrations below. Large display Small display WMI browser Click to display the WMI (Windows Management Instrumentation) browser. This browser displays - Asus V2-AE1 | User Guide - Page 49
Interconnect) browser. This browser provides information on the PCI devices installed on your system. Click the plus sign (+) before the P C I I n f o r m a t i o n item to display available information. ASUS Vintage2-AE1 3-13 - Asus V2-AE1 | User Guide - Page 50
The U s a g e browser displays real-time information on the CPU, hard disk drive space, and memory usage. Click to display the Usage browser. CPU usage The C P U tab displays real-time CPU usage in line graph representation. If the CPU has an enabled Hyper-Threading*, two separate line graphs - Asus V2-AE1 | User Guide - Page 51
shows both used and available physical memory. The pie chart at the bottom of the window represents the used (blue) and the available physical memory. ASUS Vintage2-AE1 3-15 - Asus V2-AE1 | User Guide - Page 52
!™ Technology • Make sure to install the Cool 'n' Quiet!™ driver and application before using this feature. • The AMD Cool 'n' Quiet!™ technology supports AMD Athlon™ XP and higher processors only. The system motherboard supports the AMD Cool 'n' Quiet!™ Technology that dynamically and automatically - Asus V2-AE1 | User Guide - Page 53
CPU frequency and core voltage. Make sure to install the Cool 'n' Quiet!™ software from the motherboard support u i e t > Cool & Quiet V1.024. The Cool 'n' Quiet!™ application window appears and displays the current CPU frequency and core voltage. Click ( X ) to close the window or ( - ) to minimize - Asus V2-AE1 | User Guide - Page 54
. This utility is available in the support CD that comes with the motherboard package. ASUS Update requires an Internet connection either through a network or an Internet Service Provider (ISP). Installing ASUS Update To install ASUS Update: 1. Place the support CD in the optical drive. The - Asus V2-AE1 | User Guide - Page 55
a t e. The ASUS Update main window appears. 2. Select U p d a t e B I O S f r o m 3. Select the ASUS FTP site t h e I n t e r n e t option from the nearest you to avoid network drop-down menu, then click traffic, or click A u t o S e l e c t. N e x t. Click N e x t. ASUS Vintage2-AE1 3-19 - Asus V2-AE1 | User Guide - Page 56
4. From the FTP site, select the BIOS version that you wish to download. Click N e x t. 5. Follow the screen instructions to complete the update process. The ASUS Update utility is capable of updating itself through the Internet. Always update the utility to avail all its features. Updating the BIOS - Asus V2-AE1 | User Guide - Page 57
ASUS MyLogo™ is automatically installed when you install the A S U S U p d a t e utility from the support CD. See section "3.3.2 Utilities menu" for details. • Before using the ASUS ASUS MyLogo™: 1. Launch the ASUS Update utility. Refer to section "3.4.3 ASUS e x t. The ASUS MyLogo window appears. 6. - Asus V2-AE1 | User Guide - Page 58
enlarge by clicking on it. 8. Adjust the boot image to your desired size by selecting a value on the R a t i o box. 9. When the screen returns to the ASUS Update utility, flash the original BIOS to load the new boot logo. 10. After flashing the BIOS, restart the computer to display the new boot - Asus V2-AE1 | User Guide - Page 59
For detailed information on using the Wireless LAN module, view/ download the RTL8187 Wireless LAN User's Manual on the motherboard support CD. The wireless IEEE 802.11 b/g LAN module is installed on the rear panel. See far from the access point may operate at lower speeds. ASUS Vintage2-AE1 3-23 - Asus V2-AE1 | User Guide - Page 60
wireless LAN module during start-up and displays an A d d N e w H a r d w a r e W i z a r d window. Click C a n c e l then proceed with the following instructions. To install the wireless LAN driver: 1. Place the WiFi-TV card support CD into the optical drive. 2. The CD automatically displays the - Asus V2-AE1 | User Guide - Page 61
drivers To set up a wireless network: 1. Launch the Realtek RTL8187 Wireless Network Driver and Utility by double-clicking the icon on your desktop. 2. The W allows you to set up a wireless network. Follow succeeding screen instructions and key in values for the required parameters. 4. Click - Asus V2-AE1 | User Guide - Page 62
Internet or network printer. Set to this mode if you are using Windows® 2000/XP/2003 Server operating system. The Soft AP feature can support an unlimited number of wireless clients and is ideal for homes with several computers but with only a single Internet connection and/or one printer. Wireless - Asus V2-AE1 | User Guide - Page 63
Motherboard info Chapter 4 This chapter gives information about the motherboard that comes with the system. This chapter includes the motherboard layout, jumper settings, and connector locations. ASUS Vintage2-AE1 - Asus V2-AE1 | User Guide - Page 64
4.1 Motherboard information The barebone system comes with an ASUS motherboard. This chapter provides technical information about the motherboard for future upgrades or system reconfiguration. Motherboard layout 21.8cm (8.6in) Super I/O PS/2KBMS T: Mouse B: Keyboard - Asus V2-AE1 | User Guide - Page 65
) Clear CMOS Except when clearing the RTC RAM, never remove the cap on CLRTC jumper default position. Removing the cap will cause system boot failure. ASUS Vintage2-AE1 4-3 - Asus V2-AE1 | User Guide - Page 66
2. Keyboard power (3-pin KBPWR) This jumper allows you to enable or disable the keyboard wake-up feature. Set this jumper to pins 2-3 (+5VSB) if you wish to wake up the computer when you press a key on the keyboard (the default is the Space Bar). This feature requires an ATX power supply that can - Asus V2-AE1 | User Guide - Page 67
connected USB devices. Set to +5VSB to wake up from S3 and S4 sleep modes (no power to CPU, DRAM in slow refresh, power supply in reduced power mode). The USBPWR12 and USBPWR34 jumpers are for the power supply capability (+5VSB) whether under normal condition or in sleep mode. ASUS Vintage2-AE1 4-5 - Asus V2-AE1 | User Guide - Page 68
4.3 Connectors 4.3.1 Rear panel connectors Refer to section "1.3 Rear panel" for details on the rear panel connectors. 4.3.2 Internal connectors 1 . Floppy disk drive connector (34-1 pin FLOPPY) This connector is for the provided floppy disk drive (FDD) signal cable. Insert one end of the cable to - Asus V2-AE1 | User Guide - Page 69
SATA4 SATA3 GND RSATA_TXP3 RSATA_TXN3 GND RSATA_RXP3 RSATA_RXN3 GND Important notes on Serial ATA • You must install Windows® 2000 Service Pack 4 or the Windows® XP Service Pack1 before using Serial ATA hard disk drives. • When using the connectors in standard IDE mode, connect the primary - Asus V2-AE1 | User Guide - Page 70
4. CPU and chassis fan connectors (3-pin CPU_FAN, CHA_FAN) The fan connectors support cooling fans of 350 mA~740 mA (8.88 W max.) or a total of 1 A~2.22 A (26.64 W max.) at +12V. Connect the fan cables to the fan - Asus V2-AE1 | User Guide - Page 71
with USB 2.0 specification that supports up to 480 Mbps connection speed. USB+5V USB_P8USB_P8+ GND NC USB+5V USB_P6USB_P6+ GND NC USB+5V USB_P7USB_P7+ GND ® USB56 1 A8V-MQ USB 2.0 connectors USB+5V Channel Ground Ground Right Audio Channel ® Internal audio connectors ASUS Vintage2-AE1 4-9 - Asus V2-AE1 | User Guide - Page 72
8 . Front panel audio connector (10-1 pin FP_AUDIO) This connector is for a chassis-mounted front panel audio I/O module that supports AC'97 audio standard. AGND +5VA BLINE_OUT_R BLINE_OUT_L ® Front audio connector FP_AUDIO MIC2 MICPWR Line out_R NC Line out_L 9 . Chassis intrusion connector - Asus V2-AE1 | User Guide - Page 73
10. System panel connector (20-1 pin PANEL) This connector supports several chassis-mounted functions. PLED SPEAKER PLED+ PLED+5V Ground Ground Speaker PANEL ® IDE_LED+ is for the chassis-mounted reset button for system reboot without turning off the system power. ASUS Vintage2-AE1 4-11 - Asus V2-AE1 | User Guide - Page 74
4-12 Chapter 4: Motherboard info - Asus V2-AE1 | User Guide - Page 75
Chapter 5 This chapter tells how to change system settings through the BIOS Setup menus and describes the BIOS parameters. ASUS Vintage2-AE1 BIOS setup - Asus V2-AE1 | User Guide - Page 76
F r e e B I O S 2 (Updates the BIOS using a bootable floppy disk or the motherboard support CD when the BIOS file fails or gets corrupted.) 4. A S U S U p d a t e BIOS in the future. Copy the original motherboard BIOS using the ASUS Update or AFUDOS utilities. 5.1.1 Creating a bootable floppy disk 1. - Asus V2-AE1 | User Guide - Page 77
e. Press , then follow screen instructions to continue. 2. Copy the original or the latest motherboard BIOS file to the bootable floppy disk. 5.1.2 ASUS EZ Flash utility The ASUS EZ Flash feature allows you to update Make sure that you rename the BIOS file to A8VMQ.ROM. ASUS Vintage2-AE1 5-3 - Asus V2-AE1 | User Guide - Page 78
for reference only. The actual BIOS screen displays may not be exactly the same as shown. 1. Copy the AFUDOS utility (afudos.exe) from the motherboard support CD to the bootable floppy disk you created earlier. 2. Boot the system in DOS mode, then at the prompt type: afudos /o[filename] where the - Asus V2-AE1 | User Guide - Page 79
(www.asus.com) and download the latest BIOS file for the motherboard. Save the BIOS file to a bootable floppy disk. Write the BIOS filename on a piece of paper. You need to type the exact BIOS filename at the DOS prompt. 2. Copy the AFUDOS utility (afudos.exe) from the motherboard support CD to - Asus V2-AE1 | User Guide - Page 80
CrashFree BIOS 2 utility The ASUS CrashFree BIOS 2 is an auto recovery tool that allows you to restore the BIOS file when it fails or gets corrupted during the updating process. You can update a corrupted BIOS file using the motherboard support CD or the floppy disk that contains the updated BIOS - Asus V2-AE1 | User Guide - Page 81
disk from the floppy disk drive, then turn on the system. 2. Insert the support CD to the optical drive. 3. The utility displays the following message and automatically checks be the latest BIOS version for this motherboard. Visit the ASUS website (www.asus.com) to download the latest BIOS file - Asus V2-AE1 | User Guide - Page 82
5.2 BIOS setup program This motherboard supports a programmable firmware chip that you can update using the provided utility not exactly match what you see on your screen. • Visit the ASUS website (www.asus.com) to download the latest BIOS file for this motherboard and . 5-8 Chapter 5: BIOS setup - Asus V2-AE1 | User Guide - Page 83
Master Fourth IDE Slave System Information [10:55:25] [Thu 07/21/2005] [1.44M, 3.5 in] [ST320410A] [ASUS CD-S520/A] [Not Detected] [Not Detected] [Not Detected] [Not Detected] [Not Detected] [Not Detected] Use [ENTER the navigation keys differ from one screen to another. ASUS Vintage2-AE1 5-9 - Asus V2-AE1 | User Guide - Page 84
System Time System Date Legacy Diskette A [10:55:25] [Thu 07/21/2005] [1.44M, 3.5 in.] Primary IDE Master [ST320410A] Primary IDE Slave [ASUS CD-S520/A] Secondary IDE Master[Not Detected] Secondary IDE Slave [Not Detected] Third IDE Master [Not Detected] Third IDE Slave [Not Detected] Fourth - Asus V2-AE1 | User Guide - Page 85
Fourth IDE Slave System Information [10:55:25] [Thu 07/21/2005] [1.44M, 3.5 in] [ST320410A] [ASUS CD-S520/A] [Not Detected] [Not Detected] [Not Detected] [Not Detected] [Not Detected] [Not Detected] 25 in.] [1.2M , 5.25 in.] [720K , 3.5 in.] [1.44M, 3.5 in.] [2.88M, 3.5 in.] ASUS Vintage2-AE1 5-11 - Asus V2-AE1 | User Guide - Page 86
[Auto] [CDROM] [ARMD] LBA/Large Mode [Auto] Enables or disables the LBA mode. Setting to Auto enables the LBA mode if the device supports this mode, and if the device was not previously formatted with LBA mode disabled. Configuration options: [Disabled] [Auto] Block (Multi-sector Transfer) M [Auto - Asus V2-AE1 | User Guide - Page 87
Monitoring [Auto] Sets the Smart Monitoring, Analysis, and Reporting Technology monitoring support. Configuration options: [Auto] [Disabled] [Enabled] 32Bit Data Transfer [ Displays the auto-detected CPU specification. System Memory Displays the auto-detected system memory. ASUS Vintage2-AE1 5-13 - Asus V2-AE1 | User Guide - Page 88
Power Boot Exit Jumperfree Configuration USB Configuration CPU Configuration Chipset Onboard Devices Configuration PCI PnP Exit v02.58 (C)Copyright 1985-2004, American Megatrends, Inc. CPU FSB Frequency [200 MHz] Allows you to adjust the CPU FSB frequency. Configuration options: [200 MHz] [201 MHz - Asus V2-AE1 | User Guide - Page 89
USB 2.0 Ports Enable Legacy USB Support Port 64/60 Emulation USB 2.0 Legacy USB Support [Auto] Allows you to enable or disable support for USB device is detected, the legacy USB support is disabled. Configuration options: [Disabled] I/O port 60h/64h emulation support. This item should be set - Asus V2-AE1 | User Guide - Page 90
] BIOS EHCI Hand-Off [Enabled] Allows you to enable support for operating systems without an EHCI hand-off feature. Configuration options: [Disabled] [Enabled] 5.4.3 CPU Configuration The items in this menu show the CPU-related information that the BIOS automatically detects. Advanced BIOS SETUP - Asus V2-AE1 | User Guide - Page 91
) Read Preamble Asynchronous Latency : 166 MHz : 2.5 : 3 CLK : 7 CLK : 3 CLK : 2 CLK : 10 CLK : 12 CLK : 3 CLK : 6.0 ns : 7 ns v02.58 (C)Copyright 1985-2004, American Megatrends, Inc. ASUS Vintage2-AE1 5-17 - Asus V2-AE1 | User Guide - Page 92
] allows you to set the values by yourself. Configuration options: [Auto] [Manual] The following items appear when the M C T T i m i n g M o d e item is set to [Manual]. CAS Latency (CL) [2.5] Configuration options: [2.0] [2.5] [3.0] TRAS [8 CLK] Configuration options: [5 CLK] [6 CLK]... [15 CLK - Asus V2-AE1 | User Guide - Page 93
options: [1 CLK] [2 CLK]... [6 CLK] User Config Mode [Auto] Configuration options: [Auto] [Manual] Burst length [4 Beats] Sets the burst length. Configuration options: [8 Beats] [4 Beats] [2 Beats to enable or disable ECC chip kill. Configuration options: [Disabled] [Enabled] ASUS Vintage2-AE1 5-19 - Asus V2-AE1 | User Guide - Page 94
DRAM SCRUB REDIRECT [Disabled] Allows you to enable or disable DRAM scrub redirect, which allows the system to correct DRAM ECC errors immediately when they occur, even if background scrubbing is on. Configuration options: [Disabled] [Enabled] DRAM BG Scrub [Disabled] Allows DRAM scrubbing to - Asus V2-AE1 | User Guide - Page 95
OnChip VGA Frame Buffer Size [64MB] Primary Graphics Adapter [AGP] VLink 8X Supported [Enabled] AGP Mode [AGP 8X] AGP Fast Write [Disabled] Graphics Aperture options: [Disabled] [Enabled] DBI Output for AGP Trans [Disabled] Configuration options: [Disabled] [Enabled] ASUS Vintage2-AE1 5-21 - Asus V2-AE1 | User Guide - Page 96
SouthBridge VIA VT8251 Configuration VIA VT8251 South Chipset Configuration Advanced * Serial ATA IDE Controller * LAN Controller LAN BIOS Execute OnChip AC`97 Audio AC`97 Variable Sample Rate [SATA] [Enabled] [Disabled] [Auto] [Enabled] Options Disabled SATA RAID AHCI Select Screen Select Item - Asus V2-AE1 | User Guide - Page 97
MHz] LDT to AGP Lokar (Upstream) [16 BIT] Configuration options: [8 BIT] [16 BIT] LDT to AGP Width (Downstream) [16 BIT] Configuration options: [8 BIT] [16 BIT] ASUS Vintage2-AE1 5-23 - Asus V2-AE1 | User Guide - Page 98
5.4.5 Onboard Devices Configuration Advanced BIOS SETUP UTILITY Configure Win627EHF Super IO Chipset Serial Port1 Address Parallel Port Address Parallel Port Mode ECP Mode DMA Channel Parallel Port IRQ [3F8/IRQ4] [378] [ECP] [DMA3] [IRQ7] Allows BIOS to select Serial Port1 Base Addresses. - Asus V2-AE1 | User Guide - Page 99
is free for use of PCI/PnP devices. When set to [Reserved], the IRQ is reserved for legacy ISA devices. Configuration options: [PCI Device] [Reserved] ASUS Vintage2-AE1 5-25 - Asus V2-AE1 | User Guide - Page 100
Video on S3 Resume [No] Determines whether to invoke VGA BIOS POST on S3/STR resume. Configuration options: [No] [Yes] 5.5.3 ACPI 2.0 Support [No] Allows you to add more tables for Advanced Configuration and Power Interface (ACPI) 2.0 specifications. Configuration options: [No] [Yes] 5.5.4 ACPI APIC - Asus V2-AE1 | User Guide - Page 101
] When set to [Enabled], the system enables the PME to generate a wake event while the computer is in Soft-off mode. Configuration options: [Disabled] [Enabled] ASUS Vintage2-AE1 5-27 - Asus V2-AE1 | User Guide - Page 102
Resume On KBC [Disabled] Configuration options: [Disabled] [Enabled] Wake-Up Key [Any Key] Allows you to use any key or a specific key on the keyboard to turn on the system. This feature requires an ATX power supply that provides at least 1A on the +5VSB lead. Configuration options: [Any Key] [ - Asus V2-AE1 | User Guide - Page 103
CPU CPU CPU temperatures. Select Disabled if you do not wish to display the detected temperatures. CPU Fan Speed [xxxxRPM] or [Ignored] The onboard hardware monitor automatically detects and displays the CPU CPU Q-Fan Control [Enabled] Allows you to enable or disable the ASUS ASUS Q- - Asus V2-AE1 | User Guide - Page 104
VCORE Voltage, 3.3V Voltage, 5V Voltage, 12V Voltage The onboard hardware monitor automatically detects the voltage output through the onboard voltage regulators. Chassis Intrude [Disabled] Allows you to enable or disable the chassis intrusion function. Configuration options: [Disabled] [Enabled] - Asus V2-AE1 | User Guide - Page 105
Boot Settings Configuration Quick Boot Full Screen Logo AddOn ROM Display Mode Bootup Num-Lock PS/2 Mouse Support Wait for 'F1' if Error Hit 'DEL' Message Display Interrupt 19 Capture [Enabled] [Enabled] ESC Exit v02.58 (C)Copyright 1985-2004, American Megatrends, Inc. ASUS Vintage2-AE1 5-31 - Asus V2-AE1 | User Guide - Page 106
[Disabled] [Enabled] Set this item to [Enabled] to use the ASUS MyLogo™ feature. Add On ROM Display Mode [Force BIOS] Sets the the NumLock. Configuration options: [Off] [On] PS/2 Mouse Support [Auto] Allows you to enable or disable support for PS/2 mouse. Configuration options: [Disabled] [Enabled] - Asus V2-AE1 | User Guide - Page 107
on how to erase the RTC RAM. After you have set a supervisor password, the other items appear to allow you to change other security settings. ASUS Vintage2-AE1 5-33 - Asus V2-AE1 | User Guide - Page 108
BIOS SETUP UTILITY Boot Security Settings Supervisor Password : Not Installed User Password : Not Installed Change Supervisor Password User Access Level Change User Password Clear User Password Password Check [Full Access] [Setup] to change password. again to disabled password - Asus V2-AE1 | User Guide - Page 109
changes, the program prompts you with a message asking if you want to save your changes before exiting. Press to save the changes while exiting. ASUS Vintage2-AE1 5-35 - Asus V2-AE1 | User Guide - Page 110
Exit & Discard Changes Select this option only if you do not want to save the changes that you made to the Setup program. If you made changes to fields other than System Date, System Time, and Password, the BIOS asks for a confirmation before exiting. Discard Changes This option allows you to
-
 1
1 -
 2
2 -
 3
3 -
 4
4 -
 5
5 -
 6
6 -
 7
7 -
8
-
9
-
10
-
11
-
12
-
13
-
14
-
15
-
16
-
17
-
18
-
19
-
20
-
21
-
22
-
23
-
24
-
25
-
26
-
27
-
28
-
29
-
30
-
31
-
32
-
33
-
34
-
35
-
36
-
37
-
38
-
39
-
40
-
41
-
42
-
43
-
44
-
45
-
46
-
47
-
48
-
49
-
50
-
51
-
52
-
53
-
54
-
55
-
56
-
57
-
58
-
59
-
60
-
61
-
62
-
63
-
64
-
65
-
66
-
67
-
68
-
69
-
70
-
71
-
72
-
73
-
74
-
75
-
76
-
77
-
78
-
79
-
80
-
81
-
82
-
83
-
84
-
85
-
86
-
87
-
88
-
89
-
90
-
91
-
92
-
93
-
94
-
95
-
96
-
97
-
98
-
99
-
100
-
101
-
102
-
103
-
104
-
105
-
106
-
107
-
108
-
109
-
110
 |
 |
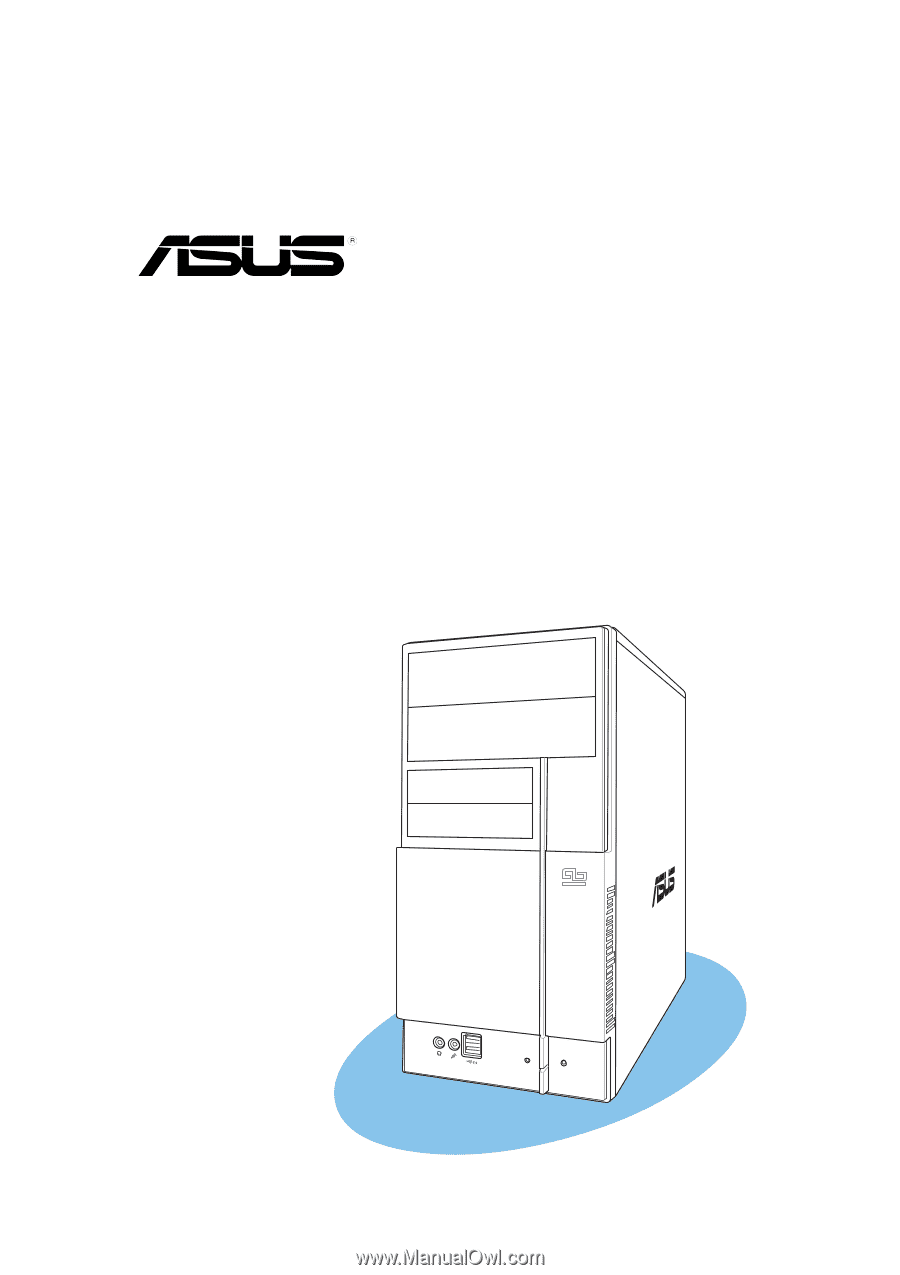
Vintage2-AE1
Barebone System