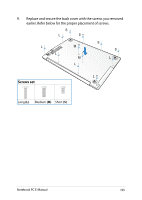
Asus V451LA User's Manual for English Edition - Page 104
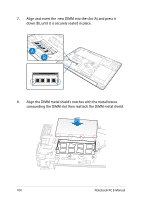
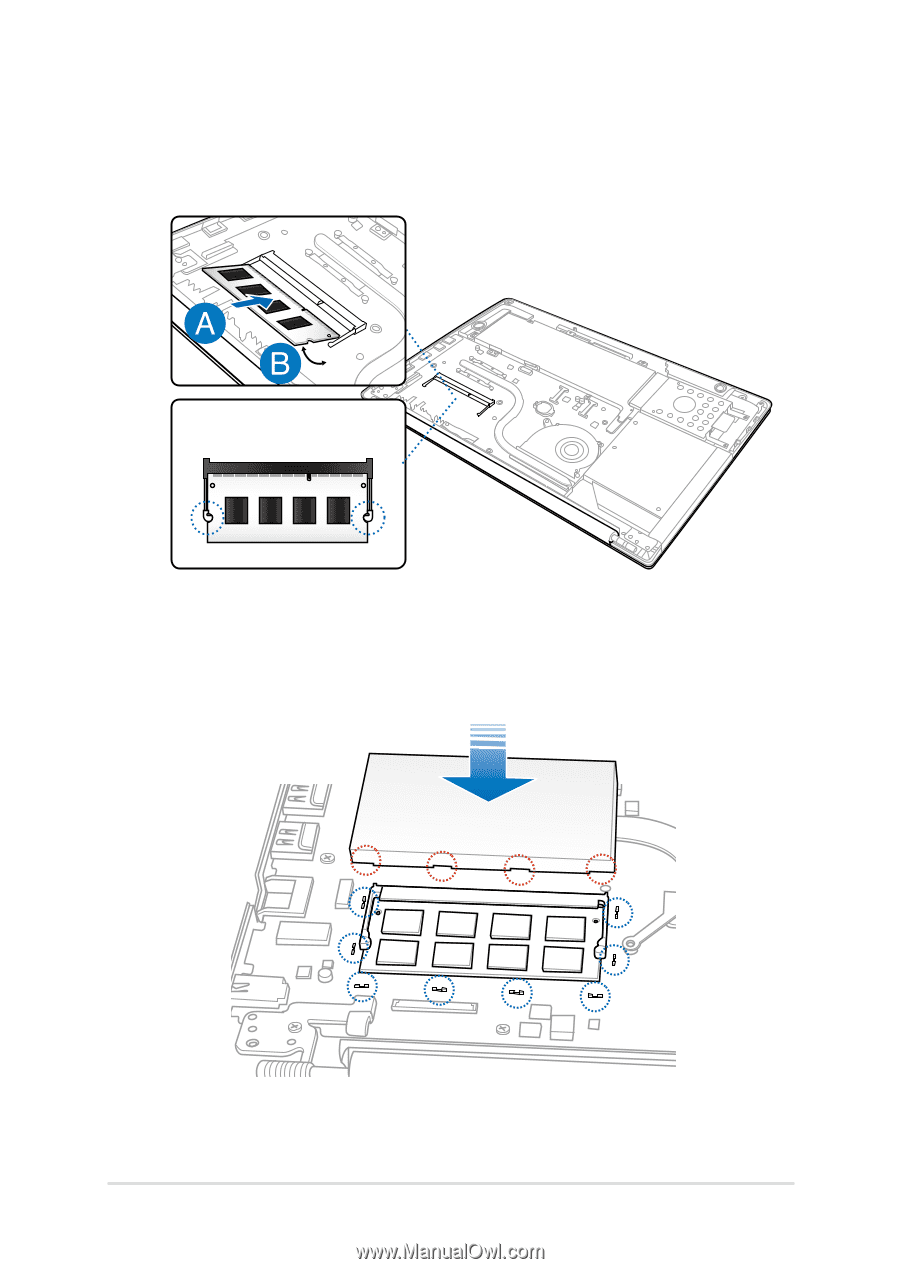
new DIMM into the slot A and press it, down B, until it is securely seated in place.
 |
View all Asus V451LA manuals
Add to My Manuals
Save this manual to your list of manuals |
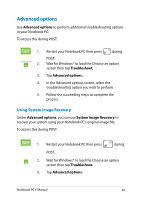
Page 104 highlights
7. Align and insert the new DIMM into the slot (A) and press it down (B), until it is securely seated in place. 8. Align the DIMM metal shield's notches with the metal braces surrounding the DIMM slot then reattach the DIMM metal shield. 104 Notebook PC E-Manual
-
 1
1 -
2
-
3
-
4
-
5
-
6
-
7
-
8
-
9
-
10
-
11
-
12
-
13
-
14
-
15
-
16
-
17
-
18
-
19
-
20
-
21
-
22
-
23
-
24
-
25
-
26
-
27
-
28
-
29
-
30
-
31
-
32
-
33
-
34
-
35
-
36
-
37
-
38
-
39
-
40
-
41
-
42
-
43
-
44
-
45
-
46
-
47
-
48
-
49
-
50
-
51
-
52
-
53
-
54
-
55
-
56
-
57
-
58
-
59
-
60
-
61
-
62
-
63
-
64
-
65
-
66
-
67
-
68
-
69
-
70
-
71
-
72
-
73
-
74
-
75
-
76
-
77
-
78
-
79
-
80
-
81
-
82
-
83
-
84
-
85
-
86
-
87
-
88
-
89
-
90
-
91
-
92
-
93
-
94
-
95
-
96
-
97
-
98
-
 99
99 -
 100
100 -
 101
101 -
 102
102 -
 103
103 -
 104
104 -
 105
105 -
 106
106 -
 107
107 -
 108
108 -
 109
109 -
110
-
111
-
112
-
113
-
114
-
115
-
116
-
117
-
118
-
119
-
120
-
121
-
122
-
123
-
124
-
125
-
126
-
127
-
128
-
129
-
130
-
131
-
132
-
133
-
134
-
135
-
136
-
137
-
138
 |
 |
10²
Notebook PC E-Manual
8.
Align the DIMM metal shield’s notches with the metal braces
surrounding the DIMM slot then reattach the DIMM metal shield.
µ.
Align and insert the
new DIMM into the slot (A) and press it
down (B), until it is securely seated in place.