Audiovox HDP100 User Manual - Page 6
Placing the attachable feet - powerlink
 |
UPC - 044476059070
View all Audiovox HDP100 manuals
Add to My Manuals
Save this manual to your list of manuals |
Page 6 highlights
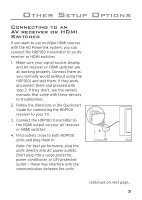
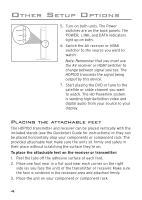
Other Setup Options 5. Turn on both units. The Power switches are on the back panels. The POWER, LINK, and DATA indicators light up on both. 6. Switch the AV receiver or HDMI switcher to the source you want to watch. Note: Remember that you must use the AV receiver or HDMI switcher to change between signal sources. The HDP100 transmits the signal being output by this device. 7. Start playing the DVD or tune to the satellite or cable channel you want to watch. The HD Powerlink system is sending high-definition video and digital audio from your source to your display. Placing the attachable feet The HDP100 transmitter and receiver can be placed vertically with the included stands (see the Quickstart Guide for instructions) or they can be placed horizontally atop your components or component rack. The provided attachable feet make sure the units sit firmly and safely in their place without scratching the surface they're on. To place the attachable feet on the receiver or transmitter: 1. Peel the tabs off the adhesive surface of each foot. 2. Place one foot near in a flat spot near each corner on the right side (as you face the unit) of the transmitter or receiver. Make sure the foot is centered in the recessed area and attached firmly. 3. Place the unit on your component or component rack. 4
-
 1
1 -
 2
2 -
 3
3 -
 4
4 -
 5
5 -
 6
6 -
 7
7 -
 8
8 -
 9
9 -
 10
10 -
 11
11 -
 12
12
 |
 |
