Audiovox MMD10 Owners Manual - Page 10
Trim Ring Installation - mmd 10
 |
View all Audiovox MMD10 manuals
Add to My Manuals
Save this manual to your list of manuals |
Page 10 highlights
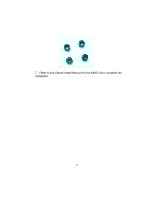
Trim Ring Installation The Trim Ring Installation is accomplished using the four (4) 2.6X1 0mm screws supplied. Please refer to the illustration below. A A A A 1. Place the MMD 10 on a soft surface with the rubber gasket facing up. Use care to avoid scratching the unit's exterior surface. 2. Take off the rubber ring. 3. Place the trim ring on the unit and note the location of the four mounting screws. 4. Attach the trim ring to the unit using the longer four (4) 2.6 X 10mm screws supplied. 5. Attach the four (4) post extensions to the bracket. 6. Attach the four (4) rubber spacers on the post extensions 10
-
 1
1 -
2
-
3
-
4
-
 5
5 -
 6
6 -
 7
7 -
 8
8 -
 9
9 -
 10
10 -
 11
11 -
 12
12 -
 13
13 -
 14
14 -
 15
15 -
16
-
17
-
18
-
19
-
20
-
21
-
22
-
23
-
24
-
25
-
26
-
27
-
28
-
29
-
30
-
31
-
32
-
33
-
34
-
35
-
36
-
37
-
38
 |
 |

10
Trim Ring Installation
The Trim Ring Installation is accomplished using the four (4) 2.6X1 0mm
screws supplied. Please refer to the illustration below.
A
A
A
A
1.
Place the MMD 10 on a soft surface with the rubber gasket facing
up. Use care to avoid scratching the unit
’
s exterior surface.
2.
Take off the rubber ring.
3.
Place the trim ring on the unit and note the location of the four mounting
screws.
4.
Attach the trim ring to the unit using the longer four (4) 2.6 X 10mm
screws supplied.
5.
Attach the four (4) post extensions to the bracket.
6.
Attach the four (4) rubber spacers on the post extensions