Bernina 717 Manual - Page 40
Applique
 |
View all Bernina 717 manuals
Add to My Manuals
Save this manual to your list of manuals |
Page 40 highlights
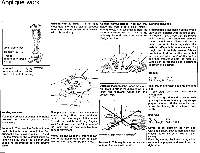
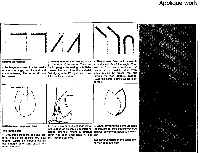
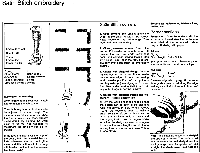
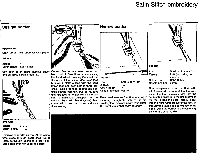
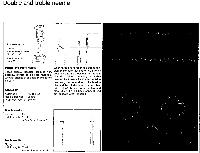
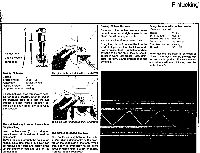
Applique work L qt• Embroidery foot Needles: 80-70 Thread: Embroidery thread No. 50 Automatic: zigzag VWVWW Needle position: centre Drop feed control: sewing Guiding with the frame: The left hand Guiding without frame: " You can only Working sequence must hold the frame steady, because guide the work if it is held lightly." often the frame is guided during sewing Nevertheless, it is essential to hold the Preparation: Trace design on the wrong with this hand only. material itself rather taut. This is the side of the material with the aid of spe- only way the work can be turned as the cial tracing paper. See that the motive design requires. is in reverse. The design can also be traced onto iron-on Vilene and the Vi- lene ironed on to the wrong side of the material. (Especially recommended for rough and irregularly woven fabrics • f are difficult to draw on.) if a design that is to be used often trace on thin Vilene and then transfer it onto the material. Vilene can be tacked on to a garment to stiffen it if desired. 1st run: Zigzag: '/2-1 Stitch length: 14/ -V2 Correct: Place thumbs under the mate- Tack material for applique onto the right rial. Make a fold if the piece of work is side. large (see diagram). Guide near the 1. Sew along the traced lines on the presser foot. wrong side. 2. Turn to right side and cut away neat- ly along the sewn lines any surplus applique material. (At the same time remove the frame.) Hold scissors cor- rectly. Guiding the work First put your hand in the position as You may work with or without the frame; when darning. Then draw forefinger however, taut more easily. material can be guided back to the inner edge of the frame. Extend the middle and ring fingers. Your hand now has complete control of 2nd run : Zigzag: 1'/2 Stitch length: Satin Stitch Important: The machine feeds automatically but only in a straight line. For the frame and the dom of movement. best possible free- Cover the cut edge on the right side with Satin Stitch. Sew corners and small curves the work must be guided by hand i. e. the frame or the material must be lightly held by one or both hands and should not be pressed onto the sewing Notice: Do not place the forefinger parallel to the thumb, otherwise the movement of your hand will be restricted. Incorrect: This way is incorrect as pres- curves, stitch by stitch (using hand wheel). Finish by tracing the lines through that were not appliqued and sew from the table. sure on the work will result. right side.
-
 1
1 -
2
-
3
-
4
-
5
-
6
-
7
-
8
-
9
-
10
-
11
-
12
-
13
-
14
-
15
-
16
-
17
-
18
-
19
-
20
-
21
-
22
-
23
-
24
-
25
-
26
-
27
-
28
-
29
-
30
-
31
-
32
-
33
-
34
-
 35
35 -
 36
36 -
 37
37 -
 38
38 -
 39
39 -
 40
40 -
 41
41 -
 42
42 -
 43
43 -
 44
44 -
 45
45 -
46
-
47
-
48
-
49
-
50
-
51
-
52
-
53
-
54
 |
 |
