Bernina 717 Manual - Page 42
Satin, Stitch, embroidery
 |
View all Bernina 717 manuals
Add to My Manuals
Save this manual to your list of manuals |
Page 42 highlights
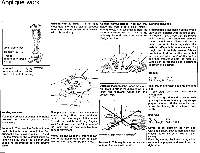
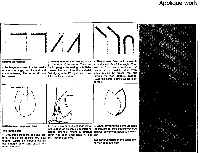
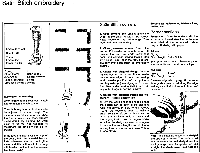
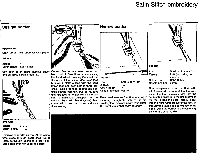
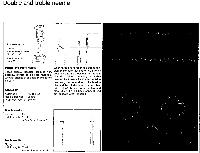
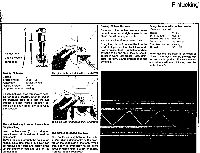
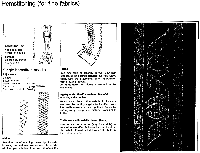
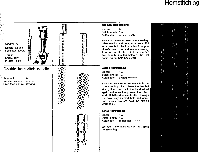
Satin Stitch embroidery Embroidery foot Needle: 80 Thread: Embroidery thread No.30 Zigzag: 4 Stitch length: Satin Stitch Automatic: zigzag AMMAN Needle position: centre Drop feed control: sewing Remember the following when embroidering over satin stitch and ornamental stitch seams : The stitch length for embroidery is to be adjusted to a short length. The material may block progress when the foot moves over a seam already embroidered. By guiding the work close to the foot and assisting its movement the difficulty can be removed. If the foot is almost over the edge of the seam, hold the material back a little otherwise the foot will glide away and this will result in a long stitch (which will look as if a mistake has been made). 1,' ',1"r"I l Satin Stitch corners Borders for table-cloths, table-napkins, doilies, etc. 1. Open corner: Sew until a space the Border scallops width of the stitch is left in the corner. Preparation: Draw the scallops with the Place needle on the inside edge. Turn aid of a cardboard stencil onto the ma- work and continue sewing. terial. Mark all the corners with white crayon. Underlay with paper. 2. Closed, oversewn corner: Sew to the corner. Put needle on the outer edge, lift let run : presser foot and turn work. Lower foot Zigzag: 4 again and continue sewing (help a little Stitch length: Satin Stitch by placing finger near the foot, see embroidery over satin stitch or embroidery seams). Sew satin stitch seam. Remove paper and carefully cut round the scallops. 3. Corner with diagonal design (rectangular): Sew to the corner. Place needle on the outer edge. Lift foot, turn sewing 2nd run: zigzag: Stitch length: 21/2-3 1-1'/2 work. Needle position, left or right (ac- Oversew edge with zigzag. At the same cording to design) sew zigzag on 0. Lower time guide a pearl cord along the edge foot. Now whilst sewing slowly turn zig- making sure that it does not slide over zag onto 4 again; sewing slowly! or under it. 4. Corner with diagonal design (for festoonery). Needle position left! a) Lay the work under the foot so that the design can be seen in the slot that runs lengthwise. b) Sew to the corner, i.e. till the needle is about to make a stitch from the left on the line drawn to assist you. c) Raise foot, turn work and turn zigzag to 0. Lower foot again. Make sure that the design appears once again in the slot that runs lengthwise. d) During sewing turn the zigzag again slowly onto 4; sew slowly I Note: The machine feeds in a straight line and not in curves. The border cord must therefore be held straight and the scallop edge must be guided on this straight line. Guide slowly and near the foot.
-
 1
1 -
2
-
3
-
4
-
5
-
6
-
7
-
8
-
9
-
10
-
11
-
12
-
13
-
14
-
15
-
16
-
17
-
18
-
19
-
20
-
21
-
22
-
23
-
24
-
25
-
26
-
27
-
28
-
29
-
30
-
31
-
32
-
33
-
34
-
35
-
36
-
 37
37 -
 38
38 -
 39
39 -
 40
40 -
 41
41 -
 42
42 -
 43
43 -
 44
44 -
 45
45 -
 46
46 -
 47
47 -
48
-
49
-
50
-
51
-
52
-
53
-
54
 |
 |
