Binatone F350 User Manual - Page 35
Route Plan - instruction manual
 |
View all Binatone F350 manuals
Add to My Manuals
Save this manual to your list of manuals |
Page 35 highlights
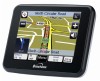
NAVIGATION In addition to setting either automatic or manually, you can select to adjust the time for daylight saving. This will adjust the time by adding 1 hour as used during British Summer Time (BST). To activate daylight saving tap in the box so that an orange tick is shown. Once set tap to confirm the selection and return to the settings screen. Tap to return to the settings screen without saving. 8.11 Brightness Allows you to change the brightness of the screen so as to optimise it for differently lit environments. Tapping will change the screen to the brightness setting screen. There are 5 settings available and are shown as bars, with an arrow indicating the currently selected level. Use the and keys to set the required level, the brightness will be reflected in the screen as the change is made. Once set tap to confirm the selection and return to the settings screen. Tap to return to the settings screen without saving. 8.12 Calibration This option allows you to calibrate the screen so that it responds accurately to your screen taps. You will need this function only if the unit begins to respond inconsistently to your screen taps. When tapped you will be shown a warning screen, tap to confirm you would like to calibrate the screen. The screen will change to the calibration screen; follow the onscreen instructions in order to complete the calibration process. 9 Route Plan Once you have entered your destination and confirmed it is correct, you will be taken to the Route Plan screen; from here you can begin navigating, carry out a simulation of the route or add additional waypoints to the journey. Tap to return to the Free Navigation Menu screen. Select a destination so that it is highlighted orange and tap to view the location on the map. 9.1 Navigating To begin navigating to you entered destination tap . The unit will begin to calculate a route from your current location to your destination. Once calculated the screen will change to the route navigation screen and you are ready to drive. 34
-
 1
1 -
2
-
3
-
4
-
5
-
6
-
7
-
8
-
9
-
10
-
11
-
12
-
13
-
14
-
15
-
16
-
17
-
18
-
19
-
20
-
21
-
22
-
23
-
24
-
25
-
26
-
27
-
28
-
29
-
 30
30 -
 31
31 -
 32
32 -
 33
33 -
 34
34 -
 35
35 -
 36
36 -
 37
37 -
 38
38 -
 39
39 -
 40
40 -
41
-
42
 |
 |
